I've finished all my boring Monday chores so now it's time to 'work' in the stamp room! My card today actually has no stamping on it! Hard to believe but yes, you can make a card without ink or stamps! I don't do it very often but my card today is an example of letting punches, dies and paper do the work!
I used the Color Hues challenge to create this love themed card. I love the red and pink combo and it's the perfect time of year for those sweet colors in preparation for Valentine's day.
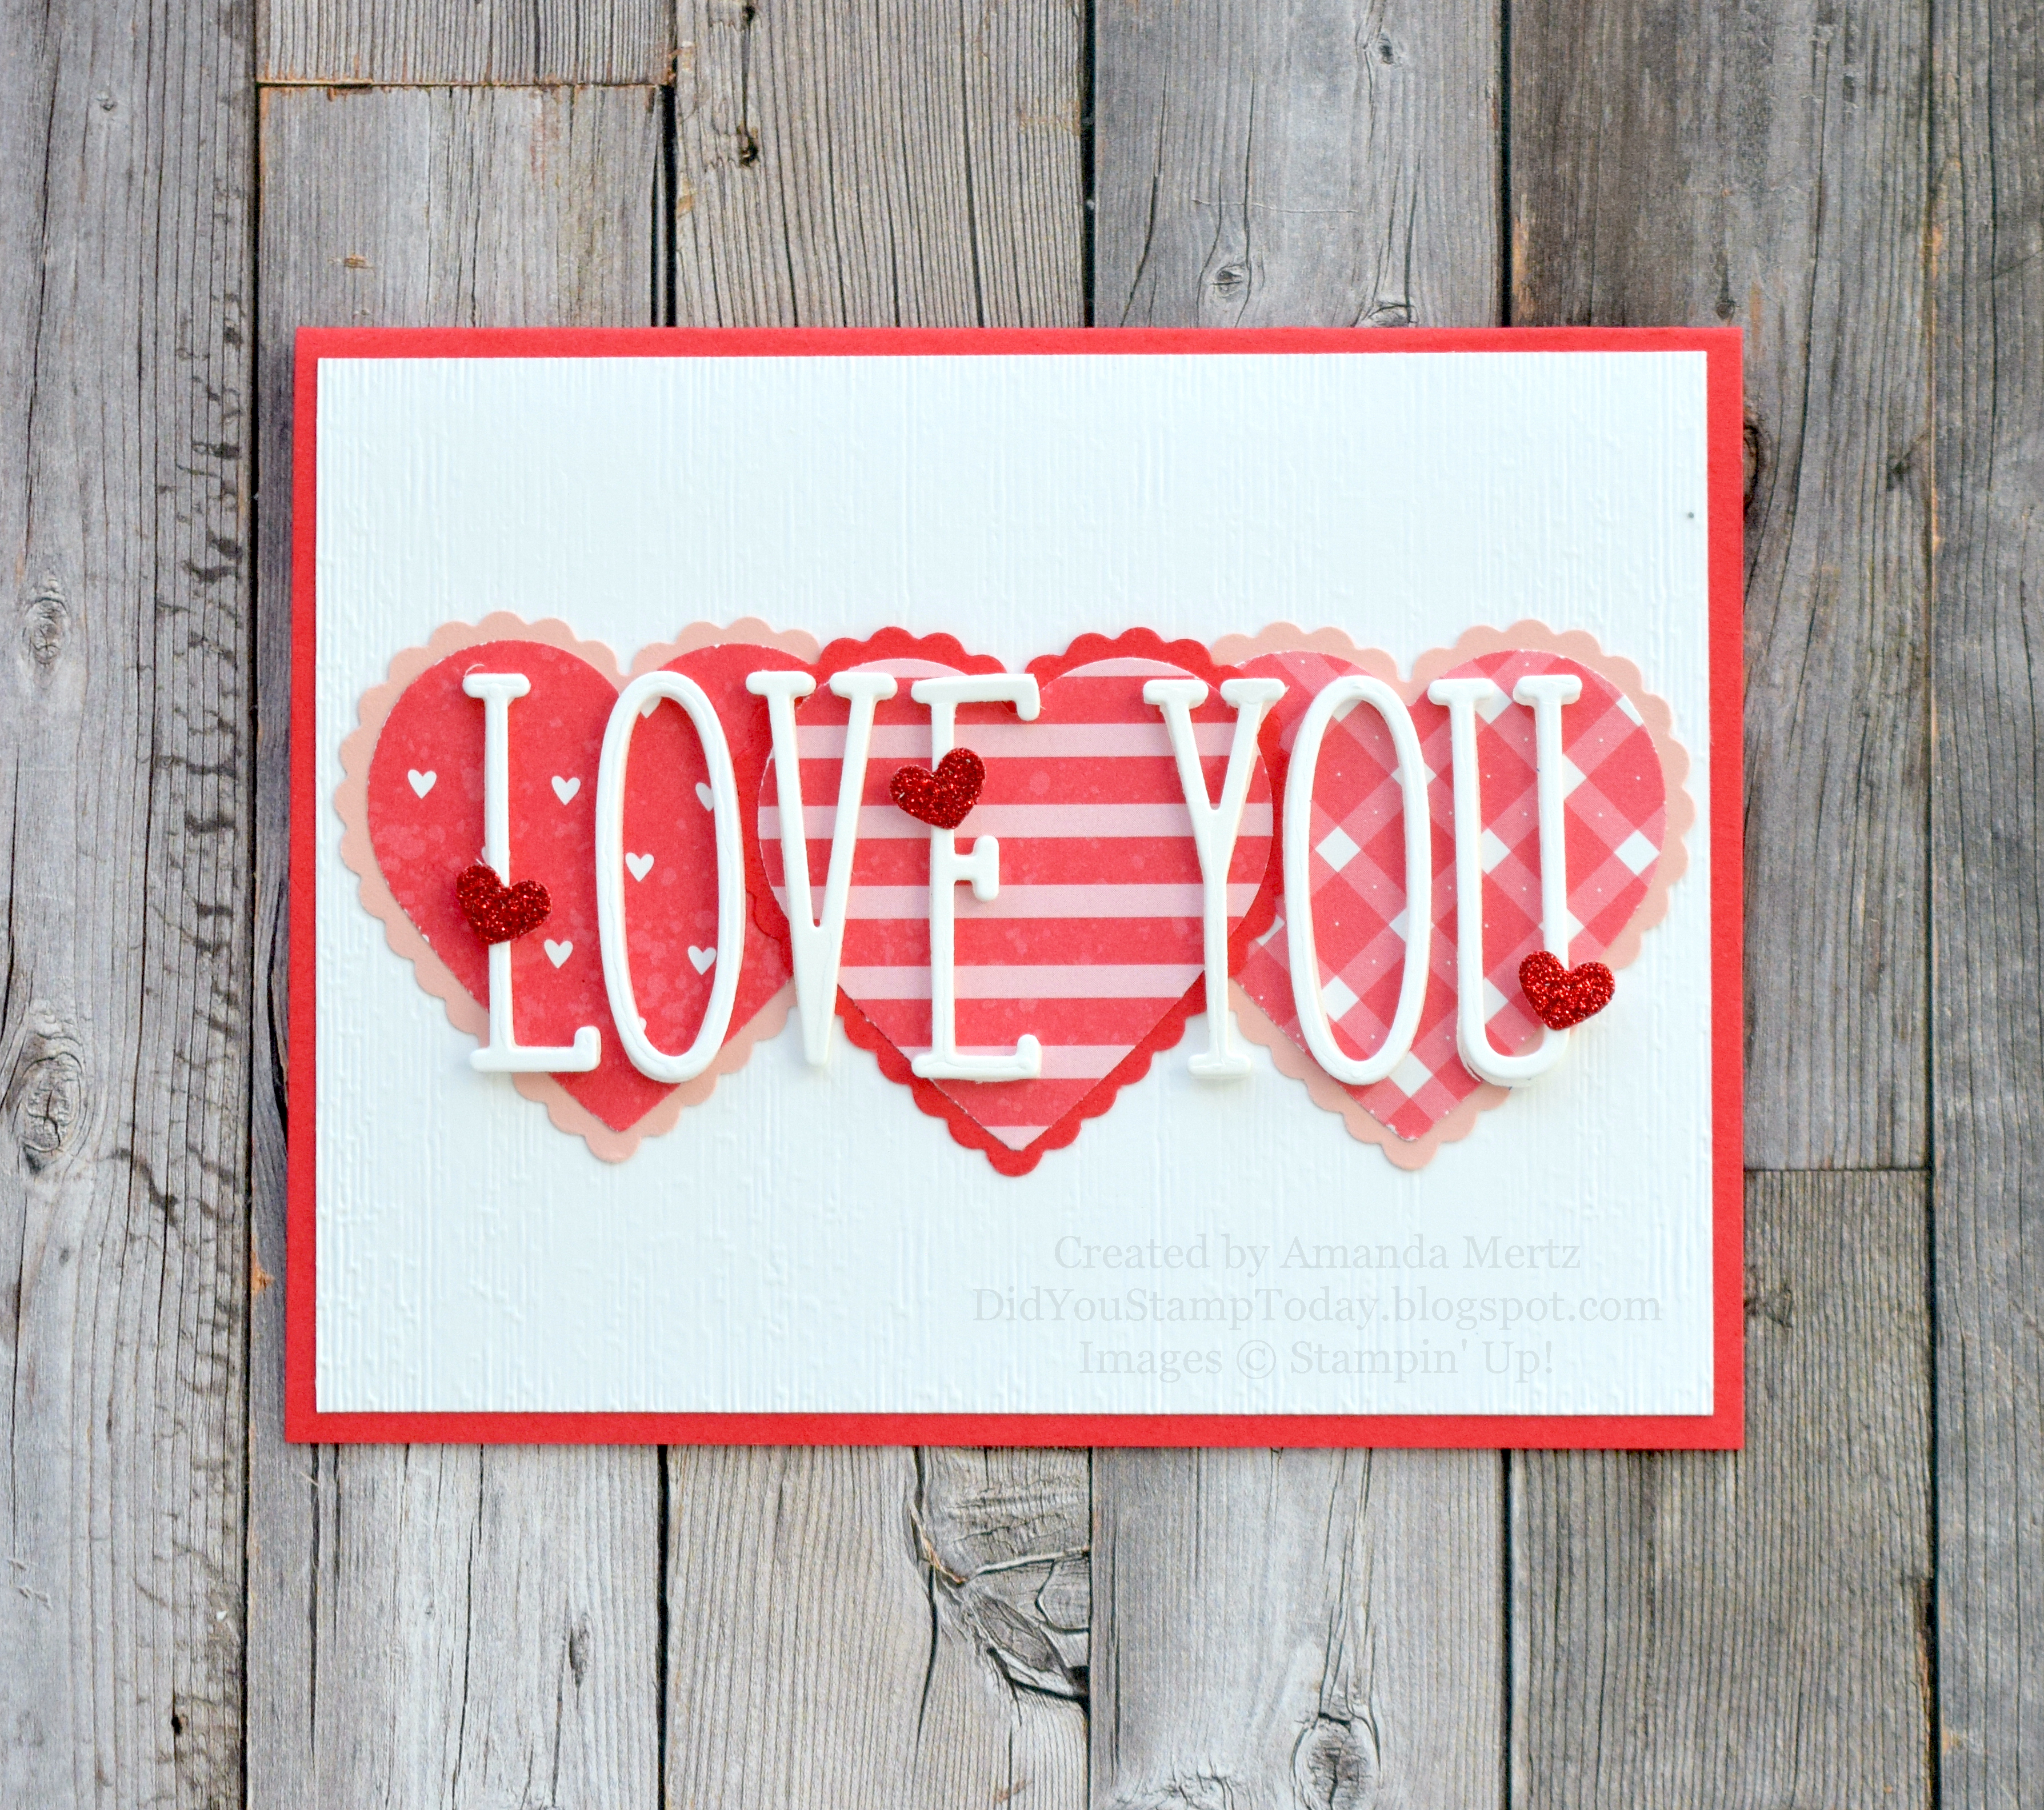
I started with a Sweet Sorbet base topped with a piece of Basic White panel embossed with the retired Subtle embossing folder. Using the Heart Punch pack I punched 2 hearts from Country Floral Lane DSP and one from Country Gingham DSP and then backed them with either a Sweet Sorbet or Blushing Bride scalloped heart.
Once i had the hearts adhered to my card front I went to work with the Alphabet a la Mode dies which I hadn't used yet even though I received them way back in the beginning of December. I really like the style of these dies as they are tall but skinny so you can still fit a good amount on a regular A2 card so you can spell quite a few things.
So I did learn a few things using these dies for the first time which will make it easier for me (and maybe you!) in the future. First, they are very skinny so getting them out of the die if they stick you need to be careful not to rip them. Definitely use your die brush or a toothpick/paper piercer to help you out.
Second, I used Basic White for my letters and I think the next time I will use Basic White thick just to have them be a little bit sturdier.
Third, since I wanted the letters to stand out from the hearts I backed the die cut letters with a second letter die cut with the the dimensional adhesive sheets. In the past it hasn't been a problem to line up letters or other shapes onto the adhesive sheet die cuts. Let me tell you, with these super skinny letters I had quite the time and had to do a bit of trimming around the edges as I wasn't quite as exact as I'd like to be. So next time I'll suck it up and attach my card stock to the dimensional adhesive sheet first and then just cut with the dies so the letters come out with the dimensional piece already attached. I think wasting a bit of the dimensional sheet will be worth the aggravation of trying to line up the letters.
After I lined my letters up and adhered them I cut a few hearts out of red glimmer paper using the Conversation Bubbles dies and added those to the card front.
I think this card will end up being for one of my boys for Valentine's day so I didn't want to add any ribbon or extra fluff because that might be seen by a teen boy as sappy or some such thing lol! So a bit clean and simple is where it ended up.
Thanks for looking! Did you stamp today?
Stamps: none
Ink: none
Paper: Sweet Sorbet, Basic White, Country Floral Lane DSP, Country Gingham DSP, Blushing Bride, Red Glimmer paper
Accessories: Alphabet a la Mode dies, Conversation Bubbles dies, Heart Punch pack, dimensional adhesive sheets, Subtle embossing folder (retired)

That alphabet is fabulous, as is your pretty valentine! I love the patterned papers you chose. Thanks for sharing with us at Color Hues!
ReplyDeleteAWESOME card! I could not love this anymore! Thanks for playing along with us at Color Hues!
ReplyDeleteLove the alphabet you've used here over those cute pink and red hearts. Try keeping the foam die cuts in place and adding the card ones over the top, then removing them from the foam. It stops the warping you get when the dimensional foam is die cut. Thanks sharing at Color Hues. :)
ReplyDeleteSuch a sweet sweet card Amanda! I love the combination of patterned heart shapes! Thanks for playing at Color Hues ♥
ReplyDeleteWhat a fabulous card, Amanda! Love your creative design!
ReplyDelete