TGIF! I hope you all have lots of fun plans for the weekend! We have a few things planned to keep us busy.
Today I'm sharing a card I made as a swap at the Stampin' Up! Baltimore regional in April. It's really fun to swap different cards with other demonstrators at theses events. It's a great way to see samples using sets you don't own and to get layout and color ideas. The Baltimore Regional came at a hard time in the Stampin' Up! catalog year as the retirement list wasn't out yet but they did tell us about the Color Refresh. You always want to use products that are current but at the end of the big catalog it's hard to know what will be staying!
I tried to play it safe and used the newer Designer Typeset Photopolymer set along with colors that I knew were sticking around.
I think this color combination was from a challenge back in April but I have no idea which one now! If it looks familiar just let me know and I'll update my post.
The photopolymer sets are pretty cool in that they are totally clear (different from the clear mount rubber stamps). It's super easy to see exactly where you are stamping. I arranged the letters on my clear block and then tested on scrap paper and just adjusted if necessary. I didn't use the Stamp-a-ma-jig at all and I think it came out pretty straight. Also the photopolymer stamps can bend. Check out my 2 arrows….they are actually straight but I bent the stamp a bit on the clear block to get a curved arrow. Neat huh?
For the background letters I just lined up all the alphabet and number stamps on my large clear block and stamped it several times.
*****Local ladies: If you want to come to stamp club on Tuesday the 21st (9:30am or 7:00pm) please let me know by tonight so I can start to prepare the project supplies*****
Thanks for looking! Did you stamp today?
Stamps: Designer Typeset Photopolymer
Ink: Calypso Coral, Daffodil Delight, Blushing Bride, Soft Suede
Paper: Soft Suede, Calypso Coral, Blushing Bride, Whisper White
Accessories: button, baker's twine
Amanda Mertz ~ Independent Stampin' Up!® Demonstrator ~ didyoustamptoday@gmail.com
Showing posts with label Swaps. Show all posts
Friday, May 17, 2013
Wednesday, August 29, 2012
Happy Mail
Don't you just love to get happy mail? A pretty card, a sweet note or a beautiful photo? I send out more cards than I get but I guess that's to be expected since I make a ton of cards but when I do receive a handmade card I prop it up on my desk for a few weeks and continue to enjoy the warm fuzzies. Over the last several months I've received a few cards from customers and friends and I wanted to share them with you.
I think the Blossom punch is only one I don't own! Kristen's card is making me re-think that! Love these colors and how she used the satin ribbon layered over another piece of DSP.
Again with this punch and Mixed Bunch stamp set! Love the Wisteria Wonder and Lucky Limeade together. And the half embossed top panel divided by the ribbon is really cool too!
Who doesn't love a baby hippo?? The sentiment stamped over the flower stem gives a nice layered look. A perfect thank you card from a busy mom!
This is great use of this year's Sale-a-Bration Designer Series paper Everyday Enchantment. Love the rounded corners and the top squares are popped up to give great dimension! I'm still hoarding a whole pack of this paper!
I know you all have a few cards sitting there waiting to be sent out...go ahead and get them in the mail today and let someone know you're thinking about them!
Thanks for looking! Did you stamp today?
| Made by Kristen |
| Made by Marie |
| Made by Jenn |
| Made by Beth |
I know you all have a few cards sitting there waiting to be sent out...go ahead and get them in the mail today and let someone know you're thinking about them!
Thanks for looking! Did you stamp today?
Monday, April 23, 2012
A Little of This, A Little of That
We are very happy in our house today since the Flyers won their playoff game against Pittsburgh yesterday afternoon! All four of us sat and watched the game and ate popcorn (well, the boys sat and watched until the popcorn was gone). Not a bad way to spend a cold rainy day. Now we have to wait for the other series to finish up so we know who our next opponent is going to be.
Today (well I guess it's now tonight....where did my day go?) I'm showing a few cards that I've received recently as invitations or swap cards. My stamping ladies are so talented aren't they? I don't really get very many cards in the mail, I send out a ton, but very rarely get any myself so it's super exciting to open an envelope or exchanges cards in a swap and see something that someone else made for a change!
Check out these fun cards!
How awesome are these Sesame Street punch art characters? The bright colors and fun faces are perfect for a preschooler birthday invitation.
Here's another great kids birthday invitation! The giant Mario face on the card front is super fun for a themed birthday party.
This is a classic one layer card and sweet too! I love how the front flap is cut a bit smaller and the image is stamped on the inside so you can see it peeking out from underneath.
Isn't this the cutest flower pot card? I love the pearls in the popped up centers and the pretty spring colors.
I think I should get my stamping ladies to contribute more projects to show on my blog! Maybe I need to pretend it's my birthday a few times a year to see if I can get some extra fun mail?? Do you think they would fall for it?
Thanks for looking! Did you stamp today?
Today (well I guess it's now tonight....where did my day go?) I'm showing a few cards that I've received recently as invitations or swap cards. My stamping ladies are so talented aren't they? I don't really get very many cards in the mail, I send out a ton, but very rarely get any myself so it's super exciting to open an envelope or exchanges cards in a swap and see something that someone else made for a change!
Check out these fun cards!
| By Cory A. |
| By Beth R. |
| By Jill F. |
| By Debbie C. |
I think I should get my stamping ladies to contribute more projects to show on my blog! Maybe I need to pretend it's my birthday a few times a year to see if I can get some extra fun mail?? Do you think they would fall for it?
Thanks for looking! Did you stamp today?
Friday, April 13, 2012
Dino Birthday Swap
I hope everyone had a happy Easter and an enjoyable Spring Break if you're like our area with the week off from school and all the kids home! We've had a nice week for sure. We headed out to a rented cabin in one of Virginia's State Parks for a few days of hiking and fishing and quiet time in the woods. We didn't have internet or cell service and it was divine. The boys really enjoyed playing with sticks and poking around in the woods and my husband and I got to relax with our books.
Now that we're home and back in the world it's time to get back to blogging and sharing some projects from the past month.
Some of my stamping ladies and I participated in a card swap last month. We each made a card to swap with the others. I needed a little boy birthday card so I decided to design a card that I could make multiples of and use the same design for my swap.
In an ongoing effort not to have a ton of retiring In Color cardstock left I choose to make the base Pear Pizzazz. I stamped some grass down on the corner also in Pear Pizzazz. The dinosaur is embossed with black embossing powder onto a Whisper White circle that is pierced along the edge all the way around. I used a blender pen to color the dino in with Pear Pizzazz and Pacific Point ink. He is of course popped up on dimensionals.
The sentiment is also embossed in black on a strip of Pacific Point with white brads on the ends.
The card layout was a design on the challenge blog Freshly Made Sketches a while back.
Thanks for looking! Did you stamp today?
Stamps: Dinoroar
Ink: Pear Pizzazz, Pacific Point, Versamark
Paper: Pear Pizzazz, Pacific Point, Whisper White, Pool Party DSP
Accessories: black embossing powder, paper piercer, blender pen, white brads, Circles #2 die
Now that we're home and back in the world it's time to get back to blogging and sharing some projects from the past month.
Some of my stamping ladies and I participated in a card swap last month. We each made a card to swap with the others. I needed a little boy birthday card so I decided to design a card that I could make multiples of and use the same design for my swap.
In an ongoing effort not to have a ton of retiring In Color cardstock left I choose to make the base Pear Pizzazz. I stamped some grass down on the corner also in Pear Pizzazz. The dinosaur is embossed with black embossing powder onto a Whisper White circle that is pierced along the edge all the way around. I used a blender pen to color the dino in with Pear Pizzazz and Pacific Point ink. He is of course popped up on dimensionals.
The sentiment is also embossed in black on a strip of Pacific Point with white brads on the ends.
The card layout was a design on the challenge blog Freshly Made Sketches a while back.
Thanks for looking! Did you stamp today?
Stamps: Dinoroar
Ink: Pear Pizzazz, Pacific Point, Versamark
Paper: Pear Pizzazz, Pacific Point, Whisper White, Pool Party DSP
Accessories: black embossing powder, paper piercer, blender pen, white brads, Circles #2 die
Friday, June 17, 2011
May Swap Cards
So I never found the time to post the other swap cards yesterday. Cleaning and childcare just takes so much time! =) We have a busy Father's Day weekend ahead of us so I better not waste anymore time!
| Andrea's Card |
| Jenn's Card |
| Jill's Card |
| Kristen's Card |
Great job ladies! I love seeing the cards that other people make. You get so many great ideas for color combinations, layouts, and how to use different stamp sets.
Have a great Father's Day weekend!
Thanks for looking! Did you stamp today?
Wednesday, June 15, 2011
Bench of Love Swap Card
Every few months my stamping ladies do a card swap at club. I had time to participate this past month and came up with this card. I did have an ulterior motive for this design. I needed to make a wedding card for my cousin and his new wife and I only had time to design one card so I made this one into my swap card as well. Isn't this cute for a wedding, anniversary or Valentine's day card?
When the Have a Seat set came out I kind of wondered what you could do with it so I didn't get it for a while. Then I saw a few samples and decided that I should get it since I kept thinking about the cute little chairs. I didn't want to be haunted if it retired and I never bought it and then I would only see it for sale for like twice the price of what it was in the catalog. (Been there, done that right?) You can really make this set be anything you want it to be that's what's so great about it...just change the sentiment or embellishments and it can be for just about any occasion.
The base is Crumb Cake with a layer of Early Espresso topped with another layer of Crumb Cake embossed with the Square Lattice embossing folder. The bench is stamped with Early Espresso ink on Very Vanilla cardstock. I punched the hearts out of the the Glimmer Paper (LOVE THIS!) which is carrying over to the new Idea Book & Catalog and I am excited not to have to hoard it! I used the small heart punch but you could also use the smallest heart in the Heart to Heart punch. I made a bow with Early Espresso 3/8" taffeta ribbon and wrapped a Vintage Brad around the middle and stuck it through the embossed layer. On the inside I stamped "Happiness Always" from the Happy Greetings set in the Summer Mini.
Tomorrow I'll try to post the swap cards the other ladies made. It's so much fun to see all the different styles of swap cards.
Thanks for looking! Did you stamp today?
Stamps: Have a Seat
Ink: Early Espresso
Paper: Crumb Cake, Early Espresso, Very Vanilla, Glimmer paper
Accessories: Square Lattice embossing folder, 3/8" Taffeta ribbon, Vintage Brad, small heart punch
When the Have a Seat set came out I kind of wondered what you could do with it so I didn't get it for a while. Then I saw a few samples and decided that I should get it since I kept thinking about the cute little chairs. I didn't want to be haunted if it retired and I never bought it and then I would only see it for sale for like twice the price of what it was in the catalog. (Been there, done that right?) You can really make this set be anything you want it to be that's what's so great about it...just change the sentiment or embellishments and it can be for just about any occasion.
Tomorrow I'll try to post the swap cards the other ladies made. It's so much fun to see all the different styles of swap cards.
Thanks for looking! Did you stamp today?
Stamps: Have a Seat
Ink: Early Espresso
Paper: Crumb Cake, Early Espresso, Very Vanilla, Glimmer paper
Accessories: Square Lattice embossing folder, 3/8" Taffeta ribbon, Vintage Brad, small heart punch
Tuesday, October 12, 2010
September Stamp Club Swaps
Just a quick post today to share the swap cards I received from a few of my Stampin' Ladies (that's what my 4 year old calls my stamp club) in our swap last month. The first is Andrea's card....Isn't this a great color combination using the Woodland Walk DSP? I love the circles and the popped up butterfly. Great job cutting out the butterfly don't you think?
Here is Holly's card. This is one of my favorite color combinations since Rich Razzleberry was introduced. The eyelet border punch along the one edge is really sweet! Great friend card!
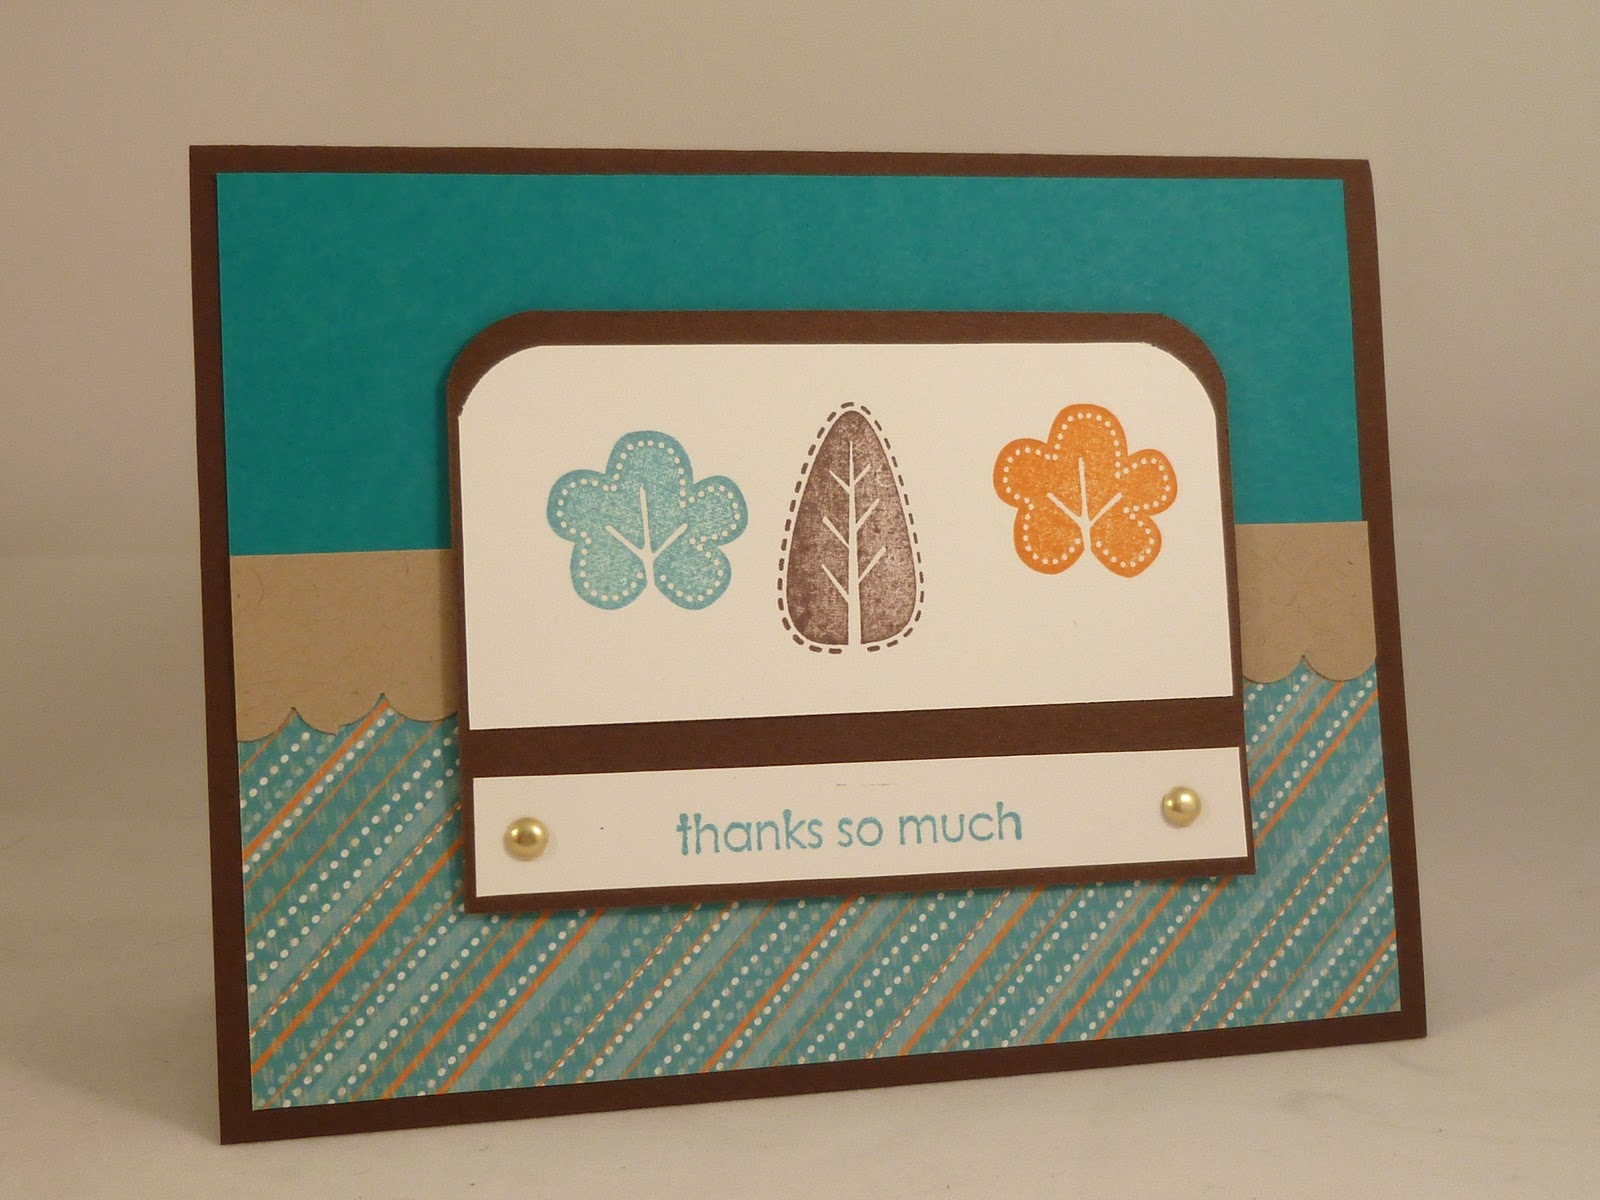
And here is Liz's card. I really like how she just stamped the tops of the trees from Trendy Trees. The rounded corners at the top are a really nice touch too! I always feel I have to match all 4 corners but I need to remember to try it this way too.
Thanks for checking out my talented Stampin' Ladies! Happy Stamping!
| Andrea's Card |
| Holly's Card |
| Liz's Card |
Sunday, October 10, 2010
Happy Harvest September Swap
Here is the card I made for my September stamp club swap. I hadn't used any of the new In Colors up until this card and wanted to rip that plastic off the ink pads and cardstock and get busy. The layout was from some challenge that I saw. I have no idea where as I just scribbled the sketch on scrap paper and piled it up on my desk so when I needed a starting point I would have one to go to. Unfortunately I didn't write down where the layout was from. If someone recognizes it please let me know so I can add that info.
First, I stamped the right hand gourd in Stazon on Whisper White, then stamped the left hand gourd. I masked both gourds and then stamped the pumpkin in the middle. I used an Aquapainter and some ink on the lid of my ink pads and watercolored the images.
I stamped the "Happy Harvest" from Loads of Love Accessories and punched it out and sponged some Peach Parfait on the edges. Behind this layer I used a strip of Pear Pizzazz that was embossed with the Perfect Polka Dots embossing folder and I added a few black strips that were punched with the Scallop Trim border punch. And few black brads tossed in for good measure.
Thanks for looking! Happy Stamping!
Stamps: Autumn Harvest, Loads of Love Accessories
Ink: Stazon, Peach Parfait, Pear Pizzazz
Paper: Whisper White, Black, Pear Pizzazz, Peach Parfait
Accessories: Perfect Polka Dots embossing folder, Scallop Trim border punch, 1 1/4" & 1 3/8" circle punches, brads
First, I stamped the right hand gourd in Stazon on Whisper White, then stamped the left hand gourd. I masked both gourds and then stamped the pumpkin in the middle. I used an Aquapainter and some ink on the lid of my ink pads and watercolored the images.
I stamped the "Happy Harvest" from Loads of Love Accessories and punched it out and sponged some Peach Parfait on the edges. Behind this layer I used a strip of Pear Pizzazz that was embossed with the Perfect Polka Dots embossing folder and I added a few black strips that were punched with the Scallop Trim border punch. And few black brads tossed in for good measure.
Thanks for looking! Happy Stamping!
Stamps: Autumn Harvest, Loads of Love Accessories
Ink: Stazon, Peach Parfait, Pear Pizzazz
Paper: Whisper White, Black, Pear Pizzazz, Peach Parfait
Accessories: Perfect Polka Dots embossing folder, Scallop Trim border punch, 1 1/4" & 1 3/8" circle punches, brads
Tuesday, August 3, 2010
July Stamp Club Swaps
Here are the swaps from my July Stamp Club that I promised to show. After some finagling I got the photos from the camera to the new Mac (it took me longer to figure out how to rename them than anything!). So here they are! Enjoy these beautiful cards from my very talented stamp club.
Andrea's card. How cute are these little banner flags?
Jenn's Card. She did a great job watercoloring!
Karen's Card. I love these colors and how she colored the tips of the flower.
Kristen's Card. I really like how she has the large butterflies popped up. Great summer card!
Thanks for looking & Happy Stamping!
Monday, August 2, 2010
Just Believe Swaps
Here is the card I made for my stamp club swaps. I got the inspiration from an altered notebook layout in a recent issue of the demonstrator only magazine Stampin' Success (another great perk to becoming a demo---have any other questions just ask, I can talk about stamping all day!). It was fun playing with some of the new colors and new stamp set Just Believe.
I really like this layout and want to try it out with some other colors and stamps. It's amazing how different the same layout can look just by changing out a few elements. For this one the base is Crumb Cake with the leaves also in Crumb Cake ink (I'm soooo glad we have ink to match this cardstock now!). I used the scallop border punch on the top edge of the Very Vanilla layer. I stamped the sentiment in Early Espresso and then paper pierced across using the template to make sure it was straight. I also pierced each scallop on the top to bring it all together. The 3 circle panels were stamped in Certainly Celery, Marina Mist, and Cherry Cobbler and punched out with the 11/4" circle punch. I layered these on 13/8" circles punched out of Early Espresso.
My stamp club member who participated in the swap gave me permission to share their awesome swap cards as well so I'll be back to post those tomorrow once I get them off the camera. It might take some doing since we got a new computer (thanks to my fall down the stairs last week!) and I haven't learned to download the photos from the camera yet....wish me luck!
Thanks for looking! Happy Stamping!
Stamps: Just Believe, Thank You Kindly
Ink: Crumb Cake, Certainly Celery, Marina Mist, Cherry Cobbler
Paper: Crumb Cake, Very Vanilla, Early Espresso
Accessories: paper piercer & template, 1 1/4" & 1 3/8" circle punches, scallop edge punch
I really like this layout and want to try it out with some other colors and stamps. It's amazing how different the same layout can look just by changing out a few elements. For this one the base is Crumb Cake with the leaves also in Crumb Cake ink (I'm soooo glad we have ink to match this cardstock now!). I used the scallop border punch on the top edge of the Very Vanilla layer. I stamped the sentiment in Early Espresso and then paper pierced across using the template to make sure it was straight. I also pierced each scallop on the top to bring it all together. The 3 circle panels were stamped in Certainly Celery, Marina Mist, and Cherry Cobbler and punched out with the 11/4" circle punch. I layered these on 13/8" circles punched out of Early Espresso.
My stamp club member who participated in the swap gave me permission to share their awesome swap cards as well so I'll be back to post those tomorrow once I get them off the camera. It might take some doing since we got a new computer (thanks to my fall down the stairs last week!) and I haven't learned to download the photos from the camera yet....wish me luck!
Thanks for looking! Happy Stamping!
Stamps: Just Believe, Thank You Kindly
Ink: Crumb Cake, Certainly Celery, Marina Mist, Cherry Cobbler
Paper: Crumb Cake, Very Vanilla, Early Espresso
Accessories: paper piercer & template, 1 1/4" & 1 3/8" circle punches, scallop edge punch
Subscribe to:
Posts (Atom)