Saturday, December 17, 2022

Sweet Grapefruit - Stampin' Up! Sweet Citrus

   It's winter citrus time at my house!  We get a farm box delivered each week with fresh local produce but once winter hits citrus from a small family run farm in Florida gets added to the box.  The grapefruit, oranges and tangelos are a welcome burst of color and flavor in the gray/brown of Virginia winter! So I was inspired to use the new Sweet Citrus bundle to play along with the Freshly Made Sketched challenge.


  The 2 circles in the sketch seemed like a perfect match for some ruby red grapefruits!  I stamped the peels in Mango Melody and then centers in Polished Pink.  I used the die to cut them out and then tried to match the images as best I could to the embossing folder to add the fun texture.  There's an easier way but I already had them cut out before I knew I wanted the texture!

  The leaves are stamped in Shaded Spruce and then die cut.  I tucked the leaves under the fruit then adhered them to the card front with the front most piece popped on dimensionals.

  The flower is stamped in Polished Pink and Mango Melody both stamped off for a lighter look.  The flower is popped up on a double layer of dimensionals so it sit higher than the popped grapefruit.

  The sentiment is stamped in Memento black.  It's not quite where the sketch has the sentiment but I wanted to use this one since I think it might be a good Happy New Years card. So I hope the team at FMS forgives me for the slight alteration!

 You can order the Sweet Citrus bundle starting on January 5th when the Jan.-April mini catalog goes live for customers.

  Thanks for looking!  Did you stamp today?

Stamps: Sweet Citrus

Ink: Mango Melody, Polished Pink, Shaded Spruce, Memento Black

Paper: Basic White thick, Basic White, Polished Pink

Accessories: Sweet Citrus hybrid embossing folder/dies, dimensionals


Friday, December 16, 2022

Cupcake Kitty - Stampin' Up! Best Day

  The Best Day stamp set is coming soon when the Jan.-April mini catalog is released on January 5.  If you are a cat lover I think you'll find several sets in this mini to be to your liking!  I needed to restock my birthday cards so Best Day made it on to my demonstrator preorder since it's nice to have something other than florals for birthdays.

  I used the Global Design Project challenge colors for this one; Blushing Bride, Tahitian Tide and Bermuda Bay.  They are a nice set of colors to celebrate a birthday!


 I started with a Tahitian Tide base then stamped the little confetti stamp along the edges of a piece of Blushing Bride using the same color ink.  I added a strip of Snowflake Specialty vellum to the center.  I thought the polka dots on the vellum were a nice match to the polka dots on the cupcake liner.

  I stamped the cat in Basic Gray ink on Basic White cardstock then colored him/her in with Stampin' Blends (colors listed below).  After it was colored in I fussy cut and mounted it on a Stylish Shape circle with dimensionals.  I tucked a piece of retired Bermuda Bay ribbon under one edge before adhering the circle.

  The sentiment is stamped in Bermuda Bay then cut apart and popped on mini dimensionals.  

  I'm thinking a lot of friends and family will be getting cat birthday cards this spring!

  Thanks for looking!  Did you stamp today?

Stamps: Best Day

Ink: Basic Gray, Bermuda Bay, Blushing Bride

Blends: Tahitian Tide light & dark, Basic Gray light & dark, Bermuda Bay light & dark, SU1000

Paper: Tahitian Tide, Blushing Bride, Snowflake Specialty Vellum, dimensionals, Bermuda Bay ribbon (retired)

Tuesday, December 13, 2022

Dandy Owl Birthday - Stampin' Up! Adorable Owls

   I made a get well card for a little boy over the weekend and forgot to get a photo before sending it off so I tried to re-create it while I had all the supplies still out and it was fresh in my memory! I changed this one up to be a birthday card and I think with the colors I could consider this one another installment in Testosterone Tuesday!


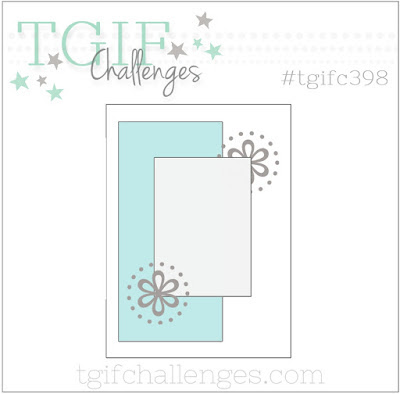
  This is another card that uses almost all brand new products from the upcoming January - April mini and Jan-Feb. Sale-a-Bration.  I used the TGIF Challenges sketch for the layout but flipped it on it's side.

  The card starts with a Balmy Blue base and then almost a full card front of a piece of the Dandy Designs DSP which is an AWESOME Sale-a-Bration reward this time around!  You get 48 sheets of 12x12 paper in a wonderful set of colors and patterns that can be used all year round!  You can get it with a $100 product order starting January 5.  Think about going in with a friend to place an order if $100 is too much for one time; you can split the pack and you each would get 2 sheets of every pattern! I used a bit of the reverse side for the smaller piece of DSP.

  Next I cut a rectangle out of Basic White with the Stitched Rectangle dies and popped it on the card front with dimensionals.  The owl is also a Sale-a-Bration reward called Adorable Owls which has 3 super cute owl images and 3 sentiments.  I colored it in with Blends markers (listed below) and then fussy cut.  The owl is popped on dimensionals.

  The word bubble is new and can be found in the Jan.-April mini.  It's a from bundle called Conversation Bubbles which has a fun stamp set and die set with all different shapes of word bubbles.  I just used one of the dies and cut a Basic White center part and then a Balmy Blue frame.  I used it again to cut the shapes from a piece of foam adhesive sheet so I could pop the whole piece.  The Happy Birthday sentiment from Paradise Palms fits perfectly and is stamped in Memento black.

  The finishing bits are a few stars die cut from another of Dandy Designs DSP and added to the corners to match the sketch and a Parakeet Party Metallic Woven ribbon bow.

  I can't wait to create more with this new DSP and these owls which just have the cutest expressions!

 Thanks for looking!  Did you stamp today?

Stamps: Adorable Owls (SAB), Paradise Palms

Ink: Memento Black

Blends: Old Olive light, Balmy Blue light & dark, Crumb Cake light & dark, Ivory, Mango Melody dark (retired)

Paper: Balmy Blue, Basic White, Dandy Designs DSP (SAB)

Accessories: Stitched Rectangle dies, Conversation Bubble dies, dimensionals, foam adhesive sheets, star dies (retired), Metallic Woven ribbon


Monday, December 12, 2022

Floral Park Thanks - Stampin' Up! Petal Park

   I only had a little bit of stamping time over the weekend but I was able to design 2 cards one of which I sent off before I remembered I hadn't taken a photo!  Total fail!  I might try to re-create it if I can remember what I did!  I did take a photo of this one before mailing it out and it's a beauty!

  Everything except the inks and cardstock are new coming soon products!  The DSP, embossing folder, stamps, punch and embellishments are either in the upcoming Jan.-April mini catalog or January-February Sale-a-Bration!  So many fabulous new items to share with you in the coming months!

  The Regency Park Suite contains everything on this card except for the DSP which is the Sale-a-Bration reward Dainty Flowers DSP.  I love the flowers and punch combo for quick designs without skimping on details.


  I started with a Basic White thick base and then layered a piece of the Dainty Flowers DSP and a piece of Basic white embossed with the Cane Weave embossing folder to cover the whole card front.  I pulled my color combo right from the Regency Park DSP even thought I didn't use it on this card.  These colors are such a pretty combo!

  Next I stamped the flower outline in Shaded Spruce and then filled them in with the matching stamp with stamped off Shaded Spruce ink for a lighter look.  Using a smaller stamp of flowers I used Balmy Blue ink and stamped off twice and stamped it all around the edges of the leaf panel and then I did the same with Petal Pink ink and the little speckle stamp.  

  To make the flowers I stamped the flower outline stamp 3 times in Night of Navy ink and then filled them in with the 3 different colors so I ended up with enough to make 3 cards just mixing and matching the flowers.  After punching them out he flowers are adhered with the Balmy Blue and Petal Pink ones popped on dimensionals.  

  I added a bit of Night of Navy Bordered ribbon behind the Petal Pink flower and an Adhesive-backed Milky Dot in Mango Melody next to it.

  The 'thanks' from Sentimental Park (part of the whole Regency Park Suite or as a separate bundle) is stamped in Night of Navy.

  I think I will be using this suite a lot as there are so many mix and match opportunities with the 2 stamp sets, punch and die set (which I didn't even use on this card!), not to mention all the papers and embellishments!

  Thanks for looking!  Did you stamp today?

***all of the below products besides the ink and cardstock are coming soon in January***

Stamps: Petal Park, Sentimental Park

Ink: Night of Navy, Balmy Blue, Shaded Spruce, Petal Pink, Mango Melody

Paper: Basic White thick, Basic White, Dainty Flowers DSP (SAB), Balmy Blue

Accessories: Cane Weave embossing folder, Petal Park builder punch, Night of Navy Bordered ribbon, Adhesive-backed Milky Dots, dimensionals

Thursday, December 8, 2022

Merry Christmas Basics - Stampin' Up! Spruced Up

   This card has all the basics you need to get your Christmas started!  You've got the tree, ornament(s) and a gift.  All finished!  If only it were that easy to be ready for Christmas in real life right?  We made this card at my last class and it showed off 3 of the elements from the Spruced Up Bundle in a clean layout with some texture thrown in for good measure!


  We started this one with a Soft Sea Foam base, then a layer of Basic White behind an embossed piece of Evening Evergreen using the Whimsical Woodland embossing folder.  

  I think one of the essential things you need when working with this set are the adhesive sheets found on page 127 of the annual catalog.  With these sheets you basically turn a piece of cardstock into a sticker so it makes using the thin outline parts of these dies a snap to work with.  The gift and ornament outlines have the the adhesive sheets applied to them and they stick perfectly to the 2 different DSPs.  The silver polka dot design is the Sale-a-Bration reward Silver & Gold Specialty paper from this past summer.  The little hearts/knitted design is found in the Happy Forest Friends DSP.

  The tree is stamped in Soft Sea Foam and die cut then popped with dimensionals.  We decorated it with a Daffodil Delight star and some rhinestones colored with the Evening Evergreen Stampin' Blends marker.  Some iridescent trim decorates the ornament as does the little sentiment from the Christmas To Remember set.

  This is probably my last Christmas card of 2022 as I've shared all the ones that I have made and I still have a handful left in my stash for last minute needs so I don't think I'll be making any more. That is unless I get some awesome idea I just have to make!

  Thanks for looking!  Did you stamp today?

Stamps: Spruced Up, Christmas to Remember

Ink: Soft Sea Foam, Evening Evergreen

Paper: Soft Sea Foam, Evening Evergreen, Basic White, Blushing Bride, Happy Forest Friends DSP, Silver & Gold Specialty paper (retired-SAB), Daffodil Delight

Accessories: Whimsical Woodland embossing folder, dimensionals, Spruced Up Outlines dies, rhinestones, Iridescent trim

Wednesday, December 7, 2022

Ornament Aglow - Stampin' Up! Lights Aglow DSP

   Do you have a lot of narrow DSP strips that you're holding onto but don't know how to use them?  Want a cool way to use them up for a Christmas card?  Check this one out!


  I started with a Very Vanilla thick card base.  Then I embossed a piece of Soft Succulent with the Merry Melody embossing folder.  To highlight the embossed pattern I brushed a retired gold ink pad across the whole panel to give it a nice gilded look.

  Now on to those strips!  Start with a piece of Very Vanilla that's slightly larger than the circle die you want to use.  I used the largest circle in the Stylish Shapes die set.  Next get your strips of DSP ready.  Add dimensionals to the strips and layer them evenly down the piece of Very Vanilla leaving equal spacing between them. Now cut the circle from the panel of DSP pieces.  If any of your DSP is not securely adhered because where you had the dimensional placed got cut off just add another one to get it adhered. trim them down if you need to.

  I used the little ornament hanger die from the Spruced Up Outlines die to cut a piece of Metallic Gold paper for the top of the ornament.  A gold ribbon knot finishes the ornament.  The whole ornament is popped on the card front with dimensionals.

  The sentiment from  Inspired Thoughts is stamped in Evening Evergreen and cut out with a smaller Stylish Shapes circle and added with yet more dimensionals!

  No excuses now not to use up all those skinny pieces of DSP!

  Thanks for looking!  Did you stamp today?

Stamps: Inspired Thoughts

Ink: Evening Evergreen, Gold

Paper: Very Vanilla thick, Very Vanilla, Soft Succulent, Lights Aglow DSP, Metallic Gold

Accessories: Merry Melody embossing folder, Stylish Shapes dies, dimensionals, Spruced Up Outlines dies, gold ribbon

Tuesday, December 6, 2022

Flurry for New Years - Stampin' Up! Joyful Flurry

   It's nice to have a few Happy new Years cards in your stash as December gets underway so you're ready to go.  I designed this one for my last class and I made a few extras for myself.


 And it's easy enough to swap out a Christmas sentiment instead of the New Years one in case you find yourself short a card or 2 for that stack of Christmas cards.

  This one starts with a Basic White thick card base.  Next is a layer of Starry Sky (such a pretty color!) stamped with snowflakes from the Joyful Flurry set in the same color of ink.  Using the Stylish Shapes dies a circle is cut out of one side of the panel.  On the back of the Starry Sky layer I adhered a piece of the Snowflake Specialty vellum paper.  You could just cut the vellum in a circle but the extra detail of the bit of stitching around the opening is a nice touch and also keeps you from having to be careful with your adhesive so it doesn't show through the vellum as you put the adhesive on the Starry Sky layer.

  Next, a silver snowflake is stamped and embossed on a piece of Fresh Freesia and cut out.  It's popped on dimensionals along with the sentiment stamped in Starry Sky.

  Finally all the "extras" are added on.  2 small snowflakes are cut out of the white glimmer paper and are added to the card front.  A few Fresh Freesia sequins and Adhesive Backed Iridescent stars add some shine and shimmer. And finally a Metallic Woven ribbon bow is added to the edge of the sentiment.

  Thanks for looking!  Did you stamp today?

Stamps: Joyful Flurry

Ink: Starry Sky, Versamark

Paper: Basic White thick, Basic White, Fresh Freesia, Snowflake Specialty Vellum, white glimmer paper

Accessories: Stylish Shapes dies, Frosted Flurry Dies, dimensionals, Adhesive baked stars, sequins, Metallic Woven ribbon

Friday, December 2, 2022

Mini Gift Bag Pop-Up Card - Stampin' Up! Christmas Season

   I taught my stampers how to make this adorable fun fold pop-up card the other day at class.  The mini gift bag is the perfect size to hold a gift card so it is great design for this time of year.  Think of all the teacher gifts you need to have ready to go in just a few weeks!  I've created a step by step video showing how to make the mini gift bag and how to get it to pop up inside your card.  

front of card
 
Inside of card

  Check out the video to see how to make your own mini gift bag pop-up card!  The measurements and step by step instructions are also below. 


 For the mini gift bag you'll need:

1 piece of Designer Series Paper cut 4" x 9.5"

Tear and Tape

paper snips

Simply Scored or scoring tool

2 - 5" length of coordinating ribbon

a finished coordinating card 

Instructions:

  1. Score down the long sides at 1/2” & 3”
  2. Turn cardstock 90° to score the short side
  3. Score at 1/2”, 1”, 4.5”, 5”, 5.5” and 9”
  4.  Snip out the scored tabs (see sample) where the narrow score marks intersect to make assembling the bag easier
  5.  Pre-fold score lines to make the gussets for the sides of the bag
  6. Leave the top 1” flaps up and then punch the holes for the ribbon handles through both layers at once.  The holes should be about 1 inch from the gusset sides of the bag
  7. Thread ribbon through the holes and tape down with Tear & Tape on the inside of the bag.  Peel off the backing paper and fold down the top flaps to cover the ribbon ends.
  8.  Add Tear & Tape to the small flaps at the bottom of the bag on the outside pattern***DO NOT PEEL OFF BACKING PAPER YET!!****

  9. Add Tear & Tape to the small flap on the side of the bag on the outside pattern

  10. Fold bag lining up the gusseted ends. Peel off the backing paper and adhere the flaps to complete the gusset

  11. Once your card is made, center the mini gift bag along the center fold and peel off ONE backing of the Tear Tape, press down to secure.  Peel off the second backing of Tear Tape and close card to adhere the last flap. 


  I hope you have fun making this card on your own!  

  Thanks for looking!  Did you stamp today?

Stamps: Christmas Season, Sweet Candy Canes

Paper: Garden Green, Basic White, Peaceful Prints DSP (retired, SAB) **in the video I use Sweetest Christmas DSP**

Ink: Garden Green, Real Red

Accessories: Candy Canes dies, dimensionals, ribbon, Seasonal Adhesive backed sequins, tear & tape, Simply Scored/scoring tool

Thursday, December 1, 2022

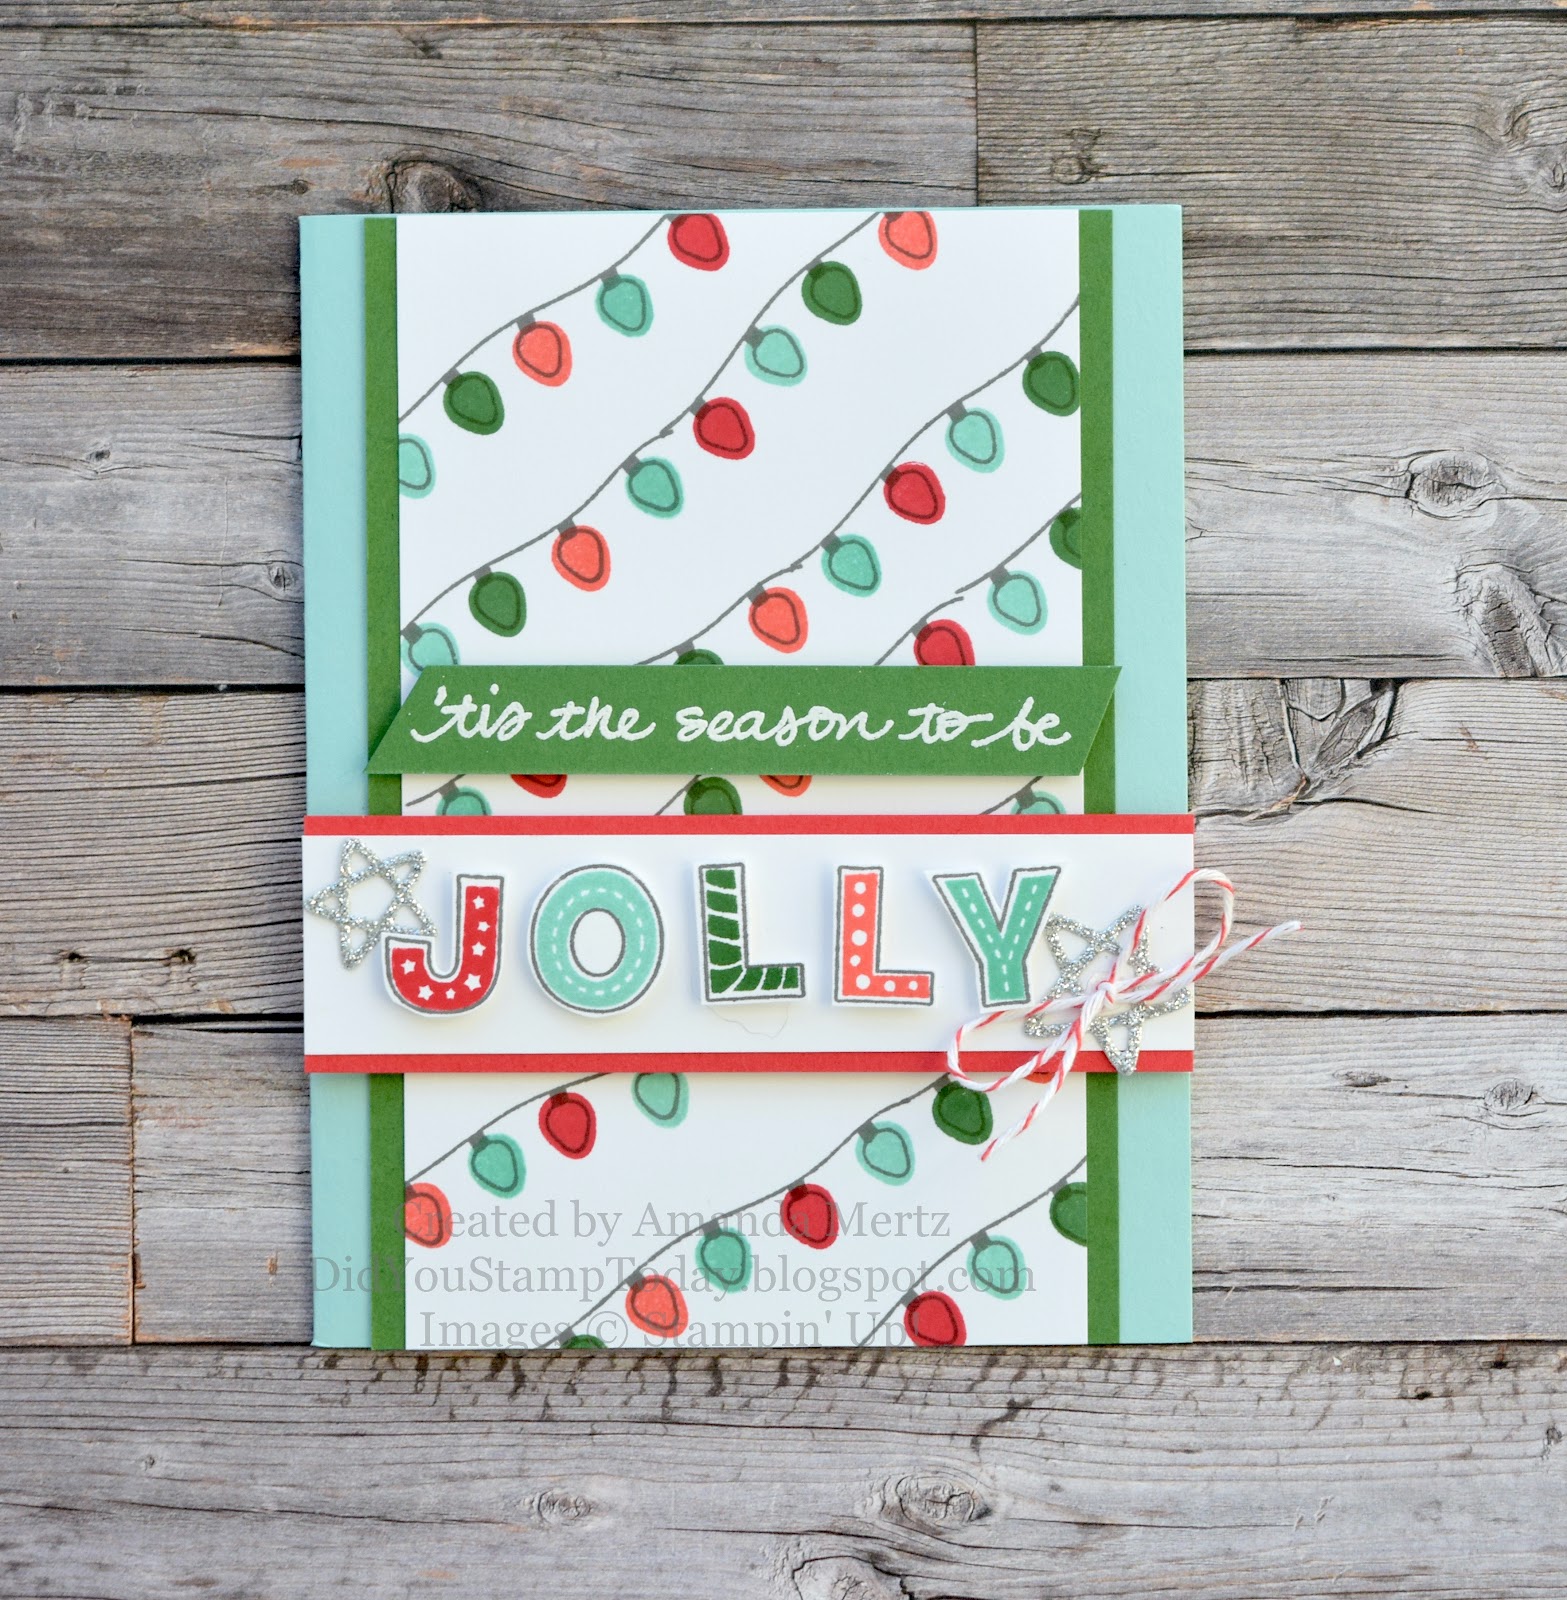
Jolly Christmas Lights - Stampin' Up! Jingle Jingle Jingle

   Who has their tree up already?  Do you go for white or colored lights?  We brought our tree in today and we'll get the lights on it tonight or tomorrow and then decorate.  We always do white lights on our tree but put some colored ones outside in the yard so I get the best of both worlds.  I think the way to go these days is get the fancy strands that have the remote where you can change from white to colors depending on what you feel like that moment!

  My card today has a ton of lights and I was so paranoid that I was going to mess up and do the colors in the wrong order.  Not that I think anyone would notice but me but I wanted to get them just right!


  I only made 5 of these because they were a bit labor intensive with the lights and then the fussy cutting of the letters.  And also it works out to 5 if you stamp the word Jolly in each of the 5 colors I used on the card so I didn't have any leftover pieces so there's that!

  I started with a Pool party base, then a layer of Garden Green topped with some Basic White.  I stamped the light strands in Basic Gray and then filled them in with my colors; Pool Party, Sweet Sorbet, Coastal Cabana, Flirty Flamingo and Garden Green.

  The outline of the Jolly is stamped in Basic Gray and like I said I did it 5 times then filled in each with a different color then fussy cut and mixed and matched them on the 5 cards.  I popped them with trimmed down bits of dimensionals on a Basic White strip backed with some Sweet Sorbet.

  The "'tis the season to be" is stamped in Versamark on Garden Green and then embossed in white.  It is also popped on dimensionals.

 I added 2 die cut stars in Silver Glimmer paper and put a Sweet Sorbet baker's twine bow in the center of one.  

  Thanks for looking!  Did you stamp today?

Stamps: Jingle Jingle Jingle

Ink: Versamark, Pool Party, Sweet Sorbet, Coastal Cabana, Flirty Flamingo, Garden Green

Paper: Basic White, Sweet Sorbet, Garden Green, Sliver Glimmer paper

Accessories: baker's twine, dimensionals, Spruced Up Outlines dies (stars), White embossing powder