Friday, September 27, 2019

Football for the Win - Stampin' Up! For the Win

  Happy Friday stampers!  I hope you've had a good week!  I've been MIA this week due to lots of commitments as well as my monthly stamp club.  But I couldn't miss out on a Fab Friday challenge post!  We have a great new sketch to work with this week.


  I took some liberties with the sketch for my Design Team card but I think you'll be able to see that I was definitely inspired by the sketch.  I went with a seasonal card.  By season I mean football season!  My son had his first middle school football game this week so I wanted to mark the occasion with a little card for him.  This is an easy one to alter for specific teams; just change out the banner colors to your team colors and voila-- a personalized card!


  So can you see the sketch?  If not you'll just have to trust me that I was definitely working with the sketch when I sat down to stamp. 

  And try as I might I just cannot get my greens to photograph true to life so you'll have to trust me that the green really is Call Me Clover!  I thought it looked like a nice green football field before the season starts.  It even has a bit of texture thanks to the Subtle embossing folder.

  This was a fun to card to make with creating a football with the Hammered Metal embossing folder and some Whisper White scraps.  I hand cut the shape and sponged the edges with Soft Suede ink for extra detail.  Then I used a few dimensionals to pop the ball up.

  The banners are simply embossed with white embossing powder on Night of Navy cardstock.  Go Team is popped with a dimensional and the game day on is just tucked under the edge of the ball.

  Finally, the stars are stamped with the Stamparatus for perfect alignment.

  Head over to Fab Friday to see the rest of the Design Team and their fabulous projects.

  Thanks for looking!  Did you stamp today?

Stamps: For the Win

Ink: Versamark, Call Me Clover, Soft Suede

Paper: Call Me Clover, Whisper White, Night of Navy, Soft Suede

Accessories: Subtle embossing folder, Hammered Metal embossing folder, white embossing powder, dimensionals

Monday, September 23, 2019

Layered Christmas Stars - Stampin' Up! Stitched Stars Dies

My card today has very little stamping because I was just so into creating with the Stitched Stars dies that there really wasn't any space for stamping once I was finished!

 
My inspiration for this card came from the challenge over at The Card Concept.  They have a really neat inspiration photo so I took my colors and the layout from that to do this Clean and Layered card. See the end of this post for the photo.

The card base is Early Espresso with a layer of Whisper White stamped with the Birch background stamp.  I was going for a non-traditional Christmas color look but I guess with a change of sentiment on the inside it could be for just about any occasion.  You could easily mix traditional Christmas colors for a great look in this same style.

  I used the Stitched Stars dies to cut a lot of different stars and then spent some time mixing and matching to get the right balance of colors.  Each one is popped on a dimensional and then has either a sequin or an adhesive rhinestone in the center.

  This isn't a hard card to make just a bit fussy to get the balance just right.

  Thanks for looking!  Did you stamp today?

Stamps: Birch

Ink: Early Espresso

Paper: Early Espresso, Whisper White, Pear Pizzazz, Coastal Cabana, Rococo Rose, Petal Pink

Accessories: Stitched Stars dies, dimensionals, sequins, rhinestones


Friday, September 20, 2019

Silver Stars - Stampin' Up! So Many Stars

Have you figure out what my favorite Holiday catalog stamp set is yet?  I hope you aren't sick of seeing the So Many Stars set because I know I'll be using it a lot more in the coming months!

For my card today I used the Paper Players current challenge for my inspiration.  The challenge is to use metallics.  Easy enough with stars right?


I started with a Seaside Spray card base and then embossed silver stars down the front.  The star is made with 3 different layers using the Stitched Stars dies.  The bottom layer is the cool new Mercury Glass Acetate which is really fun for these seasonal cards.  The next star is Seaside Spray and the top is a detailed star cut out of Galvanized Metallic paper.

  The layered star is adhered to a Stitched Nested label die and the sentiment is stamped in Seaside Spray ink.  The whole label is popped up with dimensionals.

  Thanks for looking!  Did you stamp today?

Stamps: So Many Stars

Ink: Versamark, Seaside Spray

Paper: Seaside Spray, Whisper White, Mercury Glass Acetate, Galvanized Metal paper (retired)

Accessories: silver embossing powder, Stitched Stars dies, Stitched Nested label dies, dimensionals

Wednesday, September 18, 2019

Cheers to the New Year - Stampin' Up! Sip Sip Hooray

I know that New Years is quite a ways off but it was so fun making this card with new products!  The Sip Sip Hooray stamp set is cute and festive for all kinds of celebrations...adult celebrations that is.  I doubt any 8 year old would appreciate a birthday card made with it!


  I used one of the samples in the Holiday catalog as inspiration for the background but I added some of the fun new Ice Stampin' Glitter to the glasses for some sparkle.  The pink martini glass also has some Ice Stampin' Glitter as well.

  I may have to make a few more of these Happy New Years cards in case I don't have enough Christmas cards.  And a change of the sentiment this could easily be a birthday card.

  My colors are inspired by the Just Add Ink challenge

  Thanks for looking!  Did you stamp today?

Stamps: Sip Sip Hooray, Itty Bitty Christmas

Ink: Gray Granite, Rococo Rose, Mossy Meadow

Paper: Rococo Rose, Very Vanilla, Blackberry Bliss

Accessories: Ice Stampin' Glitter, Stitched Shapes dies, Sip and Celebrate dies, Mossy Meadow twine (retired), dimensionals


Tuesday, September 17, 2019

Christmas Love - Stampin' Up! So Many Stars

 When stamp sets have a limited seasonal use it's fun to try to get as much mileage out of them as you can.  Christmas products are great to mix and match to get even more designs out of them in a short amount of time.  I paired the Pine Tree punch with 2 other stamp sets for this sweet card.

I used the sketch at CAS(e) this Sketch to start my creating.   I flipped it because in the end the long sentiment banner fit better.


 I could not get the Shaded Spruce and Night of Navy to look true to life in my photos.  It's a much more crisp looking card in real life!

  The Night of Navy card base is stamped with the little star background in Night of Navy ink.  I punched the pine tree shape into a piece of Very Vanilla cardstock embossed with the Pinewood Planks (see the theme??) embossing folder.  I tossed the actual punch out away and used the negative panel.  It's popped up on dimensionals over a piece of Perfectly Plaid DSP.

  I added a few Gold Glimmer paper stars cut with the Stitched Stars dies.

  The sentiment is stamped with gold ink onto Night of Navy cardstock and then hand cut into the banner shape.  If you like to have a lot of options for Christmas sentiments then Itty Bitty Christmas might be for you.  While they are on the smaller size there are a lot of font styles and sayings to fit just about any card you're making.

  Thanks for looking!  Did you stamp today?

Stamps: So Many Stars, Itty Bitty Christmas

Ink: Night of Navy, gold

Paper: Night of Navy, Perfectly Plaid DSP, Very Vanilla, Gold Shimmer

Accessories: Stitched Stars dies, Pine Tree punch, Pinewood Planks embossing folder, dimensionals


Monday, September 16, 2019

Classic Christmas Stars - Stampin' Up! So Many Stars

  I had a lot of time in the stamp room last week to really dive into my Holiday catalog products and I am loving everything so far!  With so many new products sometimes it can be overwhelming to figure out what to start with and what to make!  I was able to use some of the wonderful stamping challenges for inspiration and some focus for my designs.

  I always love the Freshly Made Sketches challenge but rarely get a card made, photographed and blogged in time to participate so I am excited to join in with this sketch that ends today.  Just in the nick of time!  The circles in the sketch seemed perfect to use with the So Many Stars bundle.


  I changed out the circles in the sketch and made them stars.  It was fun to mix and match stamps and DSP to make this Christmas card.

  The card front is a cool woodgrain pattern from the Come to Gather DSP.  I layered a strip of Soft Sea Foam across the front and added a sentiment in Cherry Cobbler from the Itty Bitty Christmas set.

  I used a variety of star die cuts in different papers and cardstock and added in some gold embossing to create these 3 lovely layered beauties.

  The largest star has a bit of the new Real Red curly ribbon accenting the one side.  This trim is not really ribbon but more of a soft yarn.  It's very nice but the name doesn't really fit!

  Even though the weather is still hot here in my neck of the woods be prepared to see a lot more Christmas designs this week!

  Thanks for looking!  Did you stamp today?

Stamps: So Many Stars, Itty Bitty Christmas

Ink: Cherry Cobbler, Versamark

Paper: Come to Gather DSP, Wrapped in Plaid DSP, Soft Sea Foam, Shaded Spruce, Gold Foil

Accessories: gold embossing powder, Stitched Stars dies, Real Red Curly ribbon, dimensionals


Friday, September 13, 2019

Gathering Well Wishes - Stampin' Up! Gather Together - Fab Friday 172

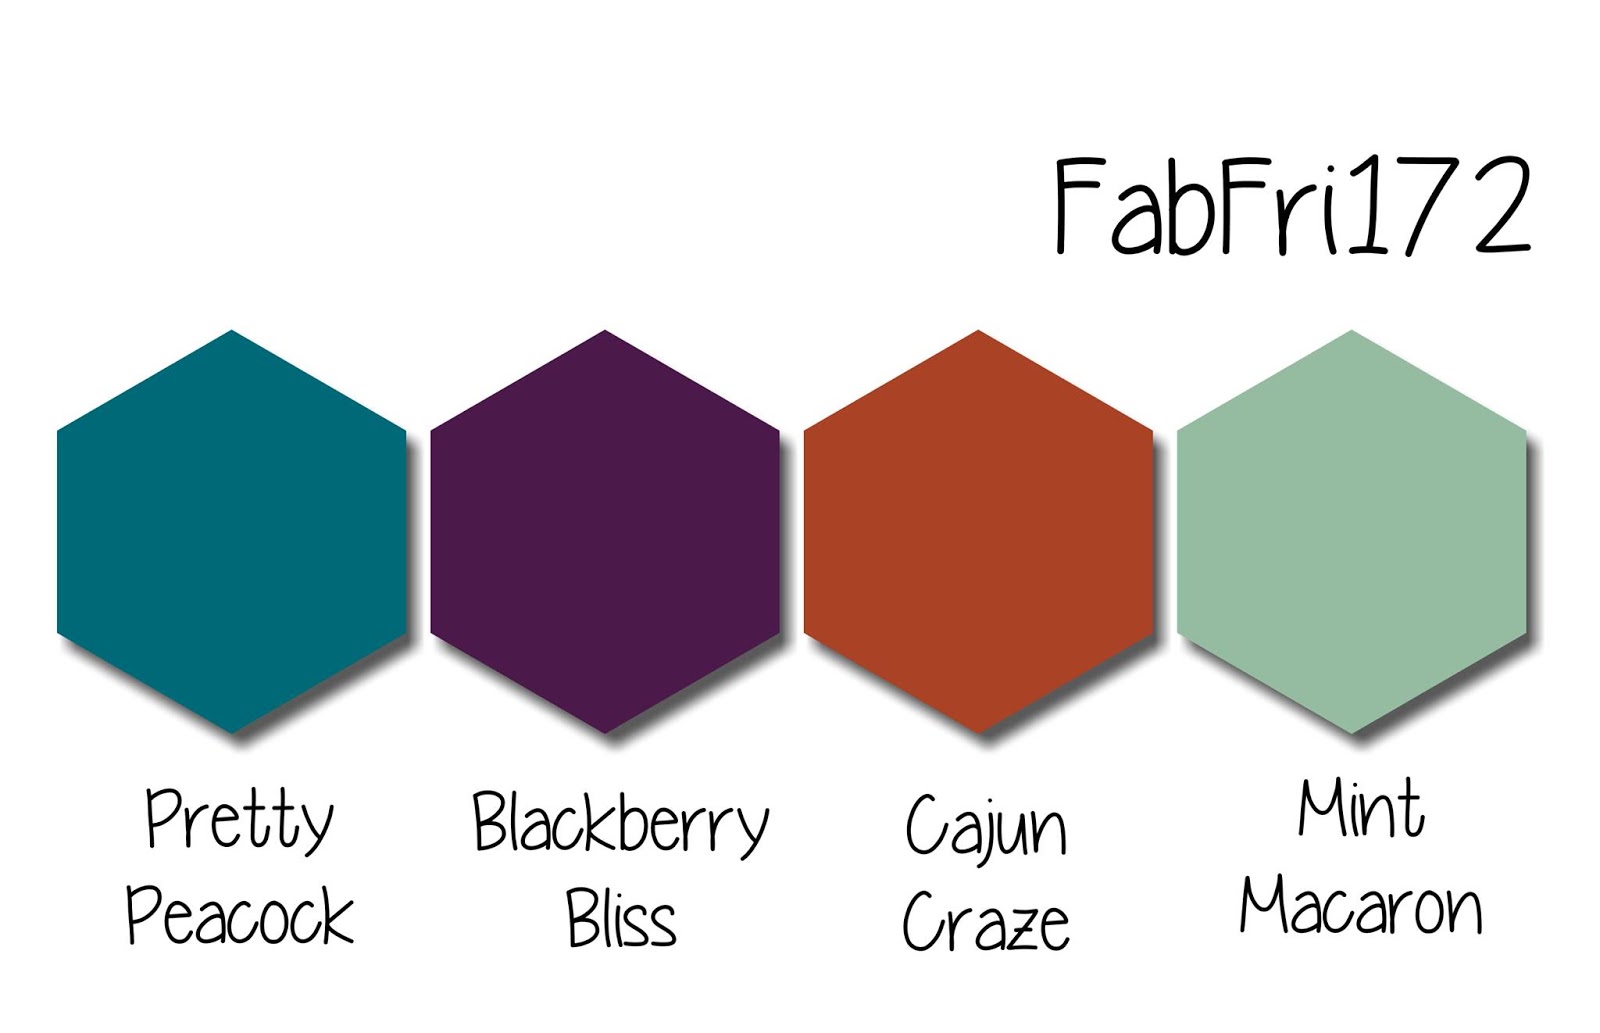
  This week's Fab Friday challenge snuck up on me and after I started to work with these colors I realized they were similar to this card I posted on Tuesday.  So clearly these are 'the' fall colors to use this year!

  I had already decided I wanted to work with the current Hand Stamped Sentiments sketch so I incorporated it into my plan for more fall leaves!

 Here are the Fab Friday colors:


  I love these rich jewel tones!  And just because I went right to autumn doesn't mean that's all you can do with them.  I love seeing ideas that are different from what my brain comes up with!


  The first supply I pulled out to use was the great medallion pattern from the Woven Threads DSP and I built my card up from that.

  The leaves are cut with the Gathered Leaves dies then I used each ink color to highlight inside the vein details.  I used ink and a blender pen and it really gives just enough contrast to really show off the delicate leaves.

  I arranged the leaves around the Stitched Nested Label that is embossed with the Pinewood Plank embossing folder.

  The sentiment is stamped in Pretty Peacock onto Mint Macaron cardstock and then flagged.

  The gold accents are the final detail and I think add to the richness of this color group.

  Thanks for looking!  Did you stamp today?

Stamps: Gather Together

Ink: Pretty Peacock, Cajun Craze, Blackberry Bliss, Mint Macaron

Paper: Very Vanilla thick, Very Vanilla,  Cajun Craze, Blackberry Bliss, Mint Macaron

Accessories: Corner rounder punch (retired), Pinewood Plank embossing folder, Stitched Nested Labels dies, dimensionals, Gathered Leaves dies, gold sequins (Paper Pumpkin kit), Gold cord (retired)


Wednesday, September 11, 2019

Puppy Thanks - Stampin' Up! Happy Tails

  When your dog has to send a thank you card of course you're going to make it using the Happy Tails stamp set and Dog Builder punch.  It's a no brainer! 


  I don't think it's ever taken me so long to make a card!  The dog was stamped before we left for the beach (3rd week of August) and didn't get colored until we got back from the beach.  Then it sat while I had class prep and back to school craziness (the last 2 week) and then finally it got put onto a card!  You'd think it would have some crazy involved techniques or something!  Nope!  It's all basic!

  And let me tell you, black dogs are hard to color and hard to photograph!  It just seems like she ends up looking like a black blob with no features or details!

  The card layout came from Case This Sketch and I thought the long detail across was a good spot for a dog to sit.  I used a bit of Gold Foil for the strip as well as the heart collar tag.

  The "thanks" was die cut with the Well Written dies 3 times and glued together to make a thicker more sturdy element.  I used Gorgeous Grape for the purple accents as that's the color of Aggie's leach and collar.  I'm all about color coordinating!.

  The Sahara Sand colored DSP panel is from the Woven Threads DSP and was a nice neutral with a bit of texture.  They don't show up well but I stamped some paw prints across the front as well.  I stamped off once so the ink is very light.

  Thanks for looking!  Did you stamp today?

Stamps: Happy Tails

Ink: Memento Black, Gorgeous Grape, Sahara Sand

Blends: Basic Black light & dark

Paper: Whisper White thick, Gorgeous Grape, Whisper White, Woven Thread DSP, Gold Foil

Accessories: Dog builder punch, dimensionals, Well Said dies


Tuesday, September 10, 2019

Gathering Leaves - Stampin' Up! Gather Together

   I got a bit of stamping time in the last 2 days and was able to finish 2 cards one of which I started back in August that I just couldn't find the time to finish between vacation, out of town visitors,  August stamp club and back to school.

  The card I'm sharing today is one for a challenge that has a great group of autumn colors. The Paper Players group has this rich color palette to work with. Cajun Craze, Merry Merlot, Pretty Peacock and a neutral.  Perfect for fall leaves I thought so I got to work with the new Gather Together bundle.


 The card base is Very Vanilla thick with a layer of Cajun Craze topped with an embossed piece of Pretty Peacock.  I thought the Tin Tile embossing folder would be a good compliment for my fall theme.  I lightly brushed the embossed panel with gold ink for a little bit of shimmer.

 The Gathered Leaves dies not only cut out the leaf shape they also emboss the texture on the leaves so I wanted to show that off with a few leaves in Merry Merlot and Cajun Craze.  They also got a bit of the gold ink treatment.

  The label Very Vanilla cardstock cut with the Stitched Labels dies.  I stamped the sentiment in Pretty Peacock ink and then threaded the label with Braided Linen trim.  I added a little Braided Linen trim knot to each leaf stem as well and then popped them up with dimensionals.

  Thanks for looking!  Did you stamp today?

Stamps: Gather Together

Ink: Pretty Peacock, Gold

Paper: Whisper White thick, Cajun Craze, Merry Merlot, Pretty Peacock, Very Vanilla

Accessories: Gathered Leaves dies, Stitched Labels dies, Braided Linen trim, Tin Tile embossing folder, dimensionals


Monday, September 9, 2019

Check Out This Book Tutorial - Stampin' Up! Check You Out

When planning for my classes I like to do a mix of techniques, fancy folds and basic cards as I have all levels of stampers attend.  Some of my stampers have been stamping way longer than me and I don't want them to get bored with the same old things.  So enter the fancy fold book pop up card!


  I love the Check You Out set and thought it was the perfect pairing for the fancy fold pop up book card.  I kept the front very basic since there is a lot going on inside the card!  It may look very familiar as I really just re-did this card in new colors.
  
  The Woven Threads DSP is perfect for this themed card as I think the designs lend themselves to old book endpapers.  And a little sponging with Sahara Sand ink helps too!


  How cool is that?? The inside opens up and there is a little book!  To see a video tutorial check out this video by Frenchie Stamps.  She does her cutting and scoring a little different than I did so see below for step by step pics using the Simply Scored instead of just a paper trimmer/scorer.  I switched this part from the video because I was doing it in a class setting and wanted it to be as straight-forward as possible without so much moving and lining up on the same tool.

  First things first are the measurements of the papers.  Using one sheet of 12 x12 DSP you can get 2 of these cards made including the DSP panel on the cardfront.

Card base - 8 1/2 x 5 1/2
DSP Inside - 8 1/2 x 5 3/8
Book Pages - 3 1/4 x 2 (2)
                      3 1/4 x 7/8 (2)
DSP Layer Front - 3 1/2 x4 3/4

  Ready to see how 2 cuts and a few scores makes this fun card?

1)  fold your large piece of DSP in half like a card base and open back up so you have a fold down the center (I forgot that part on my sample in the pics until halfway through the photo shoot!)

You want to find the one inch mark at the top of the cutter as well as along the blade guard.  Find the 7.5 inch mark as well.  You can see them marked with the pink flags in my pictures.


2) Line up DSP on the paper cutter (with cutting blade in place) with short side along the top of the cutter at the 1 inch mark


3) Find the one inch mark on the clear cutting guard and line up the cutting blade at that point without pressing down to the paper.

4) Press the cutting blade down and cut just down to the 7 1/2 inch mark

 I highlighted with a marker where the cut was made.  You should have a strip cut but still attached at the ends.

5) Turn the DSP and do steps 2-4 along the other long side of the paper


  This is what your DSP should look like after the second cut.

Move on to your Simply Scored.  There are 2 sets of scores.  One set inside the cut lines shown with the pink flags (1, 2, 6 1/2, 7 1/2 inch marks) and on the outside of the cut lines shown with the green flags (2 1/2 and 6 inch marks)

 1) Line up your DSP with the long side at the top of the Simply Scored


2) Score INSIDE the cut lines at 1, 2, 6 1/2, 7 1/2 inches (shown with the pink lines/flags below)


3) Leave DSP in place and score OUTSIDE the cut lines at 2 1/2 and 6 inches at the top of the DSP (shown with the green lines/flags below)


4) Turn DSP so the opposite long side is at the top of the Simply Scored and repeat step 3 OUTSIDE the cut lines


  That's it!  Once you see where the different cuts/scores are it's a pretty simple design.

I suggest using some scrap copy paper for a practice once or twice before committing to DSP but it really isn't as hard as it looks as long as you take your time to line up at the proper places.

  See the above picture of the inside of the card to see where the folds go up or down.  Use glue and not SNAIL adhesive so you can get the edges lined up and have a little wiggle room to reposition if you have to.  You just need the glue on each short end just until the first score mark. You should have a little edge of the card base showing all around the edge of the DSP on the inside.

  Decorate the inside and outside however you'd like.  This is a great fold for book lovers birthdays, book club events, Teacher Appreciation, Library/Librarian appreciation or just a cute "checking on you" card.

  I hope these photos are helpful to see how things get lined up for this fold.  Please let me know if you have any questions. 

  Thanks for looking!  Did you stamp today?

Stamps: Check You Out

Ink: Pretty Peacock, Soft Suede, Rococo Rose, Terracotta Tile, Sahara Sand

Paper: Terracotta Tile, Whisper White, Woven Threads DSP

Accessories: Stitched Shapes dies, dimensionals, paper trimmer, Simply Scored

Thursday, September 5, 2019

Back to School Cat - Stampin' Up! Nine Lives

  We made it through the first 2 days of school and everyone is still managing.  It might be a few weeks before we hit our groove though.  Fingers crossed it's sooner rather than later!

  I made this card a few weeks back and I think it was a mash up of several challenges which have long since closed.  It has already been sent off to a friend who was ready for school to start for her kids too.  And she likes cats so it was appropriate!


 Along with being a challenge mash up it's also a product mash up of current and old products.  I had a bit of fun mixing up and customizing the sentiment.  The "celebrating" part is from the Well Said set which has soooooo many choices you shouldn't ever be stuck for an appropriate greeting (except for back to school celebrations lol!).  After crossing off the "happiness" I made a little extra strip with the Back to School with the Make a Difference alphabet set.

  I hope that your back to school routines are getting in place and your kids are enjoying it all!

  Thanks for looking!  Did you stamp today?

Stamps: Nine Lives, Well Said, Make a Difference

Ink: Memento black, Pumpkin Pie

Paper: Very Vanilla thick, Very Vanilla, Coastal Cabana, Pumpkin Pie, DSP (retired)

Accessories: cat punch,  Layering Squares dies, Tailored tag punch, rickrack trim (retired), enamel shape (retired), dimensionals, Coastal Cabana twine (retired)

Wednesday, September 4, 2019

Over the Moon for You - Stampin' Up Over the Moon

A quick share today as Aggie has her first class at the beginner level this morning.  She passed the puppy class but I'm thinking the next level might be more rigorous.  I don't know if she has what it takes as she's a bit of a spazz.  We have to keep reminding ourselves that she's not quite six months old.  Fingers crossed!


  My card today is another one from my last class.  I love these cows in the Over the Moon set and they are super cute to use for many different occasions.  I also wanted to show off more of the Stitched Labels dies which has a really fun mix of dies.

  The Stitched Labels dies are used on the card front with the fun crosshatch pattern which cuts the pattern into the cardstock kind of like an embossing folder.  The "grass" also uses a die for the little x's and finally the heart.

  The color is colored with Blends and it and the word bubble are fussy cut and popped on the background panel.

  We used a bit of the In Color DSP in Rococo Rose for the little flag.

  Thanks for looking!  Did you stamp today?

Stamps: Over the Moon

Ink: Memento black

Blends: Petal Pink light & dark, Soft Suede light, Crumb Cake light, Basic Black light, Daffodil Delight light, So Saffron dark

Paper: Crumb Cake, Whisper White, Seaside Spray, Rococo Rose, Pear Pizzazz, In Color DSP

Accessories: Stitched Labels dies, dimensionals, linen thread

Tuesday, September 3, 2019

Sloth Get Well - Stampin' Up! Back on Your Feet

 I held my last class for this summer this past week and showed off a few new stamp sets from the Annual catalog that I hadn't used yet.  It's always nice to have a few get well or sorry you're feeling crummy cards on hand so you can just pop them in the mail.  The Back on Your Feet set is a perfect lighthearted set with cute images and basic sentiments.

  While I don't have an obsession with sloths or anything I can admit that this is a pretty cute image and even better...quick to color!


 We mixed and matched a few other sets to round out this design.  The new background stamp Birch is stamped in Gray Granite ink onto a Gray Granite card base.

  The leaves are from the To a Wild Rose set and coordinate well with the bit of greenery on the end of the branch.  The leaves are Garden Green ink on the same color cardstock.

  The little sloth is stamped in Stazon and then colored with colored pencils and blender pens.  

  Thanks for looking!  Did you stamp today?

Stamps: Back on Your Feet, To a Wild Rose, Birch

Ink: Gray Granite, Garden Green, Stazon

Paper: Gray Granite, Garden Green, Whisper White

Accessories: Wild Rose dies, colored pencils, blender pens, dimensionals