Showing posts with label Punch Art. Show all posts

Sunday, September 13, 2026

CAS Thanksgiving - Stampin' Up!® Soiree Salutations

  Talk about a clean and simple card!  This one lets the sparkly leaf be the focal point.  I send out a small amount of Thanksgiving cards each year so I like to get some finished up early and this would be a great one to make multiples of!


  I used Very Vanilla for the card base as well as to die cut the Scalloped Christmas Cheer rectangle.  I used the detailed Elegant Leaves die to cut the leaf shape out of the Very Vanilla panel.  Then I cut the same leaf in Cajun Craze.   I adhered a piece of the Cajun Craze Autumn Woodland Glimmer paper behind the Vanilla panel and then added the detailed Cajun Craze die cut over the top of the Glimmer paper.


  The sentiment from Soiree Salutations is stamped below the leaf in Early Espresso and then a few retired Streaked Dots finish this clean and simple seasonal card.

Thanks for looking!  Did you stamp today?

All of the current products used to make this card can be purchased in my ONLINE STORE.

Stamps: Soiree Salutations

Ink: Early Espresso

Paper: Very Vanilla, Cajun Craze, Autumn Woodland Glimmer Paper

Accessories: Scalloped Christmas Cheer dies, Elegant Leaves dies, Streaked Dots (retired)

Thursday, August 6, 2026

Ladybug Hi - Stampin' Up!® Summer Happiness

   Do you ever find yourself with a good idea but then talk yourself out of it because you don't have the 'right' stamp for it?  Don't forget that punch art is a great way to create that image that is perfect for your idea.  I wanted to make a ladybug card to go with the sweet ladybug paper in the Homemade Sweetness DSP (it's on sale right now too if you have it on your wish list!!) but not a ladybug stamp to be seen.  Punch art to the rescue!


  The layout comes from the Sketch-n-Scrap sketch challenge.  I started with a Crisp Cantaloupe card base (that you can't see!) and topped it with a piece of Basic White embossed with the Ladybug Picnic embossing folder.  Then comes the DSP with the bottom corners rounder to follow the sketch.


I created the ladybug with circle punches of various sizes.  The base and wings on this one are 1 3/4" circles for reference.  The little dots are colored with clear Wink of Stella and the whole bug is popped on dimensionals over the sentiment band.  The sentiment is stamped with the Simple Alphabet stamp set and is the perfect size for the 1 inch band.


  For the other element at the top of the sketch I layered several different elements starting at the bottom with a very old scrap of Calypso Coral ribbon from my scrap stash. It always feels good to use up these bits and pieces!  Next is a die cut banner from the Stylish Shapes dies.  Then finally a stamped flower from the Summer Happiness bundle.  It mimicked the shape of the flower in the DSP so I went with it.  I popped it on dimensionals and then added a few Black sparkle gems that echo the dots on the ladybug.

  Punch art is especially good for animals and dies are easy to use too if you don't have much of a collection of punches these days!  So don't give up on that cute idea in your head!

  Thanks for looking!  Did you stamp today?

All of the current products used to make this card can be purchased in my ONLINE STORE.

Stamps: Simple Alphabet, Summer Happiness

Ink: Memento Black, Calypso Coral

Blends: Crisp Cantaloupe, Golden Glow light, Daffodil Delight dark

Paper: Basic White, Calypso Coral , Basic Black, Homemade Sweetness DSP

Accessories: Ladybug Picnic embossing folder, circle punches, Stylish Shapes dies, Summer Happiness dies, Wink of Stella, dimensionals, Calypso Coral ribbon (retired), black sparkle Gems (retired)


Thursday, July 17, 2025

Curtis the Cat Birthday - Stampin' Up!® Month by Month Alphabet

    My boys' birthdays are 4 days apart so there is always a lot of birthday celebration during birthday week.  And So. Much. Cake.  It's hard to get through so much birthday dessert no matter how good it is.  We currently have most of a SpongeBob cake, most of an assorted cheesecake platter and a key lime pie that I had bought for an event that ended up being cancelled.  I'm going to have to make room in the freezer I think!  Anyway... my card today is for my oldest on his birthday.  I decided to do a punch art cat that looks like his cat since the SpongeBob card came out so well.


  Meet Curtis the Cat.  He's actually not this chubby in real life but the shape worked and I used the dies that I had on hand.  I started with a Balmy Blue background embossed with the Forever Plaid embossing folder.   The stripes on Curtis are created with an aqua painter and Peach Pie ink as well as some white craft ink sponged on various areas to mimic Curtis' white splotches.  The edges of all the pieces are sponged with Pumpkin Pie ink to give him a fuzzy appearance.


  The eyes came out kind of crazy looking; he doesn't look this unhinged in real life lol!  The whiskers are just super thin cuts of Basic White.  The stamped meow's are made with the Month By Month Alphabet set that comes in the Stampin' Up! Virtual Album Retreat kit.


  He may look like he wants you to rub his belly but don't be fooled!!  lol!

  Thanks for looking!  Did you stamp today?

All of the current supplies used for this card can be purchased in my ONLINE STORE.

Stamps: Monthy By Month Alphabet

Ink: Peach Pie, White craft, Gray Granite, Petal Pink, Pumpkin Pie

Paper: Balmy Blue, Peach Pie, Basic White, Basic Black, Soft Sea Foam

Accessories: Forever Plaid embossing folder, Impressions Abloom dies (body & tail), circle punches/dies (head, eyes, nose, cheeks), Party Banners dies (ears), oval punch/dies (paws), dimensionals, aquapainter

Saturday, July 12, 2025

SpongeBob Birthday - Stampin' Up!® Punches & Dies

   My card today has no stamping but uses all Stampin' Up! products.  When I have a need for a card and I have no stamps that work for the theme, punch art always comes to the rescue!  My youngest asked for a SpongeBob cake for his birthday.  People, this boy just turned 17.  Whatever. SpongeBob cake was ordered and then I figured I might as well make it a theme for his card too!  I browsed Pinterest for a hot minute for some inspiration then pulled out my Daffodil Delight cardstock and a bunch of punches and got to work!


  I think it turned out pretty good and even my son was impressed so I guess that's a win for mom!  lol.  I started with a Daffodil Delight card base then added a layer of Daffodil Delight embossed with the retired Tasteful Textile embossing folder for that sponge-y texture.  Then I added some small punched circles in Crushed Curry.

  The eyes came together with a bunch of punched and die cut circles.  I had to play around a bit with sizes to see what worked.  The eyelashes are just very thinly cut pieces of Basic Black.  I don't have a white gel pen at the moment (they always crap out on me after using them just a few times!) or I would have added some highlights to his eyes to make them look a bit more finished.

  Next are the cheeks and the mouth; more circles which are sponged around the edges for depth.  The nose is made the same way. The mouth is just a partial circle that I used another circle die to cut a sliver from.  The teeth are just small pieces of Basic White.

  The shirt is a strip of Basic White and the collar is made from a square piece that was cut in half diagonally.  I ran my Basic Black Stampin' Write marker around the points of the collar pieces to make them more defined.  The tie is a strip of Real Red and the tie knot is just hand trimmed.

  I probably won't ever need a SpongeBob card again but if I did I would try to work his brown pants in too to help balance out All. That. Yellow. 

  Thanks for looking!  Did you stamp today?

All of the current products used to make this card can be purchased in my ONLINE STORE.

Stamps: none

Ink: Daffodil Delight, Basic Black marker

Paper: Daffodil Delight, Crushed Curry, Basic White, Basic Black, Azure Afternoon, Real Red

Accessories: various circle punches, various circle dies, Tasteful Textile embossing folder (retired)

Monday, September 9, 2024

Pumpkin Season - Stampin' Up! More Than Autumn

   I'm back with another pumpkin themed card!  Tis the season and all that!  I made this design as my customer thank you card for orders placed in August.  Place an order with me this month and get a hand stamped card from me as a thank you!  And help me reach a sales goal....I'm so close!! You never know what kind of card it might be...I don't even know until I sit down to make them!


  I saw fellow demonstrator, Trayce Bauer use the Bee Builder punch to make a pumpkin and I filed that away to CASE as I don't currently have a good sized pumpkin stamp or punch.  It's really easy just 3 bee bodies in Pumpkin Pie.  The back two have the tail trimmed off and the top one has the tail trimmed just slightly to make a stem.  Each layer is sponged with Pumpkin Pie ink around the edges before adhering them together.  The stem is colored with the Garden Green Stampin' Write marker, an Old Olive die cut leaf from the More Than Autumn die set is tucked to the side and a bit of Copper Clay Natural Tones Linen Thread tied in a knot accents the stem.

  The pumpkin is popped on dimensionals on a Very Vanilla Spotlight on Nature die circle.  The card background is made of 3 panels using different DSP and specialty papers.  The left is Oxidized Copper specialty paper, top right is Iconic Celebrations DSP and bottom is Country Woods DSP.  All are mounted on a Pecan Pie card base.

  The sentiment from More Than Autumn is stamped in Copper Clay ink and fussy cut and added to the lower corner.  A few copper Neutrals Adhesive-Backed sequins are added for some shine.

  So thanks to my customers for placing orders last month!  I hope you enjoy getting this fun mail!  

  Thanks for looking!  Did you stamp today?

All of the products used to make this card can be purchased in my ONLINE STORE.

Stamps: More Than Autumn

Ink: Copper Clay, Pumpkin Pie

Paper: Pecan Pie, Very Vanilla, Oxidized Copper specialty paper, Iconic Celebrations DSP (Online Exclusive), Country Woods DSP, Old Olive, Pumpkin Pie

Accessories: Bee Builder punch, Spotlight on Nature dies, dimensionals, Neutrals Adhesive-Backed sequins, dimensionals, Natural Tones Linen Thread

Friday, September 4, 2020

Back to School - Stampin' Up! Well Said

   Our very, very, very long break from school is winding down here as the boys start school on Tuesday.  It's all virtual so they aren't really going any where but they still need to get up and be ready to learn first thing for a full school day.  It might be a rough morning here...wish us luck.

  I made this back to school card to give to my boys as a little bit of encouragement as they start this crazy new school year.  It was fun to do a bit of "die art" to create this big pencil.

  I started with a Whisper White thick card base topped with a lovely plaid paper from the Plaid Tidings 6x6 DSP. 

  The next layer is a hand made piece of notebook paper.  I used my dark Pool Party and light Cajun Craze Blends markers and a ruler to make the lines.  I was pleased with how well it came out.  I used my Stampin' Up! grid paper as a guide for the line spacing so that was helpful in keeping even spacing as well as straight lines.

  The tip of the pencil is a tiny Stitched Triangle in Basic Black and the the 'wood' part is a larger Stitched Triangle in Crumb Cake.  The barrel of the pencil is cut with one of the Stitched Rectangle dies in Bumblebee.  I used my Simply Scored to add some score lines down the barrel to mimic the ridges of a real pencil.  The eraser is just a square of Blushing Bride and I hand trimmed the corners to make them slightly rounded. The metallic band is just a hand trimmed scrap of the retired Galvanized Metal paper.  I think any metallic could be substituted easily though if you wanted to recreate this one.

  Once I had my pencil popped up on dimensionals on the notebook paper I added a quick sentiment from Well Said in Pretty Peacock.  I wanted a 'good luck' sentiment but believe it or not I didn't have anything like that in all my sets, even the retired ones.  The virtual school start will certainly be an adventure so I guess it's fitting!

  Thanks for looking!  Did you stamp today?

Stamps: Well Said

Ink: Pretty Peacock

Blends: Pool Party dark, Cajun Craze light

Paper: Whisper White thick, Whisper White, Plaid Tidings DSP, Basic Black, Crumb Cake, Bumblebee, Blushing Bride, Galvanized Metal (retired)

Accessories: Stitched Triangle dies, Stitched Rectangle dies, dimensionals

Wednesday, August 12, 2020

Welcome to the Neighborhood - Stampin' Up! Arrange a Wreath

  We've got a few new neighbors on our street so I have to hop to it to get some cards made so we can go introduce ourselves before they aren't "new" anymore.  I thought I could make a cute little house card by pairing the Stitched Triangle dies with the stitched square from Stitched Shapes dies.


 The Paper Players challenge this week has a great set of colors and I thought they would be perfect for a little trio of houses. 

  I started with a Whisper White thick card base then a layer of Night of Navy, then a Stitched Rectangle embossed with the Subtle embossing folder.  Before embossing I stamped the "welcome" from Well Said in Night of Navy.

  Once I had the houses cut out and popped on dimensionals I added a few finishing touches.  The Arrange a Wreath bundle had a heart and flower that were just the right size.  The heart is stamped in Melon Mambo and cut out and adhered with a dimensional.  The flower is cut out from Pool Party cardstock and in the center I added an adhesive pearl.  The Pool Party house has a Night of Navy baker's twine bow.

  Thanks for looking!  Did you stamp today?

Stamps: Well Said, Arrange a Wreath

Ink: Melon Mambo, Night of Navy

Paper: Whisper White thick, Whisper White, Pool Party, Night of Navy, Mango Melody

Accessories: Stitched Triangle dies, Stitched Shapes dies, Subtle embossing folder, Wreath Builder dies, dimensionals, adhesive pearl, Night of Navy baker's twine (retired)


Sunday, July 19, 2020

Stitched Triangle Santa - Stampin' Up! Stitched Triangle Dies

  Sometimes inspiration hits and you just have to roll with it even if it's time to clean up the stamp room and start making dinner.  I was stamping yesterday and it was slow going for the first project then things started to pick up for the second project.  Then I scrolled through my list of challenges to see what grabbed my attention for a third project and I came to the 52 Christmas Card Throwdown and their Santa themed challenge.  The only problem was that I have not a single Santa stamp or even any Santa DSP.  Nada. Zip.  Zilch. Well it's not called a challenge for nothing!

  When you need a certain image and you don't have a stamp that matches, punch art/die art is always a great way to create what you need.  I briefly thought about a punch art Santa but then I had the big idea to use my new triangle dies to do a die art Santa instead.  It came out pretty cute if I do say so myself!  I scrolled through Pinterest for a few ideas then got to work.


  Besides the circles for the eyes and nose and the hand cut tree trunks everything is a triangle die from the new Stitched Triangle die set.  It's hard to see but the background is embossed with the retired Winter Knit embossing folder (but it looks like it's currently on the Clearance Rack if you missed out on it the first time around).  And the triangles for the beard/mustache are embossed with the Subtle embossing folder for some extra texture which is hard to see in the photo.


  Make your own triangle Santa using these dies.  Here's how I put each part together.  For size reference triangle #1 is slightly less than 2 inches wide.

  • Trees = triangles #4, #5 & #6
  • Hat Pompom = #3***
  • Hat = #4 with the tip folder over
  • Hat Cuff = #1 trimmed
  • Face = #1
  • Mustache = #2 x 2 (embossed)
  • Beard = #1 (embossed)
  • Shirt = #1 x 2
  • Eyes & Nose = small circle punches
*** For the hat pompom I punched a small circle and covered it with glue and just stuck the little tiny triangles all over it until it was covered.

  All the pieces are popped up on the background with dimensionals except for the small, wide tree in the background.

  This was really a fun card to put together and a fun challenge to solve.  Sometimes it pays to not have every image in stamp form!

  Thanks for looking!  Did you stamp today?

Stamps: None

Ink: None

Paper: Whisper White thick, Whisper White, Soft Suede, Perfectly Plaid DSP (retired), Real Red, Petal Pink, Basic Black

Accessories: Stitched Triangle dies, Subtle embossing folder, Winter Knit embossing folder (retired), dimensionals, circle punches, Stitched Rectangle dies


Monday, June 15, 2020

Whale Thanks - Stampin' Up! Whale Done

  Better late than never in getting a card posted today!  My drivers license has been expired since March  and my appointment was finally this morning to get it renewed so the regular morning routine was all sorts of messed up.  I mean I had to take a shower and do my hair *gasp* all before 10am!  And be out of the house *gasp again*!  It was definitely weird having to get ready to go somewhere beside downstairs!  And I figured since I was already out doing that I might as well stop and do my every 2-2.5 weeks worth of massive grocery shopping.  So it's afternoon computer time instead of morning.

  I'm just making it under the wire also to share this card that I made for the Color Throwndown challenge.
I liked the rich colors of the palette (graphic at the end of the post).

  The Whale of A Time DSP is so cute with great patterns and colors which go perfectly with the challenge colors!


 I started with a Balmy Blue base and then topped it with a piece of the  Whale of A Time DSP in a fun gradient wave look.  Then I cut a scalloped rectangle with the Stitched So Sweetly dies.  I stamped the fish in stamped off Rich Razzleberry and the seaweed in full strength and stamped off Shaded Spruce as well as Granny Apple Green.  After the stamped was finished I ran the panel through the Big Shot using the Old World Paper embossing folder.  Then I popped the panel up on the card front with dimensionals.

  The whale is punched out with the Whale builder punch in Pacific Point, Balmy Blue and Basic Black.  The Balmy Blue belly us colored with Wink of Stella for just a hint of shimmer.  The big guy is then popped on dimensionals.

  The sentiment is stamped in Memento Black and cut with the smallest Stitched So Sweetly rectangles. And it's also popped on dimensionals because clearly I have a problem with flat layers.

  Thanks for looking!  Did you stamp today?

Stamps: Whale Done

Ink: Rich Razzleberry, Memento Black, Shaded Spruce, Granny Apple Green

Paper: Balmy Blue, Whisper White, Pacific Point, Basic Black, Whale of A Time DSP

Accessories: Stitched So Sweetly dies, Whale Builder punch, Old World Paper embossing folder, dimensionals, Wink of Stella,


Wednesday, June 10, 2020

Big Love Whale - Stampin' Up! Whale Done

  When I first placed my annual catalog order I thought for sure that the products I would use first when my order arrived would be the new In Color inks since they weren't available during the preorder.  But yesterday when I sat down to make a card I saw the Stampin' Up! Only Challenge colors and immediately had an idea for a card using the new Whale Done stamp set and Whale Builder punch.  And not a single new In Color to be seen! 


 This card could easily be a sweet new baby card but since I don't need any of those any time soon I stuck with a nice I love you sentiment.

  Let's start from the beginning!  The card base is Whisper White thick with a piece of Petal Pink embossed with the new Old World Paper embossing folder (it's a really great deep texture!). Then I layered a piece of Soft Suede under an old piece of DSP.  I found my scraps of Best Year Ever DSP from 2015 while cleaning up and reorganizing my papers to get ready for my new annual catalog items to arrive.  This paper was a Sale-a-Bration freebie and all of the colors in it are still current amazingly enough.   It's been so freeing to be able to stamp just for me the last few months without having to worry about designing for classes or only using newer products.  I thought this pattern was perfect for a background for a sweet whale and I am pleased with myself for using something that I've had for so long!

  The whale is punched with the Whale builder punch.  I look forward to seeing all the creative punch art that comes from this punch!  The body and fin/flipper? are in Coastal Cabana, the belly detail is Whisper White and the eye is Soft Suede. I added some speckles in Coastal Cabana using the stamp in the Whale Done set.

  The sentiment is colored in the 3 challenge colors with markers and stamped on Whisper White and die cut with the Tasteful Labels dies. I popped the label with dimensionals over a strip of retired Coastal Cabana ribbon.

  I punched 3 Petal Pink hearts using the Dog Builder punch and colored them with Wink of Stella for a light sparkle.  There is a heart stamp in the set but not a neat clean way of cutting it out so I decided to just use the punch.  The hearts and whale are popped with dimensionals.

  Thanks for looking!  Did you stamp today?

Stamps: Whale Done

Ink: Coastal Cabana

Markers: Petal Pink, Coastal Cabana, Soft Suede

Paper: Whisper White thick, Whisper White, Coastal Cabana, Soft Suede, Petal Pink, Best Year Ever DSP (retired)

Accessories: Old World Paper embossing folder, Whale Builder punch, Dog Builder punch, Tasteful Labels dies, dimensionals, Wink of Stella, Coastal Cabana ribbon (retired)


Saturday, March 28, 2020

Bunny Pig? - Stampin' Up! This Little Piggy

  In keeping with our family's idea of trying to keep things as normal as we can we did what we normally do on Saturdays which is sleep in a bit, have a yummy breakfast (waffles today!) and laze about not doing much of anything.  We all took a walk to the nearby park and stretched our legs and waved from a far at others doing the same thing.  Now we're puttering about the house doing this and that.  Aggie and I are sitting on the front porch watching the neighborhood go by. It's not such a bad thing not to have places to go or people to see these days!

  My card to day is a bit of a goofy one as I wanted to participate in the Color Throwdown challenge which is to use purple, pink and white for a card.  I couldn't get the thought of Easter out of my head with those colors so I sat down to see what I could come up with.  I have exactly zero Easter stamps if you take away the generic flowers in my collection.  And the only Easter greeting I had is the tiny one in Itty Bitty Greetings.  What to do? What to do?

  I saw a cute card a few days back somewhere, Facebook? Pinterest? Challenge gallery? and they used the Daisy punch to make bunny ears for some punch art bunnies.  So smart and clever!  But I didn't want to case that exactly so I thought maybe another animal wearing bunny ears would work instead.  This Little Piggy was perfect!


  I stamped the pig in Memento black and colored him/her? in with Stampin' Blends.  It's a simple image to fussy cut so I got that finished then added the ears which were punched from retired White Velvet paper from a few Christmases ago.  The bunny tail is an Assorted Pompom from the current mini catalog.  I adhered with dimensionals the Bunny Pig onto a Highland Heather Stitched circle. Voila! Bunny Pig!

  The rest of the card is very basic with a Highland Heather base, then a Whisper White stitched rectangle and a piece of retired Gingham Gala DSP (my last full piece!).  The sentiment from the long retired And Many More set is stamped in Highland Heather ink and colored in with the Petal Pink marker.  It's perfect for this card don't you think.  Maybe I should have added an oink oink too!  I added a pink ribbon knot that I found in my ribbon scrap bin to finish off the embellishments.

  Always remember punch art if you're stuck for needing an image you don't have a stamp for!  You never know what inspiration it will spark!

  Thanks for looking!  Did you stamp today?

Stamps: This Little Piggy, And Many More (retired)

Ink: Memento Black, Highland Heather

Blends: Petal Pink dark, Flirty Flamingo light, Crumb Cake dark

Paper: Highland Heather, Whisper White, Gingham Gala DSP (retired), White Velvet paper (retired)

Accessories: Stitched Rectangles dies, Stitched Shapes dies, Daisy punch, dimensionals, ribbon (retired)


Friday, September 27, 2019

Football for the Win - Stampin' Up! For the Win

  Happy Friday stampers!  I hope you've had a good week!  I've been MIA this week due to lots of commitments as well as my monthly stamp club.  But I couldn't miss out on a Fab Friday challenge post!  We have a great new sketch to work with this week.


  I took some liberties with the sketch for my Design Team card but I think you'll be able to see that I was definitely inspired by the sketch.  I went with a seasonal card.  By season I mean football season!  My son had his first middle school football game this week so I wanted to mark the occasion with a little card for him.  This is an easy one to alter for specific teams; just change out the banner colors to your team colors and voila-- a personalized card!


  So can you see the sketch?  If not you'll just have to trust me that I was definitely working with the sketch when I sat down to stamp. 

  And try as I might I just cannot get my greens to photograph true to life so you'll have to trust me that the green really is Call Me Clover!  I thought it looked like a nice green football field before the season starts.  It even has a bit of texture thanks to the Subtle embossing folder.

  This was a fun to card to make with creating a football with the Hammered Metal embossing folder and some Whisper White scraps.  I hand cut the shape and sponged the edges with Soft Suede ink for extra detail.  Then I used a few dimensionals to pop the ball up.

  The banners are simply embossed with white embossing powder on Night of Navy cardstock.  Go Team is popped with a dimensional and the game day on is just tucked under the edge of the ball.

  Finally, the stars are stamped with the Stamparatus for perfect alignment.

  Head over to Fab Friday to see the rest of the Design Team and their fabulous projects.

  Thanks for looking!  Did you stamp today?

Stamps: For the Win

Ink: Versamark, Call Me Clover, Soft Suede

Paper: Call Me Clover, Whisper White, Night of Navy, Soft Suede

Accessories: Subtle embossing folder, Hammered Metal embossing folder, white embossing powder, dimensionals

Monday, March 11, 2019

Lucky Day - Stampin' Up! Itty Bitty Greetings

  Happy Monday!  Is every one bleary eyed and tired from the time change? I hope not but if you are maybe some stamping therapy would help?  I didn't get in the stamp room much over the weekend but I have a card to share that I finished up on Thursday.

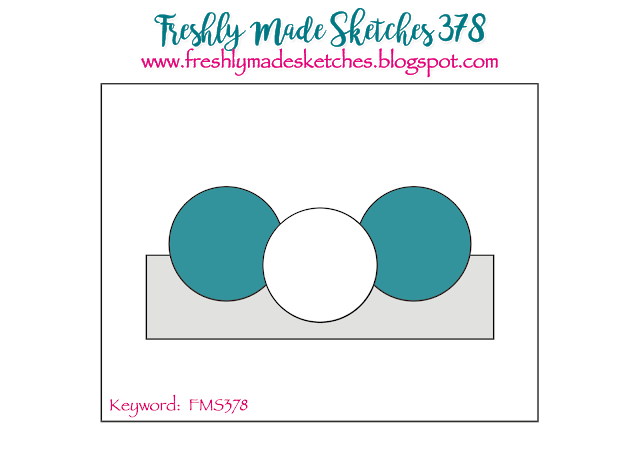
  I used 2 challenges for this one; the sketch is from Freshly Made Sketches and the theme is from The Card Concept. A clean and simple (CAS) style allows for the little clovers to pop.


  The idea of punched hearts to make 4 leaf clovers is not a new idea but I loved the idea of making little tiny ones to put in some vases for a good luck or St. Patrick's day card.

  I used some of the Gingham Gala paper in Lemon Lime Twist since it's such a nice bright color.  The hearts are die cut from the Everyday Jars framelits in Granny Apple Green.

  The stems are from the Varied Vases set and the vases are punched with the Vases Builder punch.

  The sentiment is from Itty Bitty Greetings and is punched with a small circle punch and I added a little bit of gold twine for some of that pot of gold good luck feeling.

  Thanks for looking!  Did you stamp today?

Stamps: Itty Bitty Greetings, Varied Vases

Ink: Memento Black

Paper: Whisper White thick, Whisper White, Basic Black, Granny Apple Green, Gingham Gala DSP

Accessories: Vases Builder punch, Stitched Rectangles framelits, Everyday Jars framelits, dimensionals, circle punch, gold twine


Wednesday, May 3, 2017

Sweet Fox Thank You - Stampin' Up! Foxy Friends

This time of year it's hard as Stampin' Up! demonstrator to decide which products to use for classes as you never want to have a card all designed and supplies prepared and then the day before the class find out that one of the key items has sold out.  It's a balancing act between trying to show off some favorites one last time and showing something that can't be purchased any longer.

  I tried to use mostly things that weren't on the retirement list at my last class and I decided to highlight a few bundles that are retiring but have the separate items carrying over to the new catalog.  So you'll still be able to get the Foxy Friends stamp set and Fox Builder punch in the new catalog but you won't save 10% like you can with the bundle that is available now until the end of May.


  I decided we needed to make a thank you card this time around at class since I had to send one out myself and found my stash of thank yous almost non-existant!  Nothing too crazy on this card but I did show my stampers how to line up the stamps onto one clear block so that you can stamp the fox head, tail, and body and punch all 3 out at once and have them lined up just right!

  All you do is take a piece of scrap cardstock and punch out the pieces with the Fox builder punch. Toss those punched pieces out...really it's ok, you don't need to keep them!  Then place the stamps you want to use in the negative of the punch with the image side down.  Now press your clear block down to pick up the stamps.  Test it out by stamping the images and seeing how they line up in the punch.  You might have to adjust them slightly but it makes stamping and punching multiple images out really fast....this comes in really handy at Christmas time when you might be making multiples and need to be quick!

  The tree stump is stamped in Early Espresso on Soft Suede cardstock and is cut out by hand.  The fox's head is adhered with a dimensional.  Told you it was an easy card!

  Thanks for looking!  Did you stamp today?

Stamps: Foxy Friends, One Big Meaning

Ink: Garden Green, Cajun Craze, Early Espresso, black, Soft Sky

Paper: Soft Sky, Garden Green, Soft Suede, Whisper White

Accessories: Fox Builder punch, dimensional, Garden Green baker's twine (retired)

Wednesday, April 5, 2017

Sweet Little Bunny - Stampin' Up! Punches

   I've been able to join in a few challenges lately and it's been fun to stretch my supplies and imagination.  The Mojo Monday challenge is the layout and the theme for the Paper Players is "Easter Bunny".  Super fun to put these 2 challenges together and see what I could come up with.

  I don't have any bunny stamps so the bunny challenge was a real challenge for sure.  Punch art to the rescue. I searched Pinterest to get a feel for any punch art designs with rabbits and then I got to work!


  I used 3 different punches to create my bunny; Festive Flower, Fox Builder, and Tree Builder.  It was fun to pull different shapes in to make this little sweetie.

  Festive Flower- inner and outer ears, carrot tops and bottoms
  Fox Builder- head, body
  Tree Builder- tail, neck fluff

  The bunny is punched in Crumb Cake and Whisper White.  I used the Melon Mambo watercolor pencil and a blender pen to make the bit of pink in the ear.  I stamped the bunny face with the Foxy Friends stamp set in black.  After I had everything adhered I realized I should have sponged the edges of the bunny...live and learn.  The teeth are just hand cut out of a scrap of Whisper White.

  The carrots are Peekaboo Peach with a little sponging and the Peekaboo Peach marker was used to make little detail lines.  The carrot tops are punched out in Emerald Envy cardstock.

  The punch art is mounted onto a stitched shape circle and is layered over the top of a piece of Flirty Flamingo embossed with the Elegant Dots embossing folder.

  The DSP is a piece of the retired It's My Party DSP.  I added a strip of burlap ribbon to put the sentiment on.  The sentiment is from the retired And Many More set and is punched out with the also retired Word Window punch.  Some retired items I just can't give up!

  The final detail is the sprinkling of Frosted Sequins (also retired).  Even though some of the items I used on this card are retired, all the punches used to make the bunny are current so you can easily recreate this punch art bunny!

  The Easter Bunny has come early to our house!  We've named this little guy Peter and he happily hops around our yard and even has a little hidey hole among some of our plants.  Isn't he cute?


  Thanks for looking!  Did you stamp today?

Stamps: Foxy Friends, And Many More (retired)

Ink: Basic Black, Peekaboo Peach

Paper: Whisper White thick, Whisper White, Crumb Cake, Flirty Flamingo, Peekaboo Peach, Emerald Envy, It's My Party DSP (retired)

Accessories: Festive Flower punch, Fox Builder punch, Tree Builder punch, Stitched Shapes framelits, dimensionals, watercolor pencils, Elegant Dots embossing folder, burlap ribbon, Word Window punch (retired), Frosted Sequins (retired), dimensionals


Friday, September 30, 2016

Hello Mate! - Fab Friday 97 - Stampin' Up! Foxy Friends

  I've made it through this week...not with flying colors mind you, more like spluttering, wheezing and dragging myself to the finish line!  The weather has been horribly glum and rainy and I've had an on and off again sick kiddo so it's been kind an out-of-the-ordinary week where I feel like I haven't gotten very much accomplished.

  But.....it's Friday now and a Fab Friday Challenge week to boot!  Things are looking up...maybe the sun will even show up today for some much needed vitamin D!  We are doing a sketch challenge this time around.  Check it out:


  Just think of the possibilities with those big panels!  DSP, embossing, stamping.... so many ways you can go!

  I decided that my Fox Builder punch and Foxy Friends stamp set needed a bit of love.  I have seen several examples of this cute koala bear while browsing Pinterest so I thought he would be a cute focal point for this card layout.


  All the parts of this sweet little guy are made with the Fox Builder punch except for the nose which I hand cut and the circle part of the ears which were made with the Owl Builder punch (another small circle punch would work great as well).

  The eyes and paws are stamped in black as is the Hello greeting.  The nose is covered in Crystal Effects.  Even though it's retired I still reach for it.  It gives a nice glossy look and a fun detail to this card.

  Behind the koala I stamped and cut out various leaves with the Botanical Blooms stamp set and coordinating Botanical Builder framelits.  Mint Macaron and Emerald Envy are a nice fresh pairing of green don't you think?

  Everything is adhered to a Whisper White circle backed by an Emerald Envy scalloped circle.  Both were cut with the Layering Circles framelits.  The circle is popped on dimensionals.

  The little bit of DSP that you see peeking out in the back is from the retired It's My Party DSP stack.

  I hope this little koala bear made you smile and made you want to join in the fun at the Fab Friday Challenge!  The Design Team always has loads of fun samples to get the creative juices going!

  Thanks for looking!  Did you stamp today?

Stamps: Foxy Friends, Botanical Blooms, Sunshine Sayings

Ink: Black, Emerald Envy, Mint Macaron

Paper: Whisper White, Emerald Envy, Mint Macaron, Smoky Slate, Basic Black, It's My Party DSP (retired)

Accessories: Fox Builder punch, Owl Builder punch, Layering Circles framelits, Botanical Builder framelits, Crystal Effects (retired), dimensionals

Monday, September 19, 2016

Beware of the Creeper - Minecraft Birthday Card

  If you've got kids you're probably familiar with Minecraft and some of the characters in the popular video game.  My kids get a kick out of building all sorts of crazy things in Minecraft so it was a no brainer to create a birthday card for my oldest this past summer to celebrate his 10th birthday.  When they show me what they've been making I have to confess I get a little bit of motion sickness with all the spinning and and movement and I get kind of lost as to what I'm looking at!  I guess my mind just doesn't compute in "blocks" as well as the kids!

  This is by far the easiest card to make....it's all right angles; squares and rectangles!  So easy!


  I started with a Garden Green card base and I made it square of course!  Then a layer of Basic Black.  I took a slightly small square in Garden Green and used my Simply Scored and scored half inch line across and up and down to make this fun grid.

  Next I adhered my squares and rectangles making the Creeper Face that the kids are so familiar with.

  See, I told you it was super easy and this is a great card for using up some of those smaller scraps and strips you've been holding onto!

  Thanks for looking!  Did you stamp today?

Stamps: none

Ink: none 

Paper: Garden Green, Basic Black

Accessories: Simply Scored

Thursday, September 8, 2016

Cuteness Overload Baby Bears - Stampin' Up! Fox Builder punch

Oh my goodness I don't think I've designed a card this cute in a long while!  About a month ago another Stampin' Up! demonstrator shared online a card she made using the Fox Builder punch to make an adorable baby bear.  It was the first time I had seen this adorable design.  If you haven't checked out all the sweet animals you can make with the Fox Builder punch then you are missing out!  Search Pinterest and you will see all the possibilities.  The baby bear that was shared was just too cute not to CASE (Copy And Share Everything) for one of my class projects in August.

My ladies were able to choose to make a boy baby bear or a girl baby bear.  While there are some small pieces to put together  it is not a hard card to make.


 The head, body and nose are punched with the Fox Builder punch in Chocolate Chip cardstock.  The mouth and feet are punched in Crumb Cake with the Owl Builder punch (the circle are just the right size but other circle punches or dies would work too).


  Stamp the bear face and round the ears with scissors and then feet with black ink before punch (it's just easier to line it up that way).  Pop up the mouth and feet with tiny pieces of dimensionals.  The bow is a stamp from the Celebrate Today set and is cut out with the coordinating Balloon Framelits die.

  We added a bit of sparkle to the bear with a small rhinestone and then carried the sparkle to the sentiment.  My stampers had a choice of which one to use from the Sunshine Sayings stamp set and Sunshine Wishes thinlets.  Once they cut out their large word we used the clear Wink of Stella to paint on some more shimmer.


  The tree from Foxy Friends is stamped in Pear Pizzazz on Whisper White to make a nice little back ground for our sweet bears.

  Now if you don't say awwww when seeing these little cuties there is no hope for you my friend.


  Thanks for looking!  Did you stamp today?

Stamps: Foxy Friends, Sunshine Sayings, Celebrate Today

Ink: black, Pear Pizzazz, Pool Party, Flirty Flamingo

Paper: Chocolate Chip, Crumb Cake, Whisper White, Pool Party, Flirty Flamingo

Accessories: Fox Builder punch, Owl Builder punch, Balloon Framelits, Sunshine Sayings thinlets, rhinestones, dimensionals, Wink of Stella


Friday, August 12, 2016

Paper Skunks are Sweet - Stampin' Up! Fox Builder Punch

Paper skunks are sweet but real ones are not!  They are even sweeter when they are attached to some candy.  I made these little tags to stick in my stamping ladies order bags after my last class.  They are all a joy to have at class and I enjoy our monthly get togethers and when I have the time I like to make a little something to say thanks.


  You can see the edge of the York Peppermint Pattie peeking out from the side.  The Foxy Friends and Fox Builder punch are a really fun combo!  There are so many great ideas for different animals using the 2 products together.  I saw this cute skunk all over Pinterest and fell in love with the sweet face and cute flower on her head and had to make her....or 20+ of her!

  The Layering Circles framelits made quick work of the tag base.  I used the arched branch stamp and curved it a bit more to fit the shape of the scalloped circle (love that you can do that with photopolymer stamps) and stamped it twice in Mint Macaron.  The hello is from Thoughtful Banners and is stamped in black.


  The skunk is punched in Basic Black and Whisper White.  The white part of her chest is the end of the tail trimmed off and the tail strip is just a punched tail trimmed down.  The Melon Mambo flower is punched from the Tree Builder punch.  I added a little rhinestone to the flower.  The ribbon is the new Mint Macaron sheer linen ribbon and is tied off with the retired Melon Mambo and black baker's twine.

  Thanks for looking!  Did you stamp today?

Stamps: Foxy Friends, Thoughtful Banners

Ink: Mint Macaron, Black

Paper: Melon Mambo, Whisper White, Basic Black

Accessories: Layering Circle framelits, Fox Builder punch, Owl Builder punch, Mint Macron sheer linen ribbon, rhinestone, dimensionals, Melon Mambo and black baker's twine (retired)


Wednesday, August 3, 2016

Pokemon Crazy Punch Art Birthday

 So I know that this card will seem like it's a bandwagon type of thing and I'm just getting into the game with all the Pokemon Go craziness that out there now.  But I have to say I made this card before Pokemon Go was even a thing!  My youngest son has been into Pokemon for the last 6 months or so.  He's got books, the cards, drawings etc.  His birthday was on July 11 so I thought I would make a Pokemon themed birthday card for him to go along with several Pokemon gifts.

  Lo and behold on the morning of the 11th after I came back from my very early walk before Alex was even awake I heard all this talk on the radio about this new app called Pokemon Go and how it was gaining in popularity each day.  So of course I downloaded it and figured it would be something fun to do in addition to the other birthday celebrations we had planned.  And we've had fun playing it and seeing how our local park is swarmed with people every evening playing.  But this card was made BEFORE all the madness!  :)


  I used the new Layering Circles framelits and a small circle punch to create this pokeball.  It's popped up with dimensionals.  The sentiment is from Party with Cake which I was excited to see carried over from the Occasions catalog.

  Since this card was made BEFORE I knew many of the names of the pokemon I made the only one I knew then... Pikachu!


  The ears are made using the Festive Flower punch.  Head is an oval punch.  Eyes and cheek spots are from the Owl Builder punch.  And the nose if from the new Fox Builder punch.  I hand drew the mouth and that's why it's a little crooked!

  I used another sentiment from Party with Cake and colored in the letters with my Real Red and Crushed Curry markers.

  Not a very hard card to make but it got a big smile from the new 8 year old and even the compliment that Pikachu looked good!  High praise I tell ya!

  Thanks for looking!  Did you stamp today?

Stamps: Party with Cake

Ink: Basic Black  Markers: Real Red, Crushed Curry

Paper: Crushed Curry, Real Red, Basic Black, Whisper White

Accessories: Layering Circles framelits, circle punch, Festive Flower punch, Owl builder punch, Fox builder punch