Saturday, December 30, 2023

Hooray for Birthdays - Stampin' Up! Hooray for Surprises

   Long time no post right??!  I always have the best of intentions to stamp and post at least a few projects around Christmas but it seems that as soon as my out of town family arrives for Christmas week all good intentions are thrown out of the window!  I could have snuck away a few times to the stamp room but then I feel guilty lol!  I do have a card to share that I did make before they arrived but I just forgot to post it! 

  The Global Design Project has had a challenge going for the last 2 weeks and it's just about to end so I guess I'll get it shared before it's too late.  It's a pretty color combo and works well with some of my new stamps and looking ahead to spring!  I'm using Daffodil Delight, Pool Party and Petal Pink.


  I pulled the background DSP from the new Lighter than Air DSP and then created a long narrow panel with the Perennial Postage dies.  I love the postage edge details these dies create.  

  The flower stamp is in the new Hooray for Surprises stamp set and I just stamped it in each of the challenge colors as well as a smaller flower then die cut them with the coordinating Hooray for Surprises dies.  The smaller flowers in the centers are popped on mini dimensionals and accented with retired opaque adhesive-backed gems.

  The sentiment is stamped in Basic Gray and cut out with the Perennial Postage dies.  A bit of Petal Pink ribbon from the Ribbon Duo combo pack is adhered behind the sentiment and then popped on dimensionals.

  Finally a few Sale-a-Bration (SAB) reward Opaque Faceted Gems are added to the long panel to finish this design.

  Current products used to make this card can be purchased in my ONLINE STORE. Items marked with a * will be available starting January 4, 2024.

  Thanks for looking!  Did you stamp today?

Stamps: Hooray for Surprises*

Ink: Daffodil Delight, Pool Party, Petal Pink, Basic Gray

Paper: Lighter Than Air DSP*, Basic White

Accessories: Perennial Postage dies*, Hooray for Surprises dies*, dimensionals, Opaque Faceted Gems (SAB)*, Ribbon Duo combo pack, opaque adhesive-backed gems (retired)


Tuesday, December 19, 2023

Lovely Get Well - Stampin' Up! Lovely & Sweet

   Finding time to stamp the last few days has been tough!  I thought I was in good shape with Christmas stuff a week ago and now all of a sudden I seem to have a mile long to-do list!  But I have so many new products I want to try out that I'm squeezing in a bit of stamping whenever I can!  I used the CASE the designer challenge at Inspire.Create for my card today.   Using the layout made this one come together quickly (except for the coloring!).


    I started with a Pebbled Path base then added a layer of Basic White.  On the Basic White layer I arranged my strips of Nature's Sweetness DSP around the outside edges to make a nice little frame for he star of the show!

 I stamped the image in Pecan Pie then pulled out my colored pencils.  The coloring really didn't take that long at all and before I knew it I had beautiful almond branch.  Next it was die cut it and popped up on dimensionals on the card front.

  For the sentiment I wanted to try out the new Thoughtful Moments Hybrid embossing folder.  This one has 10 different sentiments on it and comes with a large die that cuts out each of the sentiments as well a bunch of smaller dies that are shapes to accent the sentiments like hearts, stars and flowers.  The neat thing about this hybrid design is that you can ink up the embossing folder with the new brayer and get a cool inked outline around the embossed words.  I gave it a go and after a few practice tries with color/paper combos I got one I liked but it was a little stark so I ended up filling in the open space with my Pecan Pie light blends marker.  I know I'll be using this set of products a lot in the coming months!

  The only embellishments that I thought this design needed were a few retired adhesive-backed speckled dots which go well with the green of the leaves.

  All of the current products used to make this card can be purchased in my ONLINE STORE. Products marked with a * will be available starting January 4, 2024.

  Thanks for looking!  Did you stamp today?

Stamps: Lovely & Sweet*

Ink: Pecan Pie

Colored Pencils: Daffodil Delight, Pecan Pie, Old Olive, Early Espresso, Calypso Coral

Blends: Pecan Pie light

Paper: Pebbled Path, Basic White, Nature's Sweetness DSP*

Accessories: Thoughtful Moments Hybrid embossing folder/dies*, dimensionals, adhesive-backed speckled dots (retired)


Friday, December 15, 2023

CAS Sweet Bee - Stampin' Up! Bee My Valentine

   The card that I'm sharing today is made for the CAS on Sunday?/Friday? challenge (I'm confused as to which day they are since it shows up differently on their blog web address vs. the blog title page) in which they want us to use black and white and one additional color.  There are so many possibilities with these parameters!  I looked through my new(er) stamp sets and decided that the Bee My Valentine stamp set would be perfect for a clean and simple mostly black and white card!


  This was an impossible card to get a decent photo of!  I tried over the past 2 days taking probably 50 photos the way I usually do and everything looked washed out and very blue-ish no matter what I changed.  Anyway I finally took the card outside and and tried it with lots of direct sunlight!  Believe me when I tell you that this was better than the others but still just 'eh'! Anyway....just use your imagination that the card is much cuter in person!

  I started with a Basic White thick base, then a layer of Basic Black and a layer of Basic White.  I stamped the little dashed flight path around the the card a bit.  Then stamped the sentiment and punched it out and popped it up with dimensionals.

  The bee is stamped in Lemon Lolly and Memento black and I'm thinking now that Daffodil Delight would have been a better choice as it would have shown up more bold in the photo. But I like the softness of the Lemon Lolly. I punched the bee out, added the face, punched vellum wings and stamped and punched antennae. Once the bee was put together I popped it up with dimensionals above the sentiment and added a little adhesive-backed hearts & flower embellishment.

  All of the current products used to make this card can be purchased in my ONLINE STORE.  Items marked with a * will be available for purchase starting January 4, 2024.

  Thanks for looking!  Did you stamp today?

Stamps: Bee My Valentine

Ink: Memento Black, Lemon Lolly

Paper: Basic White thick, Basic White, Basic Black, vellum

Accessories: Bee builder punch*, dimensionals, circle punch, adhesive-backed hearts & flower*

Thursday, December 14, 2023

Happy Plants - Stampin' Up! Planted Paradise

  Stamping time was short yesterday as I had to make some Christmas cookies that are needed for this weekend so I ended up combining 2 of my favorite challenges to get the ball rolling so all I had to do was choose the stamp set and papers.  The colors are from Color Throwdown and the layout is from Freshly Made Sketches.  Having a few of the thousands of creative possibilities narrowed down really helped me make this card quickly.  And I was able to use so many new products!  


  The Planted Paradise stamp set will be in the upcoming Stampin' Up! January-April mini catalog.  I don't know if it's one I would have chosen myself before seeing any samples but it was a giveaway from Stampin' Up! after participating in a demonstrator event called OnStage about a month ago and I definitely don't say no to free stamps!!  This stamp set is a Reversibles which means that there is an image on one side and then if you flip the stamp over it has solid shape stamp on the opposite which can be used to fill in the first image or used on its own for more versatility.  I only used the image sides on this card but am looking forward to playing around with the possibilities.

  Starting with the Basic White thick card base I added a panel of Basic White that is embossed with the upcoming Sale-a-bration (SAB) reward Softly Sophisticated embossing folder. To follow the sketch I next added a piece of Nature's Sweetness DSP in a gold foil leafy pattern. Look for this paper pack to be very popular once it can be ordered.

  On a square of Basic White I created my little layout.  The large planter is stamped in Gorgeous Grape and fussy cut.  Then I stamped 3 large leaves in Garden Green then filled in the veining with Granny Apple Green light Blends marker.  I fussy cut the leaves then adhered them together with the planter onto the the square.  Using my Take Your Pick tool with the large stylus I picked up gold gold ink from a non-SU ink pad and highlighted the centers of the flower design on the pot to bring a bit of the challenge color to the plant elements.

  Next I stamped the square pot in Blueberry Bushel and fussy cut it and popped it with dimensionals.  The smaller plant is stamped in Granny Apple Green ink and then filled in with Lemon Lime Twist light Blends marker.  I fussy cut the plant and popped it up just tucked behind the pot.

  The Planted Paradise stamp set doesn't come with any sentiments so I looked through all of my new stamp sets to see which set has a sentiment that would fit the space. I found this one in the Notes of Nature stamp set and stamped it in Memento black.  The whole panel is then popped on dimensionals over the gold DSP.

  Lastly I added 2 Brushed Brass Butterflies to the plants for the final touch.

  All of the current supplies used to make this card can be purchased in my ONLINE STORE.  Items below marked with a * will be available starting January 4, 2024 either to purchase or to earn free with purchased during Sale-a-Bration.  If you can't wait to order these products JOIN MY TEAM and choose them in your Starter Kit today!

  Thanks for looking!  Did you stamp today?

Stamps: Planted Paradise*, Notes of Nature*

Ink: Gorgeous Grape, Blueberry Bushel, Garden Green, Granny Apple Green, Memento Black, gold

Blends: Granny Apple Green light, Lemon Lime Twist light

Paper: Basic White thick, Basic White, Nature's Sweetness DSP*

Accessories: dimensionals, Brushed Brass Butterflies, Softly Sophisticated embossing folder*(SAB)


Wednesday, December 13, 2023

Sophisticated & Airy Hello - Stampin' Up! Softly Sophisticated

 I have a huge pile of new products to begin making samples with and it's hard to know where to start!  Since Sale-a-bration is only 2 months long (Jan. 4-Feb. 29) I think I better focus on getting to know all of these great freebies that you can choose from so you can see all of the possibilities!

  I'm using the Global Design Project challenge of CASE the designer and I chose to use the layout as my inspiration.


   I packed 4 Sale-a-bration rewards onto this pretty card!  The Flight & Airy DSP is so pretty and makes for a beautiful background for this soft floral card.  The colors are gorgeous and if you love birds as much as I do then this DSP should be on your wish list!

  The Basic White panel is embossed with the Softly Sophisticated embossing folder which is paired with the Softly Sophisticated stamp set for a $100 level SAB reward.  I embossed the sentiment in white on a strip of Boho Blue and edged the bottom with a piece of Boho Blue Textured Ribbon.

  The stamped image is a two step stamp with the stem and leaves stamped in Garden Green ink stamped off once for a lighter look.  Then the flowers are stamped off once with Calypso Coral.  I fussy cut the image and then popped it up across the Boho Blue strip with mini dimensionals.

  Finally the last Sale-a-Bration item used on this card are the 2 Opaque Faceted Gems in Calypso Coral to the side of the sentiment.

  I'll be sharing as many projects with new products as I can over the coming busy weeks!

  Current products used to make this card can be purchased in my ONLINE STORE.  Items below marked with a * will be available to earn starting January 4, 2024.

  Thanks for looking!  Did you stamp today?

Stamps: Softly Sophisticated*

Ink: Versamark, Calypso Coral, Garden Green

Paper: Flight & Airy DSP*, Boho Blue, Basic White

Accessories: Softly Sophisticated embossing folder*, white embossing powder, dimensionals, Boho Blue textured ribbon, Opaque Faceted Gems*


Tuesday, December 12, 2023

Valentine Stamps - Stampin' Up! Bee My Valentine

   I needed a break from Christmas so I looked ahead at the next big card heavy holiday which is Valentine's Day!  I'm using the bright color combo over at the Paper Players.  They want us to use Real Red, Melon Mambo, Tahitian Tide, black and white.  These colors seemed perfectly suited to some hearts!  I tried to copy the challenge graphic for quite some time but I couldn't get it to work so I'll come back and add it later if I can.  


  I started with a Basic White thick card base, then because I can't quite get away from all Christmas stamping, I used a piece of Merry Bold & Bright DSP along the left side.  I've said before that this pack of DSP can easily be used all year round with the lovely stripes and polka dots patterns and this card proves my point.  I wrapped a bit of Tahitian Tide bakers twine around the DSP and tied it in a loose bow.

  Next I stamped the heart from the upcoming Bee My Valentine stamp set in Tahitian Tide, Real Red and Melon Mambo and then die cut them slightly off set for a more whimsical take with another new product that will be available on January 4, 2024; the Perennial Postage dies.  I love this die set; the postage stamp style edges in various sizes will be so useful for all of my stamping in 2024!  Each heart is backed with a slightly larger piece of Basic Black.

 The postage stamp hearts are popped on dimensionals across the card front.  The sentiment is another new set available in January called Perennial Postage and you can get it as a bundle with with the dies of the same name.

  And finally I added a few Iridescent adhesive-backed discs around the sentiment to bring just a bit of shine to the card.

  All of the current supplies used to make this card can be purchased in my ONLINE STOREItems below marked with a '*' will be available January 4, 2024 in the Stampin' Up! January- April mini catalog.

  Thanks for looking!  Did you stamp today?

Stamps: Bee My Valentine*, Perennial Postage*

Ink: Memento black, Tahitian Tide, Real Red, Melon Mambo

Paper: Basic White thick, Basic White, Basic Black, Merry Bold & Bright DSP

Accessories: Perennial Postage dies*, dimensionals, 2022-2024 In Color baker's twine, Iridescent adhesive-backed discs


Monday, December 11, 2023

Brightest Gold Christmas - Stampin' Up! Brightest Glow

   I'm squeezing in a few more Christmas cards and using paper that I had left over from classes this fall/early winter.  I try to hoard much of my DSP and specialty papers to use in my classes (I never want to be caught short when I have a great creative idea for a class card) so after classes wrap for the year I find that I always have papers that I wish I had used more in my own stamping.  I made multiples of this design and enjoyed using a large piece of the Shining Brightly Specialty Designer Series Paper on the card front!

  Many of my favorite stamping challenges are hosting a final challenge for the year with the theme Christmas or a choice board with holiday/festive elements.  I'll be sharing this card at Inspire. Create, Stampin Up! Only Challenge and Tic Tac Toe Challenge (I used the right side down column; red or green, patterned paper and die cut).  Thanks to all of those design teams for sharing so much creative inspiration all year!!!


  I started with a Very Vanilla thick card base and then there's that full panel of Shining Brightly Specialty DSP in the vanilla and gold leaf/berry pattern.  Next I used a square of red plaid Joy of Christmas DSP and topped that with a Distressed Gold Specialty paper square with a star cut out from the center.  The die I used can be found in the Stars at Night die set.  I love how it creates an opening showing off a bit the pattern behind.

  The sentiment from the Brightest Glow stamp set is stamped in Cherry Cobbler ink on a strip of Very Vanilla.  I flagged the ends and then popped it up with dimensionals over a retired gold metallic edged ribbon twist.

  A small berry sprig in Cherry Cobbler is added to the side of the sentiment banner.  The sweet sprig die is in the Wishes All Around die set.

  All of the current supplies used to make this card can be purchased in my ONLINE STORE.

  Thanks for looking! Did you stamp today?

Stamps: Brightest Glow

Ink: Cherry Cobbler

Paper: Very Vanilla thick, Very Vanilla, Shining Brightly Specialty DSP, Joy of Christmas DSP, Distressed Gold Specialty paper, Cherry Cobbler

Accessories: Stars at Night dies, Wishes All Around dies, dimensionals, gold metallic edged ribbon (retired)


Saturday, December 9, 2023

New Year Starry Sky - Stampin' Up! More Wishes

   At a certain point in the Christmas season I am just done with making Christmas cards but then I find myself needing to send out "just a few more".  So instead of dragging the Christmas card making on endlessly I give myself permission to do New Years cards instead.  And that also lets me off the hook a bit during the very busy few weeks leading up to Christmas.  I can make them when I have a few minutes but don't have to rush to get them in the mail!  It's a win win!

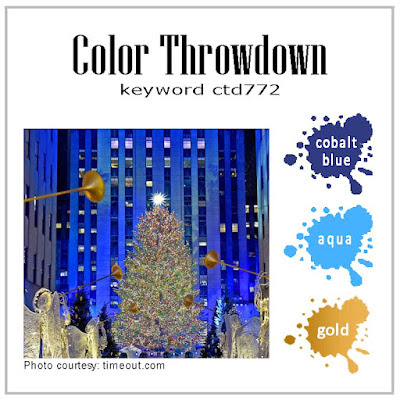
  The color combo over at Color Throwdown caught my eye and I thought it would make for a fun New Years card. Cobalt Blue, Aqua and gold which I translated into Stampin' Up! colors of Starry Sky and Coastal Cabana. 


  My card base is Coastal Cabana, then I took a piece of Starry Sky card stock and blended Starry Sky ink all around the edges giving it a darker look while leaving the middle un-inked.  I then stamped and embossed the sentiment from More Wishes and Biggest Wish (these 2 stamp sets work together to make a great mix-and-match set of sentiments) in the center.

  Using the starburst die from the Stars at Night die set I cut bursts in Coastal Cabana and the retired Gold Fine Shimmer paper (please bring this one back Stampin' Up!!) and adhered them around the the sentiment. Using the very smallest star dies in the Stars at Night die set I cut more itty bitty stars and adhered them, filling in the open spaces.

  And that's all there is to this star inspired New Years card.

  All of the current products used to make this card can be purchased in my ONLINE STORE.

  Thanks for looking!  Did you stamp today?

Stamps: More Wishes, Biggest Wish

Ink: Versamark, Starry Sky

Paper: Coastal Cabana, Starry Sky, Gold Fine Shimmer (retired)

Accessories: gold embossing powder, Stars at Night dies, blending brush


Thursday, December 7, 2023

Itty Bitty Christmas Trees - Stampin' Up! Wishes All Around

   When time gets tight this time of year it's always nice to have a Clean and Simple (CAS) challenge prompt to work with.  Knowing that the design can't be complicated with many layers or busy with endless embellishments really simplifies the creative process and that's what happened when I saw the CAS Colours and Sketches challenge this week.  They are having us choose one of their past challenges from 2023 and make it seasonal.  

  It took me just a second to find the sketch I wanted to use and only a few minutes to actually make the card that's how simple this one is.  


  I chose the Jan. 17, 2023 challenge #502 to use.  I love designs that use 3 of something and these little circles gave a nice opportunity to highlight a smaller image like the little tree from the Wishes All Around stamp set.  


  I cut the circles with the Stylish Shapes dies and some Joy of Christmas DSP in a red plaid pattern.

  I think the part that took the longest was lining up the sentiment so I wouldn't stamp it crooked and ruin the whole card!  This sentiment is in the Festive & Fun stamp set and was the perfect size.

  A few score lines above and below the trees gives a little detail without adding weight or fussiness.  The only embellishment is a very understated gold sequin.

  After finishing this card I began to think that I had already used this sketch so I looked back and I did participate in this same challenge back in January and I made this card.

  All of the supplies used to make this card can be purchased in my ONLINE STORE.

  Thanks for looking!  Did you stamp today?

Stamps: Wishes All Around, Festive & Fun

Ink: Shaded Spruce

Paper: Basic White thick, Basic White, Joy of Christmas DSP

Accessories: Wishes All Around dies, Stylish Shapes dies, dimensionals, gold sequins


Wednesday, December 6, 2023

Festive Tree Trimming - Stampin' Up! Festive & Fun

   I didn't make it in time for last week's Paper Players challenge but I'm ready to join in on this week's challenge!  You can't get any easier than the "Christmas" theme right now!  My design inspiration came from a card I saw by Elizabeth Price who is one of the fabulous Stampin' Up! Artisan Designers.  I loved the clean layout with all the small details like the embossing, torn vellum and pop of pattern along the fold.

  I busted out my neglected colored pencils and had some fun with the adorable giraffe from the Festive & Fun stamp set.


  Just like Elizabeth's card, I embossed my large panel with the Snowflake Sky embossing folder.  The smaller pattern doesn't distract from the image but still gives a nice texture in the background. I tore a strip of vellum and add it along with a piece of the Merry Bold & Bright DSP on the edge.  Many of the fun patterns in this pack can be used all year round whenever you need some fun bright colors!  I love the rainbow stripes especially.

  I stamped the image in Memento black and colored it in with colors that are shown in the DSP.  If I didn't have an exact match in a pencil I got as close as I could.  I cut it out with the retired Stitched Ovals dies and then popped it on dimensionals.

  The sentiment from the same set is stamped in Blueberry Bushel and cut apart.  Mini dimensionals are used to pop it.  I have tons of baker's twine but not many in colors that are used on this card so I ended up with some in Starry Sky which is pretty close to the Blueberry Bushel.  A tiny bit of shine is added as the final touch with some Iridescent adhesive-backed discs.

  All of the current products used to make this card can be purchased in my ONLINE STORE.

  Thanks for looking!  Did you stamp today?

Stamps: Festive & Fun

Ink: Memento Black, Blueberry Bushel

Paper: Pool Party, Basic White, vellum, Merry Bold & Bright DSP

Accessories: Snowflake Sky embossing folder, dimensionals, Iridescent adhesive-backed discs, 2022-2024 In Color Baker's twine, colored pencils, Stitched Oval dies (retired)


Tuesday, December 5, 2023

Cool Bulbs - Stampin' Up! Merry & Bright

   The Paper Players team had a fun layout last week and I started a card but didn't finish it in time to play before the challenge ended.  I loved the diagonal element and the card came out almost exactly as I had envisioned which is rare lol!


  I titled this one "Cool Bulbs" because of the cool colors I used.  Blues and greens plus a bit of gold makes for a cool Christmas card!

  I used Pool Party for the base then the diagonal layer is a piece of Merry Bold & Bright DSP.  The frame is cut out of Basic White cardstock with 2 of the Deckled Rectangle dies.

  The gold embossed Christmas element I had already from my orphaned card parts bin so I added that with dimensionals then embossed the "merry" in white onto Blueberry Bushel cardstock and then fussy cut it.

  The bulbs were stamped in Lemon Lime Twist, Blueberry Bushel and Pool Party and then die cut.  The bases are Distressed Gold specialty paper.  I popped the bulbs up on dimensionals around the frame.  I had some retired gold thread so I added bows to each bulb.  Some Adhesive backed glitter sequins are scattered across the card front as a finishing touch.

  All of the current products used to make this card can be purchased in my ONLINE STORE.

  Thanks for looking!  Did you stamp today?

Stamps: Merry & Bright

Ink: Lemon Lime Twist, Blueberry Bushel, Pool Party, Versamark

Paper: Pool Party, Basic White, Merry Bold & Bright DSP, Distressed Gold Specialty paper, Blueberry Bushel

Accessories: Merry & Bright dies, Deckled Rectangle dies, dimensionals, gold embossing powder, white embossing powder, gold thread (retired), Adhesive backed glitter sequins

Monday, December 4, 2023

Simple Peace - Stampin' Up! Alphabet a la Mode Dies

   I'm taking all the inspiration I can find to make the last few Christmas cards that I need.  I've combined 2 challenges to make the design process even faster.  The layout is from the Hand Stamped Sentiments challenge and the theme comes from Global Design Project where they want us to use "Letters".


  I thought the larger circle in the sketch would be a great place to highlight the "letters" from the theme.  A red, green and gold color scheme keep everything classic.

  I started with a Shaded Spruce base then added a layer of Joy of Christmas DSP in a red pattern.  The Stylish Shapes circle die was used to cut the green plaid pattern also from the Joy of Christmas DSP.

  The Alphabet a la Mode dies, Distressed Gold Specialty paper and foam sheets were used to spell out 'peace'.   And to balance out the heavier element on the bottom I cut a few gold snowflakes with the Wishes All Around dies and added some green sequins to the center for the upper part of the card.

 All of the products used to make this card can be purchased in my ONLINE STORE.

  Thanks for looking!  Did you stamp today?

Stamps: none

Ink: none

Paper: Shaded Spruce, Joy of Christmas DSP, Distressed Gold Specialty paper

Accessories: Alphabet a la Mode dies, Stylish Shapes dies, foam sheets, Wishes All Around dies, sequins


Sunday, December 3, 2023

Sweet Honey Bee - Stampin' Up! Bee My Valentine

   Today's card is a little sneak peek of an upcoming bundle that will be released on January 4 in the Stampin' Up! January - April 2024 mini catalog.  The Bee My Valentine bundle and the whole Bee Mine Suite is adorable and I can't wait to make stacks of Valentine's Day cards with it.  Demonstrators got the bundle extra early for a demo training event and this card is one that we made in the training.


  The Bee Mine DSP has a lot of really cute small patterns that are perfect for cards.  I used 2 of them on this card and they are great back drops to the fun black and white bee. The Bee Builder punch makes the bee body shape which could also be a word bubble, the wings (which can be a heart) and then the antennae (which is a smaller heart).

  On the Daffodil Delight background panel I stamped the honeycomb stamp in the same color ink and then stamped the sentiment straight across in Memento Black.  

  I added a Sweet Sorbet bordered ribbon knot as the embellishment as the final touch.

  All of the current products used to make this card can be purchased in my ONLINE STORE. Items marked with a * will be available starting January 4, 2024.

  Thanks for looking!  Did you stamp today?

Stamps: Bee My Valentine*

Ink: Daffodil Delight, Memento Black

Paper: Daffodil Delight, Basic White, Bee Mine DSP*

Accessories: Bee Builder punch*, dimensionals, Sweet Sorbet bordered ribbon*


Saturday, December 2, 2023

Oh What Fun Christmas - Stampin' Up! Merry & Bright

   I've been busy doing some Christmas decorating so I'm just getting around to posting today's card.  It's definitely not too late to make some cards to mail out for Christmas!  I know I still have to make some so I have enough for everyone on my list.  This design is a fun one that has a great layout to show off a few different Designer Series Paper patterns as well as the Merry & Bright bundle.


  I've loved using the fun Merry Bold & Bright DSP this season.  The colorful patterns are perfect for some playful Christmas cards but many are also not really "Christmas" so could be used for other occasions as well.  I definitely chose to highlight some of the Christmas designs on this card though.  I don't think you can beat a red and green design this time of year!
  
  This one starts with a Granny Apple Green base then then the Merry Bold & Bright DSP panels are layered with a piece of Shaded Spruce Textured Shimmer paper for some pop.  
 
  A Basic White Tailor Made Tag has the sentiment stamped in Memento black on it as well as the wire stamped in Shaded Spruce.  The tag has a Real Red ribbon tied through the end and is popped on dimensionals.
 
  The light bulbs are stamped in Lemon Lime Twist and Poppy Parade, the bases are die cut from Shaded Spruce and the fab More Dazzle Specialty paper makes for perfect filament die cuts.  Quick tip for these smaller more intricate dies is to use the Adhesive Sheets to turn the die cuts into stickers so you don't have to mess with glue.  

  The last piece to this card are a few green Adhesive-backed glitter sequins added to the card front.

  All of the products used to make this card can be purchased in my ONLINE STORE.

  Thanks for looking! Did you stamp today?

Stamps: Merry & Bright

Ink: Memento Black, Lemon Lime Twist, Poppy Parade, Shaded Spruce

Paper: Granny Apple Green, Merry Bold & Bright DSP, Basic White, Shaded Spruce Textured Shimmer paper, Shaded Spruce, More Dazzle Specialty paper

Accessories: Merry & Bright dies, Tailor Made Tags dies, dimensionals, Real Red ribbon, Adhesive-backed glitter sequins

Friday, December 1, 2023

Bubble Bath Bulbs - Stampin' Up! Merry & Bright

   I'm super excited to be joining the Color Hues Challenge as a guest designer for their new challenge!  It will run for a whole month so there's no excuse to not play along!  And the colors are so awesome you won't want to miss out!  I can wait to see what you create!

  And now for the colors:


  Now if you are still working on your Christmas cards like I am I don't think you can go wrong with a Pink & Silver design for this time of year!  I went with a fun strand of pink Christmas lights but the possibilities are endless!


  I was inspired by one of my stampers who is doing a "stash busters" craft hop in 2024 to pull a few items from my stash to use to create this card.  The silver polka dot vellum, silver glimmer paper and Stitched Rectangle dies used to make the frame are all retired products but I've been holding onto to all of it so I might as well use it right??

  The Merry & Bright stamp set and dies have been really fun to use this holiday season and I think the fat bulbs are just too cute in Bubble Bath ink with silver glimmer paper heart shaped filaments in this design.  

  The sentiment from the Brightest Glow stamp set is stamped in Versamark and embossed in silver right on one of the bulbs.  Silver foil paper was used for the wire and the bulb bases.  

  I used my Bubble Bath light Stampin' Blends marker to color a bit of white baker's twine for the sweet bow and then a few iridescent adhesive-backed discs add just a bit more shine to the design.

  All of the current products used to make this card can be purchased in my ONLINE STORE.

  Thanks for looking!  Did you stamp today?

Stamps: Merry & Bright, Brightest Glow

Ink: Bubble Bath, Versamark

Blends: Bubble Bath light

Paper: Basic White thick, Basic White, Silver foil, Silver Glimmer (retired), Silver printed vellum (retired)

Accessories: Merry & Bright dies, dimensionals, Bakers twine, dimensionals, silver embossing powder, iridescent adhesive-backed discs, Stitched Rectangle dies (retired)


Thursday, November 30, 2023

Elegant Ornaments - Stampin' Up! All About Autumn DSP

  I designed today's card to show off the beautiful foil patterns on the All About Autumn DSP.  I was hoping that this paper would be available for a lot longer than it was but it's definiely too pretty not to use.  But for those of you lucky enough to have been able to order it you can CASE this one straight up and if you don't have this exact same paper it's a simple enough design that you can swap in whatever your favorite holiday DSP is.  I made these three cards with the Merry Bold & Bright DSP a few weeks ago.  The choice of paper changes the whole vibe!


  My stampers made this elegant design at my last class and some were planning to go home and make a few more Christmas cards with this design because it's so easy!

  We started with a Pretty Peacock base, then another piece of Pretty Peacock card stock is embossed with the Distressed Tile embossing folder for a gorgeous textured background.

  The 3 ornaments are die cut with 3 of the Stylish Shapes circle dies but any circle dies or punches would work too.  

  The "hangers" are the bulb base dies from the Merry & Bright die set.  We used the Oxidized Copper specialty paper to tie in with the copper patterns on the DSP.

  The 'merry' from the More Wishes stamp set is stamped in Pretty Peacock ink and then fussy cut and popped up on dimensionals.

 And finally the copper ribbon knots adhered with glue dots are the final details.  

  All of the current products used to make this card can be purchased in my ONLINE STORE.

  Thanks for looking!  Did you stamp today?

Stamps: More Wishes

Ink: Pretty Peacock

Paper: Pretty Peacock, Very Vanilla, All About Autumn DSP, Oxidized Copper specialty paper

Accessories: Distressed Tile embossing folder, Stylish Shapes dies, Merry & Bright dies, copper ribbon, dimensionals

Wednesday, November 29, 2023

Gold Star Christmas - Stampin' Up! Stars at Night

     I held my last class of the year yesterday and of course did Christmas cards so all of my stampers could get a bit more inspiration for products in the Sept.-Dec. mini catalog which will be ending in just about a month.  The first project we did used the Stars at Night bundle.


 A little bit of heat embossing, dry embossing and great gold shimmer make this classic blue and gold Christmas card.

  The base is Night of Navy, then a piece of Balmy Blue embossed with the Stars at Night hybrid embossing folder and stamped with little Balmy Blue stars.  Next are 2 pieces of the gorgeous Shining Brightly Specialty paper; one in a Very Vanilla/gold pattern and the other in a Night of Navy/gold pattern.

  The large star is stamped in Versamark onto Very Vanilla cardstock and then heat embossed in gold.  Once it was cut out a length of Night of Navy glittered ribbon is adhered to the back (I used glue dots) and then popped on the card front with dimensionals.

  The sentiment is stamped on a narrow piece of Very Vanilla and then popped with mini dimensionals across the front.

  You can't go wrong with stars or blue and gold for classic Christmas cards!

  All of the products used to make this card can be purchased in my ONLINE STORE.

  Thanks for looking!  Did you stamp today?

Stamps: Stars at Night

Ink: Versamark, Night of Navy, Balmy Blue

Paper: Night of Navy, Balmy Blue, Very Vanilla, Shining Brightly Specialty DSP

Accessories: Stars at Night Hybrid embossing folder/dies, Night of Navy glittered ribbon, dimensionals

Monday, November 27, 2023

Gold & Red Wreath - Stampin' Up! Brightest Glow

   I'm back today with another wreath card.  This time in gold and red to play along with the Color Hues challenge.


  I just love layering the Wishes All Around sprig wreath.  Using 2 layers gives it a little more weight and using 2 different papers gives it more interest as well.  For this one I used Cherry Cobbler and Distressed gold paper.  I used a bit of Distressed Gold paper on the edges of the Basic White panel as well.

  The background is a piece of the Joy of Christmas DSP to carrying in some more red to the card.  Finally I embossed the joy from Brightest Glow stamps set on Real Red cardstock and cut it with a Stylish Shapes die.

  Gold cord and a few gold sequins finish the details.

  All of the current products used to make this card can be purchased in my ONLINE STORE.

  Thanks for looking!  Did you stamp today?

Stamps: Brightest Glow

Ink: Versamark

Paper: Joy of Christmas DSP, Basic White, Cherry Cobbler, Real Red, Distressed Gold specialty paper

Accessories: Wishes All Around dies, dimensionals, gold embossing powder, gold cord, gold sequins


Sunday, November 26, 2023

Merry Wreath - Stampin' Up! Wishes All Around

   Hopefully you're not tired of seeing wreath cards!  The Wishes All Around dies are really great to work with and I need to keep cranking out cards so I'll be using the dies until I've reached my Christmas card goal.   I used the Freshly Made Sketches challenge for the layout but I think I kind of ran off the rails a bit with keeping it 'fresh'.


  I've finished all of my card designs for my last class of the year so now I don't have to hoard my DSP anymore so I used a full card front piece of the Shining Brightly DSP for the background.  Next I added a strip of Joy of Christmas DSP in a red plaid.  To continue to follow the sketch I added a panel of Very Vanilla down the center and popped it on dimensionals.

  I stamped the tree wreath in Shaded Spruce and cut it out and popped it up.  I stamped the sentiment in Cherry Cobbler in the center of the wreath.  And then another strip of plaid DSP to follow the sketch.  After looking at the card a bit the bottom panel under the plaid paper was just too sparse so I added a piece of Distressed Gold specialty paper to fill it in.

  Finally some gold sequins in the corners and a Shaded Spruce and gold fork bow finish off the details.

  All of the current products used to make this can be purchased in my ONLINE STORE.

  Thanks for looking!  Did you stamp today?

Stamps: Wishes All Around

Ink: Shaded Spruce, Cherry Cobbler

Paper: Shining Brightly Specialty paper, Very Vanilla, Joy of Christmas DSP, Distressed Gold Specialty paper

Accessories: Wishes All Around dies, dimensionals, gold sequins,  Shaded Spruce/gold ribbon (retired)


Friday, November 24, 2023

Festive Sleigh Ride - Stampin' Up! Festive & Fun

   Just popping in quickly to share a card before it gets too late and I fall asleep!  I made this one the other day for a now closed challenge but the sun finally cooperated today so I could get a halfway decent photo!


  The closed challenge at Just Add Ink was to use Pool Party, Calypso Coral and Petal Pink.  I did add some Smoky Slate as a neutral since I couldn't make the other colors work with a rhino lol!
 
  I started with a Pool Party card base and then topped it with a piece of last year's Snowflake Specialty vellum.  Next I cut 2 circles from the Garden Walk DSP.  I stamped the Festive & Fun image in Basic Gray then used Blends markers to color it in.  Using just the 3 challenge colors plus Smoky Slate was a real challenge but I think it turned out ok.  I popped that panel on dimensionals.

  The sentiment is stamped in Pool Party and die cut with another circle.  A Calypso Coral braided linen trim bow highlights the sentiment while a few snowflake sequins topped with rhinestones are added to the opposite corner for balance.

  All of the current products used to make this card can be purchased in my ONLINE STORE.

  Thanks for looking!  Did you stamp today?

Stamps: Festive & Fun

Ink: Basic Gray, Pool Party

Blends: Pool Party light & dark, Calypso Coral light & dark, Petal Pink light & dark, Smoky Slate light

Paper: Pool Party, Basic White, Garden Walk DSP, Snowflake Vellum Specialty paper (retired)

Accessories: Stylish Shapes dies, dimensionals, Calypso Coral braided linen trim, rhinestones, snowflake sequins (retired)

Thursday, November 23, 2023

Christmas Cheer - Stampin' Up! Wishes All Around Dies

 I hope everyone has had a wonderful Thanksgiving with loved ones today.  We had a quiet day ourselves but will see family on Saturday to celebrate all over again.  I'm going to keep this one short and sweet and get back to my post-eating lounging!


  My card today is another one that I used a lot of orphaned card parts that I had.  And surprisingly it didn't turn out half bad!  It all starts with a piece of Garden Walk DSP in a simple Pretty Peacock pattern.  The tag, snowflake wreath (leftover from designing this card for a class earlier this fall, how to instructions on that post) and the gold tree (leftover from last year's cards!) were all from the parts bin.

  I added a bit of white iridescent ribbon to the tag and tied it with a piece of scrap twine.  The sentiment from the retired Itty Bitty Christmas stamp set is embossed in gold onto Fresh Freesia cardstock.  A few Fresh Freesia tinsel gems are added for embellishments.  
 
  It's amazing how fast a card can come together when all the main parts are already made and ready to go!

  All of the current products used to make this card can be purchased in my ONLINE STORE.

  Thanks for looking!  Did you stamp today?

Stamps: Itty Bitty Christmas (retired)

Ink: Versamark, Pretty Peacock, Berry Burst, Coastal Cabana, Highland Heather

Paper: Garden Walk DSP, Basic White, Fresh Freesia, Shimmery White, Gold Glitter

Accessories: Tailor Made Tags dies, Wishes All Around dies,  dimensionals, gold embossing powder, Tinsel Gems, Iridescent ribbon, twine, Spruced Up Outlines dies (retired)

Wednesday, November 22, 2023

Holiday Lights - Stampin' Up! Merry & Bright

   When I first saw the colors at Inspire Create Challenge I was stumped how to use them on a Christmas card since that's the only type of card I'm focused on at the moment but after a bit of thought and a great sketch to follow from CAS Colours & Sketches I'm really happy with how this one turned out!

  We were to use Moody Mauve, Boho Blue and Lemon Lolly as our colors.  I added in some brushed gold paper as a neutral because I love it and while I don't want to use up my last few bits of it it's too nice to hoard lol!


  I started with a Basic White thick card base, then a layer of Boho Blue popped on dimensionals.  The top layer is Basic White for a nice clean background for my lights.  As I said earlier the wire and bulb bases are cut from the retired Gold/Rose Gold Specialty paper using the Merry & Bright die set.  The bulbs themselves are stamped in Moody Mauve and Boho Blue with the Merry & Bright stamp set then cut out.  The bulbs are popped on dimensionals and then "lit up" with Lemon Lolly ink and the little stamp showing the "light" coming from them.

  To follow the sketch with the sentiment going across the 3 panels I needed one that wasn't too big because I didn't want to cover up the lights too much.  I found the perfect one in the Brightest Glow stamp set and stamped it in Boho Blue and added it to the card front.

  In keeping with the clean and simple challenge I didn't add any other embellishments.  

  All of the current items used to make this card can be purchased in my ONLINE STORE.

  Thanks for looking!  Did you stamp today?

Stamps: Merry & Bright, Brightest Glow

Ink: Boho Blue, Moody Mauve, Lemon Lolly

Paper: Basic White thick, Basic White, Boho Blue, Gold/Rose Gold Specialty paper (retired)

Accessories: Merry & Bright dies, dimensionals


Tuesday, November 21, 2023

Last Chance Products Sale!


  Don't miss out on items still on your wish list from the Sept.-Dec. Mini catalog!  Some items are up to 60% off!  Order early for best selection of retiring products.  Click HERE to see all of the Last Chance items!


Tagged Wreath - Stampin' Up! Wishes All Around Dies

   I know I'm not the only one with a bin full of orphaned card parts sitting on their stamping desk.  Mine has been getting to the point of overflowing with all the bits and pieces that haven't been making it onto my cards lately.  And if I excavate back there are even parts from last year's holiday mini catalog. Yikes. So today I did my best to pull out a few parts to use on a card.

  The Paper Players challenge has a clean and simple challenge to make a card with a tag on it.  Into the orphaned card parts I went and I was able to pull out the embossed background panel and the 2 die cut wreaths to make this card.  


  In my efforts to use up more of my supplies I pulled out some retired gold edged ribbon for the tag as well as some teeny tiny gold stars that I can't even remember what they are from; maybe a Paper Pumpkin??

  I'm happy with how this one turned out and proud of myself for using up things that I had already "made" and finally "used".

  All of the current product used to make this card can be purchased in my ONLINE STORE.

  Thanks for looking!  Did you stamp today?

Stamps: Petite Pairs (retired)

Ink: Cherry Cobbler

Paper: Very Vanilla thick, Very Vanilla, Cherry Cobbler, Wild Wheat

Accessories: Merry Melody embossing folder, Wishes All Around dies, Tailor Made Tags dies, dimensionals, gold edged ribbon (retired), star sequins (retired)


Monday, November 20, 2023

Tiny Trees - Stampin' Up! Wishes All Around

   I'm plugging right along with my Christmas cards and my goal is to have them written out and mailed the first week of December!  I need to count how many I already have and how many more I need to make.  Wouldn't it be terrible if I had to put off housework to make all the cards I need??!  

  I used 2 more challenges today to make another fun Christmas card. The Alphabet Challenge is on the letter 'Q' so the theme is for something quadrupled; 4 of the same shape or image. I pulled my colors from the Just Us Girls challenge where they have a fantastic mood board to inspire us.  The little bottle brush Christmas trees in one of the photos inspired me as well.


  So for my quadruples I've used 4 trees as well as 4 colored squares.  These are some great colors and as I was using them I realized that they were the same ones in last year's Sweetest Christmas DSP (the ones with the candy canes) and I loved the combo then and I love it this year too!

  This card is really simple with a Snowflake Sky embossed background with a Garden Green baker's twine bow across the card front.

  The little tree from Wishes All Around is stamped in my 4 colors and then mixed and matched with the same 4 colors in die cut squares.  They are popped on dimensionals and have mini rhinestones at the top.

  A larger die cut square backed with a piece of Sweet Sorbet cardstock help the small trees not get lost on the card front.

  All of the items used to make this card can be purchased in my ONLINE STORE.

  Thanks for looking!  Did you stamp today?

Stamps: Wishes All Around

Ink: Pool Party, Sweet Sorbet, Garden Green, Flirty Flamingo

Paper: Pool Party, Sweet Sorbet, Garden Green, Flirty Flamingo, Basic White

Accessories: Snowflake Sky embossing folder, Stylish Shapes dies, Wishes All Around dies, dimensionals, rhinestones, baker's twine


Sunday, November 19, 2023

Winter Cottage - Stampin' Up! Ringed With Nature

   My card today was inspired by 2 different challenges.  The first is the Color Throwdown challenge to use pink, gray and green and the 52 Christmas Card Throwdown which has the theme of 'Winter Countryside'.  These 2 challenges combined perfectly for this cute little winter cottage scene.  I used the house from Ringed with Nature a week or so ago and it was perfect for this new card as well.


   So cute right??!!  Pink is not one of my go to colors but I love how it works here.  I started with the background paper in a Powder Pink polka dot pattern from the Bright & Beautiful DSP.  Then a strip of Soft Shimmer paper also in Powder Pink for a subtle bit of bling.

  Next I cut 2 Basic White Countryside Corners die shapes and embossed the smaller one with the Snowflake Sky embossing folder.

  The Smoky Slate circle is stamped with the itty bitty snowflake in the Wishes All Around stamp set in white craft ink for a very light soft snowing sky.  The house is stamped in Powder Pink and Smoky Slate and is nestled into a scrap of Basic White that is torn and rounded with the same circle die that I used on the Smoky Slate circle so the lines would match up when adhered.

 The pine trees from Wishes All Around stamp set are stamped in Garden Green and cut out and adhered around the house with the one in the foreground popped on a mini dimensional.

  Not content to use just 2 stamp sets I pulled out a third; Festive & Fun and stamped one of the sentiments in Garden Green and cut it apart to fit to the side of the house also popped on dimensionals.

  I embellished the card with a Garden Green baker's twine bow and some Adhesive-backed sequins in an iridescent white which are hard to see in the photo.

All of the current products used to make this card can be purchased in my ONLINE STORE.

Thanks for looking!  Did you stamp today?

Stamps: Ringed with Nature, Wishes All Around, Festive & Fun

Ink: Powder Pink, Smoky Slate, Garden Green, white craft

Paper: Bright & Beautiful DSP, Soft Shimmer Specialty paper, Smoky Slate, Basic White

Accessories: Countryside Corners dies, Snowflake Sky embossing folder, Stylish Shapes dies, Wishes All Around dies, baker's twine, Adhesive-backed sequins trio


Saturday, November 18, 2023

Christmas Blocks - Stampin' Up! Wishes All Around

   Today's card might look a little familiar as it uses a lot of the same supplies as this card that I shared a few days ago.  I went with the traditional red/green and added a wreath.


  The base is Cherry Cobbler and I used 2 patterns from the Joy of Christmas DSP for 2 of the blocks with the third being the Shaded Spruce Textured Shimmer paper.  The wreath image is in the Wishes All Around.

  The wreath is topped with a banner made from the More Dazzle specialty paper.  The sentiment is stamped in Cherry Cobbler and punched out and popped with dimensionals on the banner.

  A pretty red bow finishes off this classic design.

  All of the products used to make this card can be purchased in my ONLINE STORE.

  Thanks for looking!  Did you stamp today?

Stamps: Wishes All Around

Ink: Shaded Spruce, Cherry Cobbler

Paper: Cherry Cobbler, Basic White, Joy of Christmas DSP, More Dazzle Specialty paper, Textured Shimmer paper

Accessories: Wishes All Around dies, circle punch, dimensionals, Real Red ribbon