Showing posts with label wedding. Show all posts

Sunday, March 1, 2026

Tropical Blooms - Stampin' Up!® Simply Beautiful

   The Simply Beautiful bundle makes gorgeous layered flowers and my local stampers got to see for themselves at my last class when they made this bright tropical floral card.


  The supply packet for this project was quite boring with all Basic White cardstock pieces except for a small piece of Daffodil Delight.  But the fun of this card is getting to add all the color!

  The card base is Basic White thick, then a layer of Basic White embossed with the Beautiful Pattern embossing folder. Then a strip of Basic White for the sentiment in Granny Apple Green.

  Finally the fun!  Using Daffodil Delight, Timid Tiger and Poppy Parade ink and blending brushes the ink is blended onto a panel of Basic White and then the flower layers are die cut from it.  This is a fun technique to get multi-colored flowers in whatever combo you'd like. The large flower is the 2 largest dies plus a smaller die.  There is a dimensional between the 2 larger layers.  The small flower is 2 layers also with a dimensional.  Both flowers have Daffodil Delight pistil and stamens.

  The leaves are made the same way with Granny Apple Green blended in and then the leaf image stamped over the top in the same ink.

  The final touch for this card is a pair of Pearlized Faceted Circles to add some sparkle.

  I shared a sped up video of this design coming together over on Instagram if you'd like to take a look!

 Thanks for looking!  Did you stamp today?

All of the supplies used to make this card can be purchased in my ONLINE STORE.

Stamps: Simply Beautiful

Ink: Granny Apple Green, Daffodil Delight, Timid Tiger, Poppy Parade

Paper: Basic White thick, Basic White, Daffodil Delight

Accessories: Beautiful Pattern embossing folder, Simply Beautiful dies, dimensionals, Pearlized Faceted Circles

Wednesday, January 21, 2026

Beautiful Wedding - Stampin' Up!® Simply Beautiful


   The New at SU! blog hop team is back this month with a really fun (and timely) theme!  We are focusing on Handcrafted Hearts, in other words, Love!  We are creating projects for Valentine's Day, Love, Wedding, Engagement etc. We hope you hop around with us to see the wonderful inspiration from around the world and get inspired to create your own project!  You can find the hop list at the end of my post!

  At first I was going to do the easy and more pressing project and focus on Valentine's Day but then I realized I don't have a single card that I could use for an engagement congratulations or a wedding card!  I guess where I am in my stage of life I don't have much need for them but I like to keep a well stocked selection of cards so off I went!  The Simply Beautiful bundle has perfect sentiments and the coordinating Lovely & Beautiful DSP just has "spring wedding" written all over it!


  A simple layout with the gorgeous DSP and a layered Fresh Freesia blossom is perfect for an engagement card!


  The gold accents on the paper as well as the gold sequins really makes for an elegant look.


  I created a second card with similar supplies but used Basic White and Calypso Coral ink to make the large layered flower for this wedding card.


  The layers of the flower are popped on dimensionals make for a really full look.

  I hope these cards have given you some inspiration to start thinking about your own project with a "Handcrafted Hearts" theme!  Hop around with us to see more inspiration!

  Thanks for looking! Did you stamp today?

All of the supplies used to make these project can be purchased in my ONLINE STORE.

Stamps: Simply Beautiful

Ink: Basic Gray, Calypso Coral

Paper: Basic White, Fresh Freesia Two-Toned Cardstock, Old Olive Two-Toned cardstock, Darling Duckling, Peach Pie, Old Olive, Lovely & Beautiful DSP

Accessories: Simply Beautiful dies, dimensionals, gold sequins, Pearlized Faceted Circles

Saturday, July 5, 2025

Extraordinary Wedding - Stampin' Up! Extraordinary Flora

 The Extraordinary Flora bundle and washi tape are apparently a huge hit as they are out of stock until later this month.  My stampers really enjoyed seeing these products in action at my last class.  It's so fun seeing how the washi tape images line up perfectly to be cut by the big die giving you almost instant flowers to use on your projects.  Add in the stamps and there are really a lot of possibilities!  Sign up in the online store to get a notification when these items are back in stock so you don't miss out!


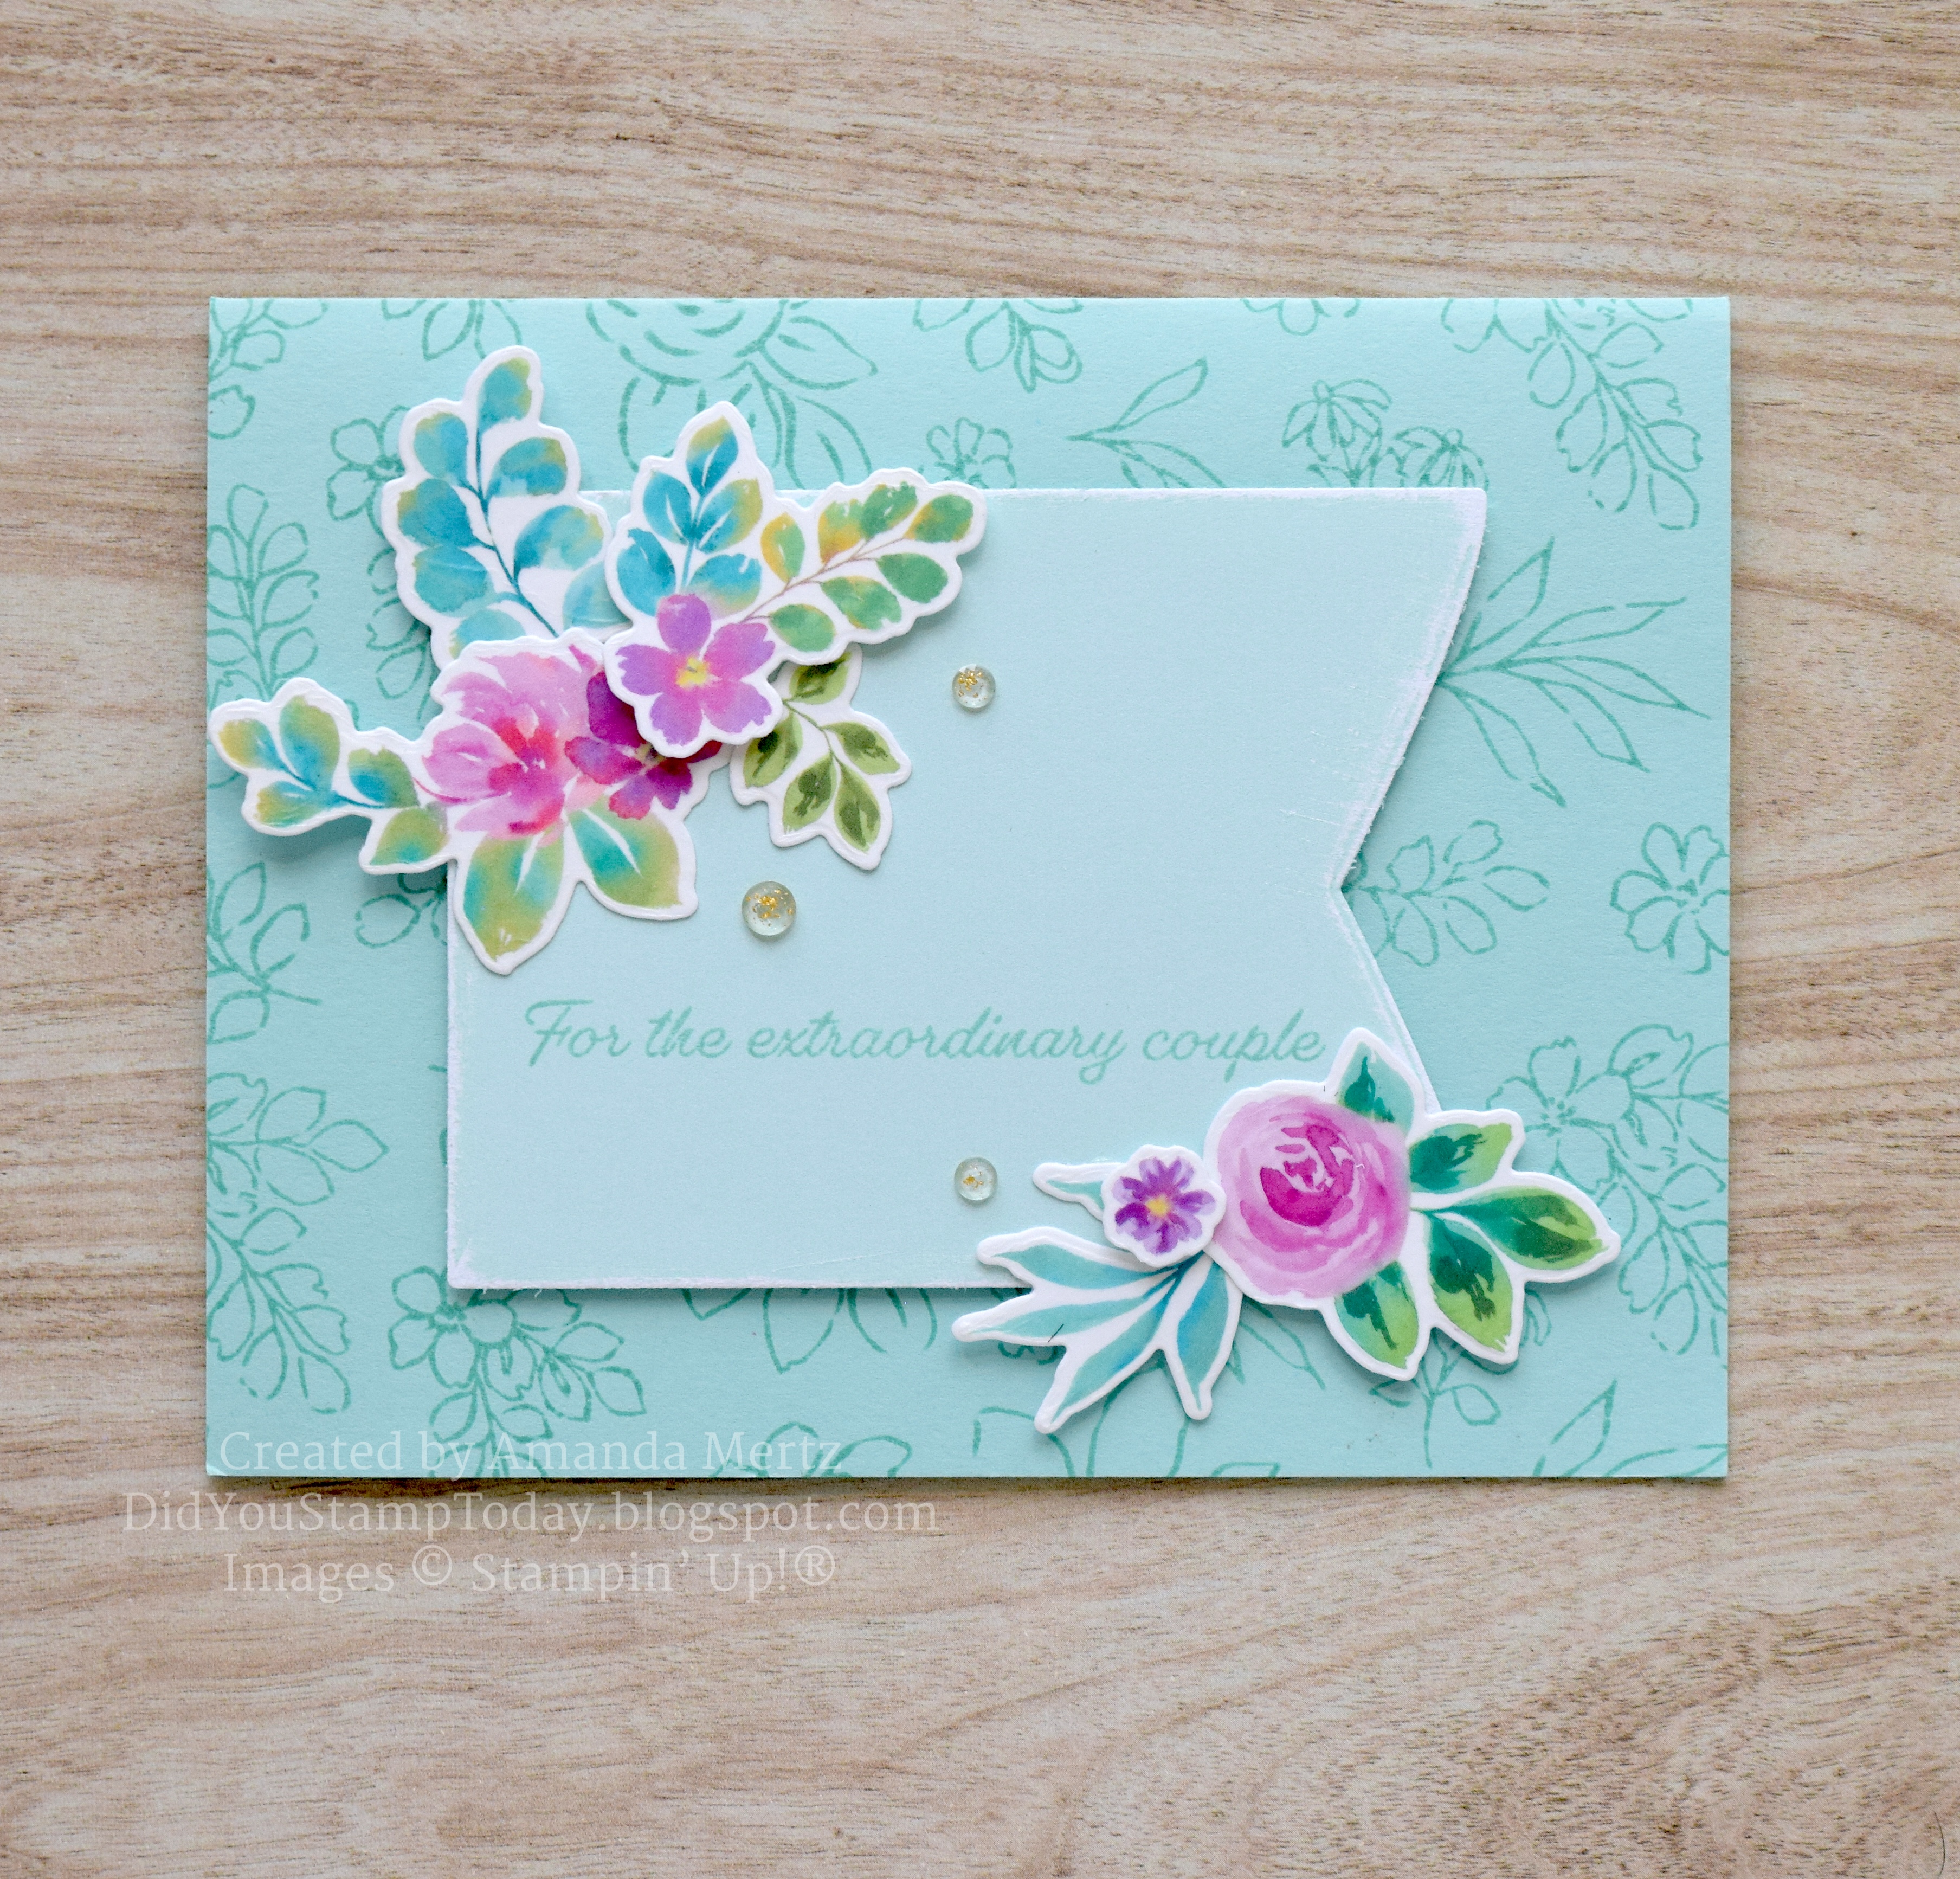
  This card starts with a Pool Party base stamped with the Extraordinary Flora stamp in Pool Party ink.  The Party Banners dies and a bit of Two Toned Pool Party card stock team up to make the banner. The lighter side is used and a sanding block was was taken to the edges to show off a bit of the white core.  Such a fun was to use this paper!  The sentiment is stamped in Pool Party along the bottom of the banner before popping it on dimensionals.

  The trick to die cutting the washi tape is to first adhere it to a piece of Basic White which makes the colors pop beautifully.  There are 2 sets of colors, each length about 5 1/2" so you can alternate between Petunia Pop and Strawberry Slush blossoms. I make sure to use a bit of painters tape or a post it to keep my die from sliding on the washi.  Even with a magnetic platform the die slides a bit more than normal with the slickness of the washi.  And you don't want to waste any of these beautiful flowers!

  The flowers are added around the banner, to the inside of the card and even to the envelope.  Some are popped on dimensionals. You can even peel the washi tape away from the Basic White backing and adhere the images to the envelope for a nice smooth finish.  Some Strawberry Slush & Pretty in Pink Gems are added for a bit of sparkle.

Thanks for looking!  Did you stamp today?

All of the supplies used to make this card can be purchased in my ONLINE STORE.

Stamps: Extraordinary Flora

Ink: Pool Party

Paper: Pool Party, Two Toned Pool Party, Basic White

Accessories: Extraordinary Flora washi tape, Extraordinary Flora dies, Party Banner Dies, dimensionals, Strawberry Slush & Pretty in Pink Gems (Online Exclusive)


Monday, June 23, 2025

Extraordinary Congrats - Stampin' Up!® Extraordinary Flora

 Last week I finally got my May customer thank you cards designed, stamped and mailed out.  I send a card to every customer who orders during the month and I leave the card blank so that they can add it to their stash for use and inspiration. Who doesn't love some happy mail right?  The Extraordinary Flora bundle and coordinating washi tape are so fun to create with.  I've never been a big washi user but this roll is so cool in that it's super wide (3 1/4"!) and you can use it like regular washi but also use the die to cut out a whole length of the flower/leaf designs!  So cool!


  The design alternates between a section of pink and then purple flowers so every 5 1/2 inches or so the colors change.  I used both colors for my cards.  I used the sketch challenge from As You See It for the layout.  The 3 panels are the perfect elements to add the washi die cuts to!

  I started with a Soft Sea Foam base then a slightly smaller layer of Soft Sea Foam embossed with the Damask Designs embossing folder.  3 narrow Basic White rectangles are cut using the Textured Notes dies.  A white baker's twine bow goes across the middle of the card.


  I used the really skinny Textured Notes die for the colored sentiment bar.  I used Strawberry Slush and Petunia Pop to coordinate with the colors in the washi tape.

  To make the washi tape elements I rolled out a length of the washi tape and adhered it to a piece of Basic White making sure to smooth out any bumps or pockets of air.  I found that by using my bone folder and working from the center to the edges worked really well.  The white cardstock really makes the designs pop. Then I ran the washi panel and die through my die cutter and came away with a neat little pile of flowers and leaves.  Be sure to tape the die down with a sticky note or painters tape even if you're using a magnetic platform as the washi is very smooth and I found that the die slide around a bit more than normal and you don't want to mis-cut and waste any of the washi.

  I added some flowers to the card front with dimensionals and glued some down to the inside of the card.  The washi pulls away nicely from the cardstock so if you wanted to use an extra flower to decorate an envelope or wanted to use the washi die cuts on their own as straight tape you can.

  Finally I added a gold Low Profile dot on the sentiment strip to finish this card off.

Thanks for looking!  Did you stamp today?

All of the current supplies used to make this card can be purchased in my ONLINE STORE.

Stamps: Extraordinary Flora

Ink: Strawberry Slush, Petunia Pop

Paper: Soft Sea Foam, Basic White, Strawberry Slush, Petunia Pop

Accessories: Damask Designs embossing folder, Textured Notes Dies, Extraordinary Flora Washi Tape, Extraordinary Flora die, dimensionals, white baker's twine, Low Profile dots (Online Exclusive)


Saturday, September 7, 2024

Autumn Wedding - Stampin' Up! Heartfelt Hexagons

   I'm off to a wedding today so I needed to get a card made for it.  I don't do too many wedding cards these days so it was fun to pull out some supplies and come up with a design that used some of the bride's colors and of course a nice fall theme!


  It's hard to see in the photo but I used the new Birch Wood embossing folder for the Very Vanilla background.  It's a nice natural/organic texture and worked perfectly for my fall theme.  I wrapped a lit of retired Very Vanilla ribbon around the embossed panel before adhering it.  The ribbon has a nice sheen to it in real life.

  Next I used the Wildflower Designs dies to cut the frame and inner panel in Night of Navy (one of the brides colors).  Using the Heartfelt Hexagon stamp set and punch I stamped the frame in Night of Navy and then the words in Versamark before heat embossing with copper embossing powder and then punching it out.

  I used 2 die sets to cut out all the leaves and twigs that are tucked behind the hexagon.  The copper leaves and the Early Espresso twigs use the Autumn Leaves dies and then Very Vanilla sprigs are cut with the Textured Floral dies.  The whole leaf/twig/hexagon thing is popped on dimensionals.  It's quite a thick card but since it's being hand delivered I didn't need to worry about it making it through the mail!

  Finally a few retired Elegant Faceted Gems are sprinkled around the card front.  I thought this champagne color matched the copper foil nicely to tie it together.

  Thanks for looking!  Did you stamp today?

All of the current products used to make this card can be purchased in my ONLINE STORE.

Stamps: Heartfelt Hexagons (Online Exclusive)

Ink: Night of Navy, Versamark

Paper: Very Vanilla, Night of Navy, Early Espresso, Copper foil (retired)

Accessories: Birch Wood embossing folder, Wildflower Designs dies, Heartfelt Hexagon punch (Online Exclusive), Autumn Leaves dies, Textured Floral dies, dimensionals, copper embossing powder, Very Vanilla ribbon (retired), Elegant Faceted Gems (retired)

Saturday, July 1, 2023

Wedding Table 8 - Stampin' Up! Textured Floral

   When I saw the current Inspired by Challenge I laughed out loud.  We have a running joke for the last 20 years with a group of friends stemming all the way back to our own wedding and Table 8.  When doing our seating plan for our reception we had a group of friends who didn't all know each other from various times/places of our lives but we knew they would have a good time together so we sat them all together.... at Table 8. And boy did they have a good time!!  They were the fun, rowdy table, laughing the whole night and having a great time with those Kodak table cameras that were all the rage back then.  Subsequently over the years we have been seated at Table 8's at their weddings even when having a table 8 made no sense to the seating plan.  We've continued the tradition of being the fun table as well as texting and sharing photos from other weddings we've attended where, just randomly, we've been seated at Table 8.  It's like someone knows that's the table we've got to be seated at! 

  This card was meant to be for a wedding was it not??  I also actually needed one for a wedding we're attending in a few weeks and while I don't know what table we'll be seated at fingers crossed for 8!  I was inspired by the floral arrangement and colors.


  This one starts with a Basic White thick card base, then a layer of Basic Black, then a layer of Basic White embossed with the retired Subtle embossing folder and then blended some Pool Party ink lightly in the background.  I created the "vase" with Basic Black cardstock and cut a partial shape with the Countryside Corners dies and then embossed it with the Stripes embossing folder (from the 2 pack Stripes & Splatters).  It's hard to see the textured as well as the Wink of Stella that I colored on for some sparkle.

  Next I stamped a bunch of flowers in Flirty Flamingo and used the stamped off versions and layered several for a more full look. The leaves at stamped (and stamped off) in Shaded Spruce.  The wispy greens are cut from Pool Party card stock.  One flower is stamped off in Petal Pink to follow the colors in the inspiration photo.  After all the die cutting was done I arranged the flowers in the "vase" with some being popped up with dimensionals and others laying flat.

  The sentiment from Sentimental Park is stamped in Memento Black and then trimmed down and layered over a length of retired crinkled seam binding ribbon.  Retired White Opaque Adhesive-Backed gems are placed all around the arrangement for subtle sparkle and shine.

  This was definitely a fun card to make and remember all of our own Table 8 shenanigans!

  All of the current supplies used to make this card can be found in my ONLINE STORE.

  Thanks for looking!  Did you stamp today?

Stamps: Textured Floral, Sentimental Park

Ink: Flirty Flamingo, Shaded Spruce, Pool Party, Petal Pink

Paper: Basic White thick, Basic White, Basic Black, Pool Party

Accessories: Textured Floral dies, Stripes & Splatters embossing folders, Wink of Stella, dimensionals, Subtle embossing folder (retired), Opaque Adhesive-Backed gems (retired), crinkled seam binding ribbon (retired)


Friday, February 3, 2023

Guacamole Engagement - Stampin' Up! Taco Fiesta

  I needed an engagement card recently so went with a silly one to celebrate the happy couple.  The Taco Fiesta stamp set continues to bring a smile to my face!


  I struggled a bit initially with this idea as the avocados are small and I couldn't get the scale of the rest of the card to work.  Finally I changed a few things and ended up here.  

  This one starts with a Parakeet Party base, then the avocados are stamped on Basic White and colored in with Blends.  I added a glimmer paper heart in the center as well as a strip of heart paper from the All Together DSP which is on sale now in the clearance rack!  Check out all the great deals HERE.

  To make the sentiment banner I inked up the 'Holy Guacamole" with my Basic Black regular marker and stamped it on Basic White.  Then I inked up the retired "you're engaged!" sentiment from Itty Bitty Greetings and stamped that underneath before using the Stylish Shapes dies to cut the banner.  A bit of black baker's twine behind the sentiment is the last piece of this card.

  Super quick and easy once I got the design scaled correctly!

  Thanks for looking!  Did you stamp today?

Stamps: Taco Fiesta, Itty Bitty Greetings (retired)

Ink: Memento Black

Blends: Parakeet Party light & dark, Mossy Meadow dark, SU400

Paper: Parakeet Party, Basic White, Real Red Glimmer paper, All Together DSP (retired)

Accessories: small heart punch, dimensionals, Stylish Shapes dies, black bakers twine

Saturday, October 8, 2022

Sunflower Wedding Wishes - Stampin' Up! Jar of Flowers

   One of the (many!!) perks of being married to me is always having a supply of cards to choose from and/or being able to ask for a bespoke card when needed.  I made this wedding card for my husband to give to someone on his team who is getting married soon.  The team went in on a gift and of course needed a card to go with it.  I was told sunflowers and the color navy were the wedding theme and main color.  So pretty for a fall wedding don't you think?


  The card starts with a Night of Navy base, then a layer of Basic White, then a layer of some unnamed DSP that I found in my retired stash in a navy/polka dot pattern.  I then cut 3 Stitched Rectangles in Night of Navy and layered them on the DSP.

  The sentiment is from Splendid Thoughts and is embossed in retired Early Espresso embossing powder and then cut with a Stylish Shapes circle die.  I popped it up on dimensionals.

  Next come the 2 clusters of sunflowers from the Jar of Flowers set.  I stamped them both in Early Espresso and then colored them in using a variety of Blends markers (listed below). I fussy cut them and adhered them with more dimensionals.

  A few Gold Faceted Gems are sprinkled on the card front for some shine.  

  Thanks for looking!  Did you stamp today?

Stamps: Jar of Flowers, Splendid Thoughts

Ink: Early Espresso, Versamark

Blends: Daffodil Delight light & dark, Mango Melody light & dark (retired), Cajun Craze light & dark, Calypso Coral light, Old Olive light, Crumb Cake light & dark

Paper: Night of Navy, Basic White, unknown Navy DSP (retired)

Accessories: Stitched Rectangle dies, Stylish Shapes dies, Early Espresso embossing powder (retired), dimensionals, Faceted Gold Gems

Tuesday, July 12, 2022

House of Love - Stampin' Up! Ringed with Nature

   I loved the Ringed with Nature stamp set the first time I saw it in the July-Dec. mini catalog and still somehow I forgot to add it to my demonstrator preorder.  I kept thinking that I would wait to get it whenever I needed to put another order in but then I couldn't wait that long!  I ended up placing another preorder just to get it and a few packs of paper that I was low on.  The justifications that I go through to order more stamps lol!

  I used this set to make an anniversary card last week.  The little house and heart just seemed like the perfect images to celebrate.


  The coordinating dies and embossing folder, Tree Rings Hybrid embossing folder/dies, are really cool because you can emboss the tree rings and cut them out at the same time with on pass through the die cutter.  It's a neat way to get a pile of the wood cuts all at once to use on multiple projects.  The rest of the dies coordinate with the stamp set but don't actually cut out any of the images but the images are pretty straightforward if you want to fussy cut them like I did with the house and heart.

  After I stamped and die cut my pieces I layered them on top of a Crumb Cake wood cut and popped the heart on dimensionals.

  The little bit of DSP behind the sentiment comes from the Happy Forest Friends DSP and definitely looks like hearts to me but you might just see a knit pattern.

  Thanks for looking!  Did you stamp today?

Stamps: Ringed with Nature

Ink: Soft Suede, Night of Navy, Calypso Coral

Paper: Crumb Cake, Basic White, Old Olive, Pear Pizzazz, Calypso Coral

Accessories: Tree Rings Hybrid embossing folder/dies, dimensionals

Monday, March 7, 2022

Spring Birds - Stampin' Up! Birds & Branches

   We have had a lot of bird activity in our yard the last few weeks.  It's so fun to see the birds pairing up and starting their nests.  We for sure have a bluebird nest and a house finch nest and there are a lot of comings and goings in all of our bushes and trees so I'm sure there are more.  Mr. & Mrs. House Finch decided that my front door wreath looked like a good home.  I usually take the wreath down before they get interested in it but I was too late this year.  I went to take it down and there was already a full blown nest all tucked up in the top edge.  So we just moved it down the porch off the front door so they wouldn't be constantly disturbed and now it's hanging on one of our shutters.  The birds didn't seem to mind at all and have gone about their business.  It will be fun to see them start their little family.  

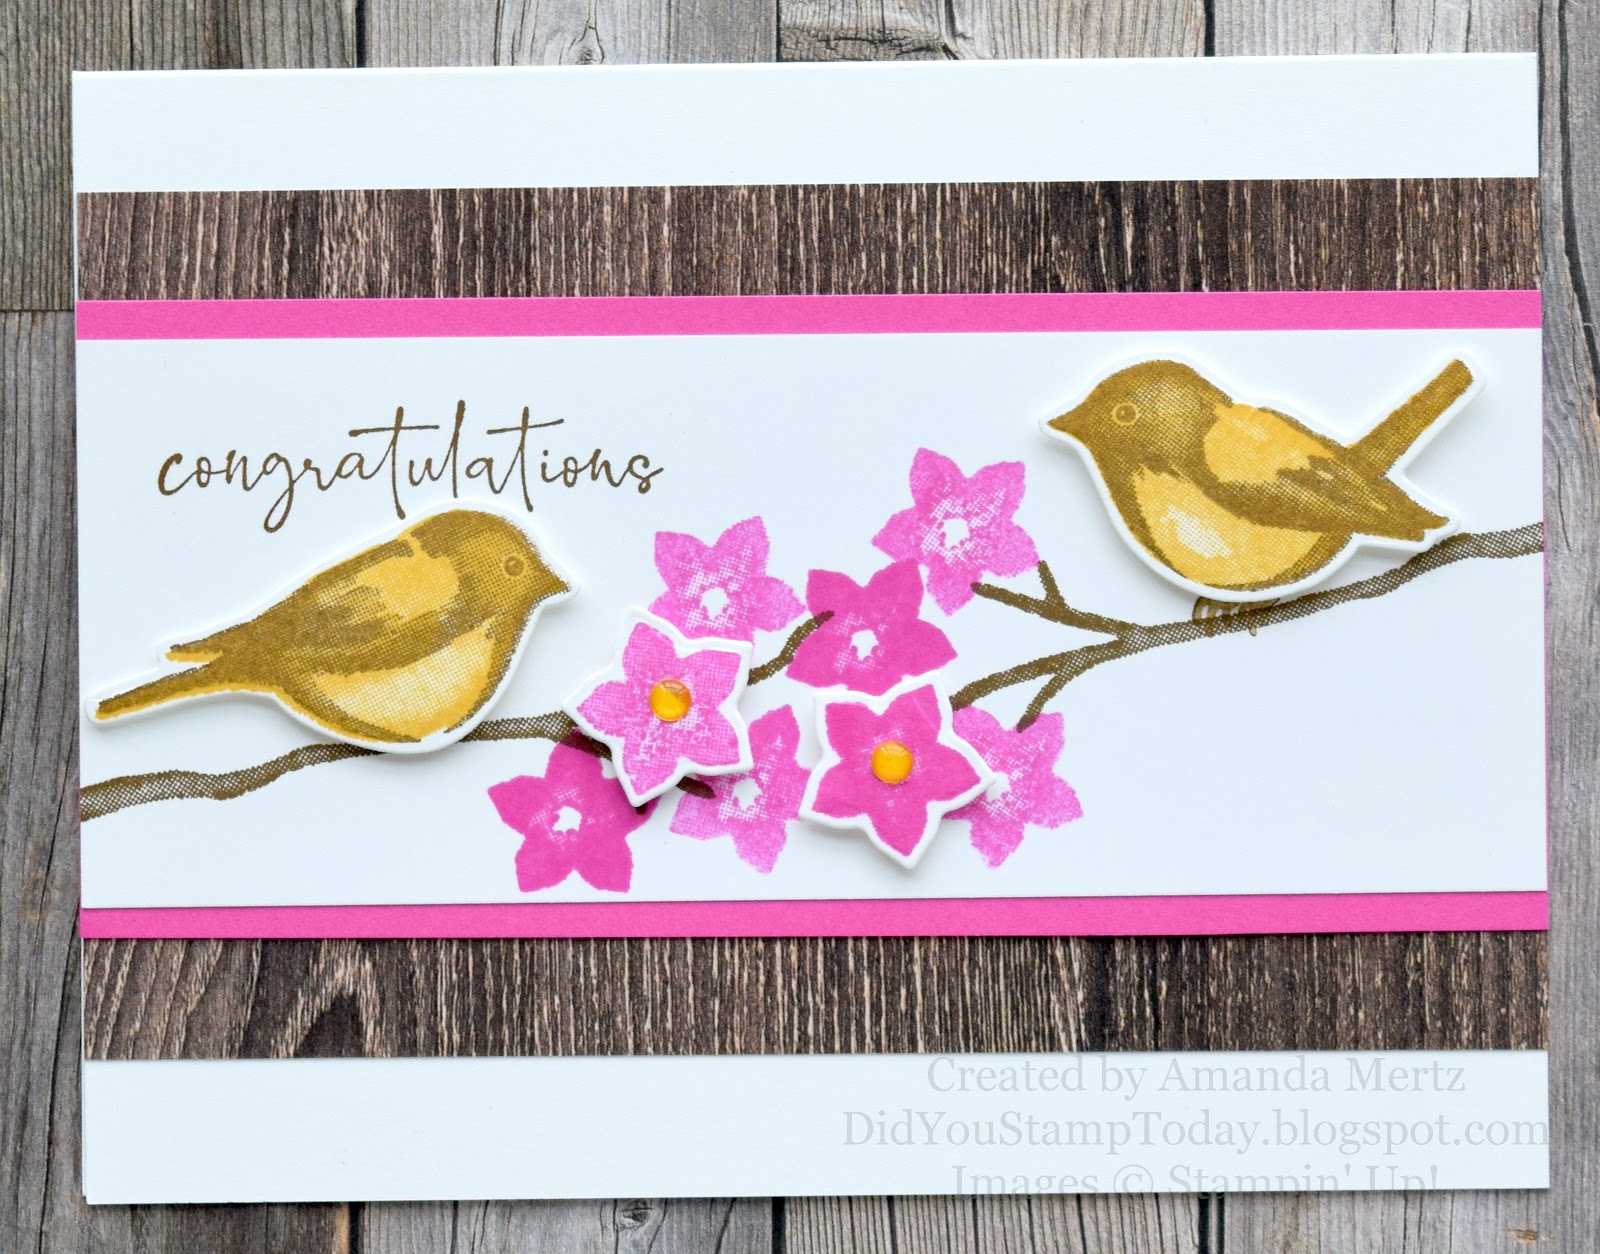
  So with all that said the birds inspired me to make a bird card using the colors over at TGIF Challenges.  I was going to skip these colors as I just find Magenta Madness hard to use.  I'm not a big pink person generally but this shade just doesn't speak to me at all.  I ended up changing my mind because the whole point of a challenge is to stretch youself creatively.  I think I like the finished card as long as I don't linger too long over the Magenta Madness lol!

  What do you think?  I was going for a congrats on your engagement/wedding type of card. The inside greeting says 'yay for love!".

  I do love these chubby little birds though.  The 2 step stamps made it easy to get the Bumblebee and Soft Suede lined up.

  I popped 2 of the flowers up for some dimension and brought in a bit of texture with the piece of woodgrain DSP from the In Good Taste DSP.

  Thanks for looking!  Did you stamp today?

Stamps: Birds & Branches, Happy & Heartfelt

Ink: Soft Suede, Bumblebee, Magenta Madness

Paper: Basic White thick, Basic White, Magenta Madness, In Good Taste DSP

Accessories: Birds & More dies, 2022-2022 In Color enamel dots (retired)


Friday, September 11, 2020

Chalkboard Thanks - Stampin' Up! Ornate Thanks - Fab Friday 197

  Well we've made it to Friday after a short first week of back to school.  So far so good but it's nice that we have the weekend to gear back up for 5 whole days next week!  I hope you'll have time to stamp over the weekend and play along with us at Fab Friday Challenge with this fun sketch challenge.


   My thank you card stash is still a bit low so I used that as my starting point when designing my card.  Remember the chalkboard technique from a few years ago?  It's basically stamping in white craft ink and then lightly sponging more craft ink for the dusty look.  Or as I did it on my card I stamped and embossed the sentiment in white embossing powder and then swiped the craft ink.  I didn't trust myself to put the card together and not smudge the whole thing if I used just craft ink!  I'm messy like that!


  I started with a Balmy Blue card base, then another layer of Balmy Blue embossed with the Dainty Diamonds embossing folder.

  For the chalkboard frame I used a piece of In Good Taste and cut it out with Stitched Rectangle dies.  the board part is Basic Black with the stamping and sponging. The whole panel is popped on dimensionals.

  The decorations are made with the Arrange a Wreath stamps and coordinating Wreath Builder dies.  They work pretty well as sunflowers right?  I used Bumblebee, Garden Green and Early Espresso for the colors.

  Once I had the little banner stamped and trimmed I arranged the flowers around it and popped them on dimensionals.

  Check out the rest of the Fab Friday Design Team for more inspiration for this versatile sketch!

  Thanks for looking!  Did you stamp today?

Stamps: Ornate Thanks

Ink: Versamark, Memento black, Garden Green, Early Espresso, White craft

Paper: Balmy Blue, Basic Black, In Good Taste DSP, Bumblebee, Garden Green, Early Espresso, Whisper White

Accessories: Dainty Diamonds embossing folder, Stitched Rectangle dies, Wreath Builder dies, white embossing powder, dimensionals

Tuesday, August 18, 2020

Summery Tiles - Stampin' Up! Today's Tiles

   I've always tried to make my stamps as easy to use and as versatile as they can possibly be.  After using the Today's Tiles stamp set a few times I found that having all of the tiles and their matching accent stamp all attached really kind of limited how I could use them.  I like to stamp on the inside of my cards as well as on the envelopes and having the large panels that couldn't be inked individually kept me from easily doing that.  Also, I didn't always want a full panel of the tiles; I maybe just wanted to a few but to mix and match colors I had to stamp the whole panel (and clean the whole panel).  

  So I splurged and bought a second Today's Tiles set to cut apart so I can have each tile on it's own to use!  I know I will reach for this set even more now that I've made it more versatile.  

  I'm playing along with the Just Add Ink challenge which is to "Just Add T" so my tiles are my letter t item.  My colors were inspired by the closed Global Design Project challenge colors.  Aren't they a nice summery combo?


 The card base is Granny Apple Green with a layer of Whisper White embossed with the Tasteful Textiles embossing folder.  I wrapped a length of Bumblebee Twill ribbon around this panel.

  One of the best things about cutting the tile stamps apart is that now I can use up a lot of my more narrow scraps.  I stamped 3 different tiles and their coordinating accents in each of the colors on Whisper White and then trimmed them down with my paper snips.  I attached them to a Whisper White square just so if I unevenly trimmed any they wouldn't stand out so much.  Then I backed that with a Granny Apple square and popped it up with dimensionals on the card front.

  The sentiment from Itty Bitty Greetings is stamped in black and cut out with smallest Stitched So Sweetly die which reminded me a bit of the tile pattern shapes.

  Thanks for looking!  Did you stamp today?

Stamps: Today's Tiles, Itty Bitty Greetings\

Ink: Granny Apple Green, Bumblebee, Calypso Coral

Paper: Granny Apple Green, Whisper White

Accessories: Tasteful Textiles embossing folder, Stitched So Sweetly dies, twill ribbon, dimensionals


Friday, October 18, 2019

Hooray for Love - Stampin' Up! Sip Sip Hooray

 Happy Friday!  I hope you have lots of fun plans for the weekend!  I have some plans for stamping of course but also lots of time to relax and enjoy some nice fall weather.

  We were invited to an upcoming wedding and unfortunately it conflicts with another event so we aren't able to attend but I wanted to get a card made so we can send it to the happy couple after the big event.  I don't have to make very many wedding cards these days so it's fun to play around with some new stamps to see what I can come up with.

  I originally purchased the Sip Sip Hooray set as more of a Happy New Year set but it very much works for weddings and engagements as well.


  While this design is very much a clean card it's not exactly simple.  I'm actually surprised I pulled it off in one take not having to redo any of the elements.  I used a now closed Cas(e) This Sketch challenge and the current Global Design Project challenge is for a wedding or anniversary theme so I can definitely enter that one.

  This one starts with a Basic Black card base then a layer of the long retired Brushed Silver cardstock which I miss greatly and have been hoarding for years with the hope of Stampin' Up! bringing it back.  Next is a layer of Whisper White die cut with the Stitched Rectangles dies.

  I embossed 5 champagne flutes in silver, stamped some champagne in So Saffron and then added some of the new Shimmery Crystal Effects to each glass.  While the Crystal Effects was still wet I sprinkled a little bit of the Ice Stampin' Glitter over it for a bit more sparkle.  It did take a while for the CE to dry as I put it on pretty thick so just be careful that it's really dry before handling it too much.

  For the sentiment I cut out 3 layers for each element with the Well Written dies and used my fine tip glue pen to adhere them to make for a thicker more sturdy die cut.  After the glasses were dry I added the sentiment and finished off the 'bride' with a rhinetsone.

  I'm pretty happy with how this card turned out to be honest.  Sometimes what I envision doesn't come out at all.  This one is spot on to my vision!

  Thanks for looking!  Did you stamp today?

Stamps: Sip Sip Hooray

Ink: Versamark, So Saffron

Paper: Basic Black, Whisper White, Brushed Silver (retired)

Accessories: Well Written dies, Stitched Rectangle dies, dimensionals, silver embossing powder, Shimmery Crystal Effects, Ice Stampin' Glitter, rhinestone


Wednesday, May 8, 2019

Mirrored Giraffe Love - Stampin' Up! Animal Outing

  Why does this time of the year always seem so busy and it always seems to catch me off guard?  You'd think after all these years of having kids in school and sports and whatever else our family is involved in that I would plan for the end of April until school gets out as being crazy busy!  Nope. Can't seem to do it.  So it ends up being that I haven't blogged in a while and my to do list is a mile long and I have stamping stuff piled on my dining room table left from a class last week! *sigh* At least I found a few minutes to take some card photographs today so that I could share when I have a moment to breathe!

  Today's card is one of the projects we made at my April stamp club last week.  I wanted to show off the Animal Outing bundle.  The stamp set and dies are carrying over to the new catalog but they won't be offered at the bundle pricing.  You definitely don't want to miss out on savings on something you're planning to buy anyway right?

  I was browsing Pinterest for some inspiration and came across the mirror technique on several cards.  Now in the past I've never had much luck getting a crisp mirror image when I've tried the technique using various plastic sheets so when I saw this card from BJ Peters along with a quick video of the technique I knew it was something I needed to teach my stampers.  It's so easy with the Stamp-a-ratus!  Definitely watch the video to see how easy it is. 

  We made these 2 giraffes who are clearly in love and turned them into a polaroid picture.  Once we had the giraffes and leaves stamped and colored in with Blends we cut the frame in Balmy Blue with Layering Square framelits.  Added a punched heart from the dog builder punch and a sentiment from Itty Bitty Greetings.  An adhesive sequin with a grosgrain ribbon knot finish off the frame accents.

  The vine die was used to make the accent at the bottom of the card front and we adhered a strip of the Animal Expedition DSP so that the Lemon Lime Twist color would show through the cut outs.

  I love the bright colors and fresh clean lines of this card.  Now I just need someone to get engaged so I can send it out!

  Thanks for looking!  Did you stamp today?

Stamps: Animal Outing, Itty Bitty Greetings

Ink: Memento Black  Marker: Lemon Lime Twist

Blends: Daffodil Delight light & dark, Soft Suede light, Crumb Cake light

Paper: Call Me Clover, Balmy Blue, Poppy Parade, Whisper White

Accessories: Animal Friends thinlets, dimensionals, Layering Squares framelits, dog builder punch, adhesive sequins, 1/8" Call Me Clover grosgrain ribbon

Friday, February 23, 2018

Back to the Birds - Stampin' Up! Petal Palette

  I just can't keep away from the birds in the Occasions catalog!  Today's card is one that my stampers made at class last month.  I also wanted to let them have a go with the new Stampin' Blends alcohol markers.  I designed this card so that they could chose whatever color they liked for their sweet little birds.


  The card base is Whisper White thick to keep it clean so the birds will stand out.  A piece of Pool Party is stamped with the speckle stamp in Pool Party ink and then the sentiment in black.  This is backed by a piece of Crumb Cake just offset from the edge for a different look. This panel is popped with dimensionals.

  The birds are stamped in Memento and cut out with the coordinating Petals & More thinlets.  The branch is cut from Pear Pizzazz cardstock and tied with a bit of organza ribbon.  These birds are colored with the Daffodil Delight Blends and then perched on the branch.  It was fun to see all the different colors my stampers chose to use.

  Thanks for looking!  Did you stamp today?

Stamps: Petal Palette

Ink: Pool Party, Memento black  Blends: Daffodil Delight

Paper: Whisper White thick, Whisper White, Pool Party, Crumb Cake, Pear Pizzazz

Accessories: Petals & More thinlets, dimensionals, 1/4" organza ribbon

Monday, July 24, 2017

The New Mr. & Mrs. - Stampin' Up! Floral Phrases

  Today's card is one that I made for a friend who got married back in the beginning of July, which seems like forever ago now!  We had fun celebrating with the happy couple and enjoying a weekend away.


  There is very little stamping on this one but lots of layers and sparkle.  The base is Soft Sky and then a layer of Silver Glimmer paper topped with Whisper White embossed with the Softly Falling embossing folder.

  Next is a narrow Basic Black flag and a length of silver 1/8" ribbon.

  I cut out Silver Glimmer paper letters with the retired Little Letters thinlets and an ampersand with the retired Typeset Alphabet die.  These are all adhered to a Soft Sky panel.

  The congratulations was heat embossed on vellum.  I adhered it to the bottom part of the ampersand with a glue dot then covered the gluedot with a rhinestone.

  Thanks for looking!  Did you stamp today?

Stamps: Floral Phrases

Ink: Versamark

Paper: Soft Sky, Whisper White, Basic Black, Silver Glimmer paper, vellum

Accessories: Softly Falling embossing folder, black embossing powder, rhinestone, Little Letters thinlets (retired), Typeset Alphabet dies (retired)

Thursday, March 9, 2017

Here Comes the Bride - Stampin' Up! Custom Tee

  I'm still trying to get through sharing my backlog of cards from the past 6 weeks!  Today's project is another one that we made at my January class.  With wedding season fast approaching it's always nice to have a bridal shower or wedding card on hand.  We go to far fewer weddings these days but this kind of celebration card is always fun make.

  Using the Custom Tee stamp set and coordinating T-shirt Builder framelits we made this fun bride and groom card.


  The card starts with a thick Whisper White base. Then a wide panel of Soft Sky is embossed with the Festive embossing folder.

  Next comes the happy couple.  The tux outfit is just the shirt and bowtie diecuts used with Basic Black cardstock.  The shirt and collar are stamped in black onto Whisper White and cut out.

  The dress is made first by cutting out the ladies tee in Whisper White.  Then using 1 Delicate White Doily the layers of the dress are trimmed and adhered with each layer being just a bit wider ending with 4 layers.  A tiny piece of 1/8" Whisper White grosgrain ribbon defines the waist.

  The 3 flowers are stamped in Watermelon Wonder onto Watermelon Wonder cardstock.  You can use the matching flower die or just hand cut them.  Mini adhesive pearls are added to the center of each flower.

  This is a very easy card to customize to the wedding or shower colors.  It would even work well as a shower invitation if you're in need of those!

  Thanks for looking!  Did you stamp today?

Stamps: Custom Tee

Ink: Basic Black, Watermelon Wonder

Paper: Whisper White, Whisper White thick, Basic Black, Soft Sky, Watermelon Wonder

Accessories: T-Shirt Builder Framelits, white Delicate Doily, Festive embossing folder, adhesive pearls, 1/8" white grosgrain ribbon

Wednesday, August 10, 2016

His & Hers 13th Anniversary Cards - Stampin' Up! Seaside Shore & Foxy Friends

  Back in the beginning of July my husband and I celebrated our 13th wedding anniversary.  We tend to be pretty low key when marking the occasion but there are always cards of course!

  I had just gotten a few more items from the annual catalog and I wanted to try them out.  The Seaside Shore is a great set with of course fish but the other images in the set give you a lot options to create fun underwater scenes.


  The card base is Very Vanilla and I used Dapper Denim as a mat for a piece of By the Shore DSP.  I used just the anchor image and embossed it in the new copper embossing powder.  I cut it and a larger layer in Dapper Denim with the Layering Circles framelits.

  The sentiment is from Sunshine Sayings and I used the Stamp-a-ma-jig to line it up and stamped it in Dapper Denim ink.  Have I said how much I like this new In Color??

  The last detail is some cotton twine that I tied into a sailors knot to keep with the theme of the card.  The main panel as well as the anchor are both popped on dimensionals.


  And now to for the card my husband made me!  He's so cute; he asks if he can use the stamp room and he heads in there and always comes up with a super cute card!  He had fun with Foxy Friends this year and even used the retired Color Coach to pick his colors.  And he knows how to clean the stamps and puts them back where they belong...I can't even tell what he's used when I go back it so the card is always a surprise!  It's the little things right?

DH's Anniversary Card to me

  What a good stamper huh?  He must have had a good teacher!  

  Thanks for looking!  Did you stamp today?

My Card-
Stamps: Seaside Shore, Sunshine Sayings

Paper: Very Vanilla, Dapper Denim, By the Shore DSP

Ink: Dapper Denim, Versamark

Accessories: Layering Circles framelits, cotton twine, copper embossing powder, dimensionals

My husband's card-
Stamps: Foxy Friends, Thoughtful Banners

Ink: Real Red, Tempting Turquoise, Early Espresso

Paper: Real Red, Very Vanilla


Tuesday, August 2, 2016

Floral Wedded Bliss - Stampin' Up!

  Well hello friends!  It's been quite some time since I've been in blog-land!  Summer days are just flying by and I haven't made much of a push to blog.  I think it's that there isn't much of routine around here this summer except for meals...a girls gotta eat and other people around here expect to get fed too!  I have been stamping just not getting around to photographing, editing and blogging.  But I had a stack of card building up since the beginning of July and I thought I better hop to it or it would be too late!


  This is one of the cards my stamping ladies made last week at class.  I'm really liking the Floral Boutique suite.  Pairing the stamp set with the fun thinlet dies makes for beautifully elegant cards.  

  Night of Navy, Calypso Coral and Whisper White is a nice crisp summer time color combination don't you think?  We stamped the large flower stamp on the card front and then layered the rest of the elements over the top.  The smaller of the Detail Floral thinlet dies was used to cut a piece of Whisper White.  Use the fine tip glue pen to adhere these die cuts.  

The Calypso Coral thick bakers twine is tied into a bow before adding the punched sentiment circle.  The long border stamp was stamped off twice and then the sentiment layered on top before punching. And don't forget those rounded corners; they echo the curves of the flowers for a nice cohesive look.

  Thanks for looking!  Did you stamp today?

Stamps: Floral Phrases

Ink: Night of Navy, Calypso Coral

Paper: Night of Navy, Whisper White

Accessories: Detailed Floral Thinlets, circle punches, corner rounder, thick baker's twine, dimensionals

Tuesday, May 31, 2016

Black & Gold Classic - Stampin' Up! Blended Bloom

  Last Tuesday I had stamp club and wanted to highlight a few last stamp sets and other products that were retiring.  The Blended Bloom single stamp was one that I chose to use and I paired it up with the retiring Typeset Specialty Paper.

  I told all of my stampers to do as I say and not as I do when it comes to Designer Series Papers.  I have a tendency to not want to use so I will have enough to use for classes but if I don't use it when I'm stamping then I tend not to come up with designs to use in class so the paper sits unused and then it retires before I've shown it off!  It's a terrible cycle and I'm bound and determined to to do better with papers from the new catalog (available to order from tomorrow!!!).


  For class we used 3 (well really 6 if you count the backside pattern) sheets and mixed and matched them to created this blocked background.  


  I think the black and vanilla and gold combo is such a classic look.  We added a bit of sparkle by using a Black Glimmer paper behind the flower panel.  We colored the center of the flower with the Gold Wink of Stella.

  Adding a bit more gold behind the flower with the Printed Gold vellum paper and then a strip of gold sequin trim.

   Thanks for looking! Did you stamp today?

Stamps: Blended Bloom

Ink: Black

Paper: Basic Black, Typeset Specialty DSP, Black Glimmer paper, Very Vanilla, Printed Gold vellum

Accessories: Gold Wink of Stella, gold sequin trim, dimensionals