Friday, December 21, 2018

New Years Celebration - Stampin' Up! Birthday Cheer - Fab Friday 153

  How can it be the end of 2018 already!?  It's flown by for sure and I always feel the same at the end of a year like how did that happen?  I think the saying that days go slow and years go fast is so true and it's never more apparent then when looking back at the last year and all that happened or didn't happen and trying to take stock of one's life.  I hope you all have a beautiful Christmas and a start to 2019 with family and friends.

  We are winding down 2018 with a final Fab Friday challenge of the year.  It's a super versatile sketch-- (do I say that every time??) so look ahead at your calendar and see what cards you'll be needing right after Christmas and at the beginning of January.  How about some thank yous for Christmas gifts?  January birthdays?  Happy New Year's cards?


  I went with the Happy New Years theme as I usually end up short on the number of Christmas cards I need vs. how many I've actually made.  I always plan for some New Years wishes to go out right after Christmas so I made a stack of this design.


  I tried to have my focal pieces offset like the sketch but I just couldn't do it; for some reason no matter what I tried it just made the card feel lopsided so I centered my pieces.  A sketch is an inspiration not a set in stone rule so I went with it!

  The card base is Whisper White thick, then a layer of Coastal Cabana.  Next is a piece of retired Springtime Foils Specialty paper from last year.  I had a bunch of this leftover so since I was making a stack of this design I decided to be frugal and use what I had on hand.  The copper is really a fun accent for a celebration card.

  The party hat from the NEW! Birthday Cheer stamp set was the perfect image to use.  I embossed it in copper and then fussy cut (not hard at all) it.  I colored the stripes with my Coastal Cabana and Flirty Flamingo markers.  I added some retired Fancy Frost sequins to the pompom for some added party sparkle.  The hat is popped on a Coastal Cabana Stitched Shape circle.

  The sentiment from Another Wonderful Year is stamped in Flirty Flamingo and then cut out with one of the NEW Stitched Rectangle dies.  I added a little Copper Glimmer paper flag behind it.

  Definitely check out the rest of the Fab Friday design team for more inspiration and then play along.  Looking forward to seeing your creation in the challenge gallery!

  Thanks for looking!  Did You Stamp Today?

Stamps: Birthday Cheer (Occasions), Another Wonderful Year

Ink: Versamark, Flirty Flamingo

Markers: Flirty Flamingo, Coastal Cabana

Paper: Whisper White thick, Whisper White, Coastal Cabana, Springtime Foils DSP (retired), Copper Joyous Noel Glimmer paper

Accessories: copper embossing powder, Stitched Shapes framelits, Stitched Rectangle framelits (Occasions), Fancy Frost sequins (retired), dimensionals

Friday, December 7, 2018

Snowflakes Abound - Stampin' Up! Another Wonderful Year - Fab Friday 152

  Well here we are back again on a Friday!  And a Fab Friday challenge day no less!  Just in time for a possible snowy weekend of stamping here in the RVA!  I've got my supplies ready and the stamp room all cleaned up in case we are stuck at home!  And we have a great set of colors for you to inspire you to maybe finish up those Christmas cards.  If you're a Johnny on the spot and already have yours mailed out then you can use this color combo for many other occasions so hop to it.


  No your eyes aren't deceiving you!  There are 5 colors in this challenge.  But I know you can do it...that's why it's called a challenge!

  I fell back onto an often used trick to get a lot of colors on one card; Color Blocking.  I just used a one inch strip of each of the colors to create the background panel.


  I attached the strips to a piece of Whisper White and then ran the whole thing through the Big Shot using the Subtle embossing folder.  A nice *subtle* texture for my blizzard to be adhered to.

  The white velvet cardstock that was originally included in the Snowflake Showcase special offer sold out so fast I didn't get a chance to use it in class so I have a lot of it left.   I had fun cutting away and making a pile of snowflakes to use on this card.  It was a bit tedious with the fine tip glue pen but no big sticky accidents.

  The only stamping on this card is the sentiment from Another Wonderful Year stamped in Cherry Cobbler then cut out with the Stitched Shapes framelits.  It's popped on dimensionals above some silver/white baker's twine.  I added a rhinestone to each snowflake center because why not?

  I can't wait to see what you all come up with for all. these. colors.  Head over to the Fab Friday challenge site to see more inspiration and to upload your creation!

  Thanks for looking!  Did you stamp today?

Stamps: Another Wonderful Year

Ink: Cherry Cobbler

Paper: Shaded Spruce, Mossy Meadow, Soft Suede, Pool Party, Cherry Cobbler, White Velvet (retired)Whisper White

Accessories: Subtle embossing folder, Stitched Shapes framelits, Snowfall Thinlets (retired), rhinestones, silver/white bakers twine, dimensionals

Tuesday, December 4, 2018

Sweet Shimmery Gift - Stampin' Up! Nothing Sweeter

I think the theme this week for my posts will be shimmery!  If you can't get behind some shimmer and glitz at Christmas time I think your heart may be black and shriveled!

My stampers made this design last week to add to their Christmas card stashes.  And I apologize for the weird coloring of the photo...it was really cloudy and dark the day I took the pics and clearly the editing didn't straighten things out!


  Stampin' Up! has so many great greens right now since the color revamp over the summer that sometimes it's hard to decide what green to use for the tradition red/green Christmas combo.  For this one I decided to pair Call Me Clover and Soft Sea Foam with some Cherry Cobbler.

  The Sweetly Stitched dies incude this great zigzag/rickrack trim that doesn't cut but does the stitches so we used that then trimmed out the edge so it would be a nice zigzag look.  We backed it with a bit of the Cherry Cobbler Joyous Noel Glimmer paper.


  After stamping the gift and cutting it out we used the Cherry Cobbler Stampin' Blends to color in the bow.  The darker color covers the Soft Sea Foam really well.  Then we used the clear Wink of Stella to add the shimmer factor to this card.

  And the snowflakes on the background are also highlighted with Wink of Stella but it doesn't show in the photo.

  Thanks for looking!  Did you stamp today?

Stamps: Nothing Sweeter

Ink: Soft Sea Foam, Call Me Clover

Blends: Cherry Cobbler

Paper: Whisper White, Soft Sea Foam, Call Me Clover, Joyous Noel Glimmer Paper

Accessories: Sweetly Stitched framelits, circle punch, Cherry Cobbler twine, dimensionals


Monday, December 3, 2018

Silvery Glistening Tree - Stampin' Up! Snow is Glistening

  I'm keep telling myself I need to count up how many Christmas cards I have already made and how many more I need to make but honestly I'm kind of scared to see how many it might be.  I'm beginning to feel a bit rushed with some of the things I need to do.  What I should do is stop poking around the internet and get some stuff done!

  We made this card last week at my stamp club.  And I love the red/aqua combination and probably do that combo every year but I can't resist.  And throwing some silver in makes my heart happy!


  The Galvanized Metallic paper looks even better when used to cut some snowflakes!  It has just the right amount of shine to go with the silver embossed Christmas tree.


  I love the little detail of a stamped off snowflake behind the Real Red "joy".  

  Thanks for looking!  Did you stamp today?

Stamps: Snow is Glistening

Ink: Pool Party, Real Red, Versamark

Paper: Pool Party, Coastal Cabana, Whisper White, Galvanized Metallic

Accessories: silver embossing powder, Snowfall Thinlets, circle punch, dimensionals, Real Red satin ribbon, rhinestone

Friday, November 30, 2018

Christmas at Home - Stampin' Up! At Home With You

  I'm working on getting my Christmas cards in order to mail out as soon as I can get a decent picture of my children to include in them.  I swear there is some genetic mutation in my kids that prevents them both from smiling nicely at the same time for a photo.  If one is smiling and looking at the camera the other one has his eyes closed and is smiling like it's the most painful thing in the world.  If the one is smiling with his eyes open the other is tilting his head in a way that makes him look like a complete stranger and not my child all the while stretching his smile so big I can see the back of his mouth.  I might have to resort to some photoshopping.  I believe this is one of the reasons the holiday season can be so stressful lol!

  When I received my holiday catalog preorder and I was looking through the Festive Farmhouse DSP checking out all the designs I thought the one white woodgrain one kind of looked like house siding.  That idea stuck so I went with it and pulled out my long neglected At Home With You stamp set and At Home framelits.

  I couldn't decide initally which color cardstock would make the better base so I ended up making the same card twice varying the base and door color.  Which do you like better?

Gray Granite

Smoky Slate
 It was fun using my Stampin' Blends to do the coloring since the color is so rich it really pops against the neutrals.

  I used the die to cut the door so that it would pop open but for the pictures I used some repositionable adhesive to close them.  On the inside of the door I stamped Merry Christmas.

  The porch accessories are all popped on dimensionals except for the door mat and I added red rhinestones to the potted bushes for a little sparkle.

  Thanks for looking!  Did you stamp today?

Stamps: At Home With You

Ink: Memento Black

Blends: Crumb Cake, Old Olive, Cherry Cobbler, Black, Smoky Slate, Daffodil Delight

Paper: Gray Granite, Smoky Slate, Festive Farmhouse DSP, Cherry Cobbler, Whisper White

Accessories: At Home framelits, dimensionals, red rhinestones

Thursday, November 29, 2018

Copper Christmas Tree - Stampin' Up! Snow is Glistening

  It's a week after Thanksgiving and I'm still trying to get organized!  How does going away for just a few days mess me up with my "to do" list?  I definitely have projects to share I just need to make time to sit down and write up the blog posts!

  Here is a card I made when I was playing around with the Snow is Glistening stamp set which is only available until November 30.  Don't wait to order it or the coordinating framelits dies.

  I love the snowflake tree in this set.  It's so elegant and when it's embossed it's even better!


  The Joyous Noel Glimmer paper and the Joyous Noel DSP have made their way onto many of my Christmas designs so far.  I was disappointed that the DSP sold out but a few of my stampers were lucky enough to snag a pack.  Every design is gorgeous!

  Thanks for looking!  Did you stamp today?

Stamps: Snow is Glistening

Ink: Versamark, Gray Granite, Merry Merlot

Paper: Gray Granite, Tranquil Tide, Whisper White, Merry Merlot, Joyous Noel Glimmer paper, Joyous Noel DSP

Accessories: copper embossing powder, Softly Falling embossing folder, Stitched Shapes framelits, dimensionals, ruffled ribbon
  

Friday, November 23, 2018

Joyful Copper Snowflakes - Stampin' Up! Snow is Glistening - Fab Friday 151

We're back with another fantastic Fab Friday stamping challenge to get your creativity flowing!  I know you want to take some time this weekend to work on some Christmas cards so take a look at our fun sketch and see what you can make with it!


  I am still mourning the fact that the Joyful Noel DSP is all sold out and no longer available.  I had a few more projects I wanted to show to my stampers but at least I can enjoy these designs with my personal stamping.  I think there will be a lot of copper getting mailed from my house this Christmas season!

  I combined the Snow is Glistening stamp set, the Snowfall thinlets and the Joyous Noel paper for an elegant snowflake card.


  My whole card was built up around this beautiful copper foil and neutral paper.  I simply added a banner and then put my layered snowflake on with a dimensional.   The Joy is embossed in copper to stick with the theme and then a simple narrow organdy ribbon is used at the top to anchor the banner.

  The snowflake layers are from the bottom up Copper Glimmer paper from the Joyous Noel Glimmer paper pack, Gray Granitem Whisper White and then the itty bitty little copper glimmer paper star that is from the center of the big snowflake.

  I hope you'll check out the rest of the Fab Friday Design Team and then play along with us!  

Thanks for looking!  Did you stamp today?

Stamps: Snow is Glistening

Ink: Versamark

Paper: Whisper White thick, Joyful Noel DSP, Whisper White, copper glimmer, Gray Granite

Accessories: copper embossing powder, Snowfall Thinlets, dimensionals, narrow organdy ribbon

Tuesday, November 20, 2018

More Snowflakes - Stampin' Up! Snow is Glistening

 I'm having a great time creating Christmas cards with the Snowflake Showcase suite.  I'm kind of sad this wasn't included in the Holiday catalog since it's such a great set I feel that I won't have enough time with it before it's gone.  The products in this suite are limited time only and few items have already sold out so don't wait if this is on your list!


  It's fun to play around with different color combinations at Christmas.  I've mostly shared only the standard red/green looks so far but this is a bit more playful and I think kind of retro.  It doesn't translate in the photo but it is sparkly too.  

  The card base is Flirty Flamingo and the white layer is Shimmery White with the corners rounded.  I stamped a small sprinkling of snow flakes in Pool Party diagonally on the Shimmery white.

  Using the Snowfall Thinlets dies I cut a variety of snowflakes in Pool Party, Flirty Flamingo and Soft Sea Foam.  Before adhering them to the card front I colored them with my Clear Wink of Stella for sparkle. 

  The tree is Soft Sea Foam stamped in Soft Sea Foam ink and cut out.  I popped it on dimensionals over a length of retired Flirty Flamingo ribbon.  The tree base is stamped in Flirty Flamingo.

  Joy is stamped in Pool Party and punched out with an oval punch and a few of the snowflakes are embellished with a rhinestone in the center. 

  Thanks for looking!  Did you stamp today?

Stamps: Snow is Glistening

Ink: Soft Sea Foam, Pool Party, Flirty Flamingo

Paper: Flirty Flamingo, Soft Sea Foam, Pool Party, Shimmery White

Accessories: Snowfall Thinlets, rhinestones, dimensionals, Wink of Stella, Flirty Flamingo ribbon (retired)

Monday, November 19, 2018

From Santa - Stampin' Up! Sincerely Santa

  This is one of the easiest Christmas cards ever!  Do you have a lot of DSP?  And ribbon?  So get to stamping and making your Christmas cards!  You can mix and match all your paper and ribbon and create some cute tags to make this easy design!


  I took my inspiration from the Sincerely Santa tag kit and decided to make a cardfront look like a present and make a fancy tag to go with.  I pulled my colors from the current Card Concept Challenge theme/inspiration picture "Homespun Holidays".  I liked the greenery of the tree and the pops of the red.

  The card base is Real Red, then a layer of Festive Farmhouse DSP.  I tied some Real Red mixed satin ribbon around the DSP layer to mimic a bow tied around a gift.

  The tag is stamped in Mossy Meadow and punched out with a circle punch (you can use circle framelits also) and then I jazzed it up with some of the smaller die cuts from the Snowfall Thinlets set. Each of the snowflakes has a red rhinestone in it's center.

  Thanks for looking!  Did you stamp today?

Stamps: Sincerely Santa

Ink: Mossy Meadow

Paper: Real Red, Whisper White, Festive Farmhouse DSP, Mossy Meadow

Accessories: Real Red mixed satin ribbon, circle punch, Snowfall Thinlets, red rhinestones, dimensionals


Friday, November 16, 2018

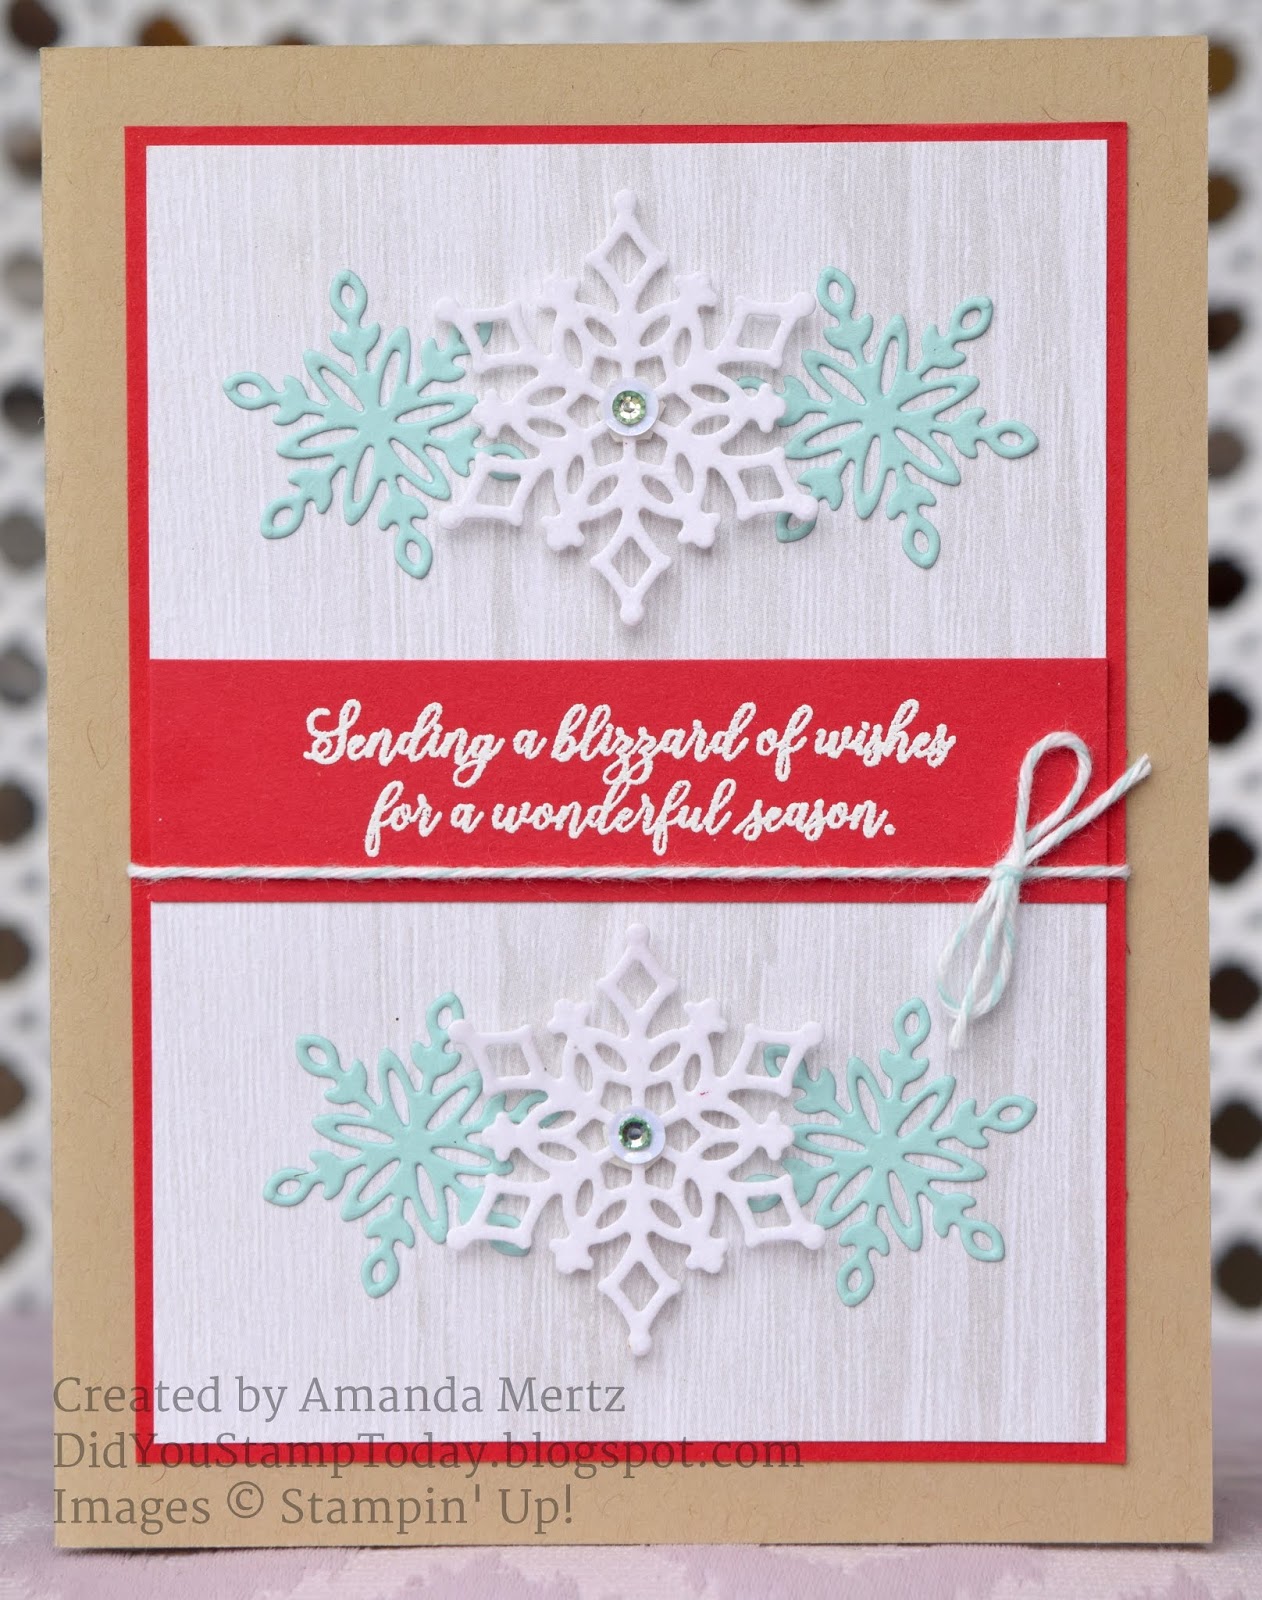
So Many Snowflakes - Stampin' Up! Snow is Glistening

  Well today's card is appropriate for much of the Northeast!  While it was just rainy here in Central VA yesterday a bit further north and they were seeing the white stuff!  Maybe some even have a snow day today?  It's nice and sunny though cold here.  It felt good to walk Alex to school this morning and have the sunshine on our faces.

  I've been having a lot of fun with the Snow is Glistening stamp set and coordinating Snowfall Thinlets dies.  I love a classic snowflake set for not only Christmas card but Christmas thank yous as well as all purpose winter cards.  It's a limited time only suite of products so be sure to order sooner rather than later.


  With all the gray rainy weather we've been having my photographs have suffered somewhat and even editing doesn't help too much so bear with me!  I designed this card for the CAS-ual Fridays challenge.  The sketch seemed like it was made for snowflakes! 

  The card base is Crumb Cake then a layer of Real Red and then a layer of Festive Farmhouse DSP.

  The center strip is Real Red with the sentiment embossed in white.  I tied a bit of retired Pool Party baker's twine around for a little detail.  My retired ribbon/twine collection is getting out of hand!

  The smaller snowflakes are Pool Party and the larger ones are the now discontinued White Velvet paper.  Demonstrators must have gone nuts because it sold out very quickly.  It's a nice kind of flocked texture but really on this design Whisper White snowflakes would look the same so this is easy enough to re-create without the Velvet paper.

  I popped the larger snowflakes with mini dimensionals and put a Pearl White basic sequin in the center.  I used my Dark Pool Party Blends marker and colored a few rhinestones to add a bit of sparkle.  I love that the Blends can be used on a lot of the accessories to make customized details.

  Thanks for looking!  Did you stamp today?

Stamps: Snow is Glistening

Ink: Versamark

Paper: Crumb Cake, Real Red, Pool Party, White Velvet (retired), Festive Farmhouse DSP

Accessories: Snowfall Thinlets, white embossing powder, baker's twine (retired), sequins, rhinestones, dimensionals


Friday, November 9, 2018

Colorful Leaves - Stampin' Up! Colorful Seasons - Fab Friday 150

 Wow!  Can you believe we are on our 150th Fab Friday Stampin' Challenge??  That's pretty impressive I think!  It's been a fun ride with the fabulous Design Team we have at Fab Friday!  I hope you'll be able to join us in this great color challenge.


  I tried to get really creative and use these colors to make a Christmas card.  That's a BIG NOPE!  I just couldn't get any of my "good" ideas to pan out.  That Cajun Craze just wasn't doing it for me even in super small doses.  So I went with some classic autumn maple leaves and broke out the Stamp-a-ratus for my alignment.  This card would be near impossible without the Stamp-a-ratus.  I first used some scrap copy paper to get my alignment just right then stamped the card front in one go without a goof up!  I was actually kind of proud of myself!  It's the little things right?


  The Colorful Seasons stamp set might be getting overlooked for Holiday Catalog items right now but there are so many great images for all year round so be sure to not let your set get dusty on the shelf!  

  The Thank You sentiment is from Another Wonderful Year and is embossed in Copper on Tranquil Tide cardstock.  I used some linen thread across the card front to soften the lines a bit.  The whole leaf panel is popped on dimensionals.

  I think this card will be perfect for thanking our Thanksgiving dinner hosts!  Make sure you get a card stamped for your hosts if you're going some place for Thanksgiving.  It's always nice to say thank you!

  I can't wait to see what you all do with this wonderful set of colors!  Check out the rest of the Design Team and play along to celebrate 150 challenges!

  Thanks for looking!  Did you stamp today?

Stamps: Colorful Seasons, Another Wonderful Year

Ink: Mint Macaron, Cajun Craze, Blackberry Bliss, Versamark

Paper: Whisper White thick, Whisper White, Tranquil Tide

Accessories: copper embossing powder, linen thread, dimensionals


Monday, November 5, 2018

Joyous Christmas - Stampin' Up! Merry Christmas To All

  I fell in love with the Joyous Noel Specialty paper when I saw the Holiday catalog back in the summer and I'm still loving it.  I was really disppointed last week when I featured it on a card at class and then saw that it had moved to the backorder list!  I guess me and a zillion other people are loving it too. Several of my stampers loved it too and didn't care if they had to wait on it!

  Every page is lovely with a copper accent on one side so you don't have to be choosy when you want cut into all the sheets.  I designed this card to show off the different patterns and to show a card where the stamping isn't the centerpiece.


This card is a little bit of a fancy fold with the Merry Merlot card base cut shorter and the Whisper White cardstock insert is cut long to fit on the inside so the stamped sentiment shows at the bottom.    It's a nice little something different for a Christmas card.  The front flap of the card is also embossed with Tufted embossing folder.

  I'm also really enjoying the Merry Christmas To All stamp set so that I can mix and match the sentiment to fit the card I'm making.  I had a bunch of stamp sets carry over from last Christmas so it's nice to be able to continue using them but changing up the sentiments to keep things fresh.

  The Joyous Noel paper is backed by Sahara Sand squares and popped up on the card front with dimensionals.   The Tranquil Tide ruffled ribbon is across the front and tied in a knot.

  Thanks for looking!  Did you stamp today?

Stamps: Merry Christmas To All

Ink: Tranquil Tide

Paper: Merry Merlot, Sahara Sand, Whisper White, Joyous Noel Specialty DSP

Accessories: Tufted embossing folder, ruffled ribbon, dimensionals


Friday, November 2, 2018

Thankful for Autumn - Stampin' Up! Falling for Leaves

 Thankful for the weekend too! Our family has a weekend full of soccer and the weather looks like it will cooperate so fingers crossed for no rainouts!  Even if a rainout would mean more stamping time I'm ready to be outside in the cool fall sunshine!  And don't forget to turn your clocks back on Saturday night!

  Today's card is one that I designed for my October stamp club.  There were lots of pieces and parts but nothing too hard and my stampers rocked it.  The delicate leaves are beautiful and I really like the slightly non-traditional fall colors.


  The card base is Balmy Blue and then a layer of Very Vanilla embossed with the Tin Tile embossing folder and then sponged with Crumb Cake ink.

  The stamped layer is lightly sponged with Crushed Curry ink and the the images from Falling for Leaves are stamped right over the top to make some custom DSP.  We used Crushed Curry, Balmy Blue and Soft Suede inks.

  The leaves are cut out from the same 3 colors and layered behind a punched circle with the sentiment and a stamped off once Balmy Blue leaf.

  A Very Vanilla baker's twine bow finishes off the last detail for this card.

  Thanks for looking!  Did you stamp today?

Stamps: Falling for Leaves

Ink: Crushed Curry, Balmy Blue, Soft Suede, Crumb Cake

Paper: Crushed Curry, Balmy Blue, Soft Suede, Very Vanilla

Accessories: Detailed Leaves thinlets, Tin Tile embossing folder, circle punch, Very Vanilla baker's twine, dimensionals

Wednesday, October 31, 2018

Sweet Stitched Christmas - Stampin' Up! Nothing Sweeter

Boo!  Happy Halloween to you all! I hope you've stocked up on the candy for all your trick-or-treaters tonight!  I have several giant bags of candy at the ready.  The last few years our trick-or-treater count has far exceeded the number of kids who actually live in the neighborhood so I need to be prepared to sugar up the masses!

On the stamping front we are on to Christmas cards!  Before we know it it will be time to be putting these Christmas cards in the mail so we must be ready!  I designed this card for my stamp club which met yesterday.  It's a very simple but sweet card that can be made and enjoyed by stampers of all skill levels.


  The color combo is a classic red and green with Cherry Cobbler and Mossy Meadow.  The Festive Farmhouse DSP works perfectly for this easy design.  My stampers at class had the choice between this plaid pattern and then the one with narrow red/green stripes.

  I love that this card is basic but with the detail of the stitching on the narrow Mossy Meadow band as well as inside the tree keeps it from being boring.  The small details really make a design stand out.  And I, of course, love the copper glimmer paper stars.  They add just the right amount of holiday sparkle.

  Thanks for looking!  Did you stamp today?

Stamps: Nothing Sweeter

Ink: Mossy Meadow, Cherry Cobbler

Paper: Cherry Cobbler, Mossy Meadow, Very Vanilla, Festive Farnhouse DSP, Joyous Noel glimmer paper (copper)

Accessories: Sweetly Stitched framelits, dimensionals

Friday, October 26, 2018

Dear Santa - Stampin' Up! P.S. You're the Best

  Happy Friday everyone!  We are back with another Fab Friday challenge to celebrate the day that everyone looks forward to all week!  It's a fun sketch challenge this time around and those squares are just calling for all kinds of creative interpretations aren't they?


  Since there are only 60 days until Christmas I decided to continue with the Christmas card theme from the last few days.  You just gasped didn't you?  Time to get on that holiday to-do list!  Here's a little card that might inspire you to write your wish list and send it off to Santa at the North Pole!  Or maybe even start creating your own Christmas cards to send out to those near and dear to you.


  This was a fun one to finally put down on cardstock since I have had the idea in the back of my mind for a few months now.  This Fab Friday layout challenge seemed like the perfect one to highlight that awesome typewriter.

  Nothing crazy going on here just some classic Christmas colors paired up with some texture and glimmer.

  I hope to see your card over in the Fab Friday gallery and since you have 2 weeks to enter there aren't any excuses really!

  Thanks for looking!  Did you stamp today?

Stamps: P.S. You're the Best, Labeler Alphabet

Ink: Memento black, Mossy Meadow

Paper: Mossy Meadow, Festive Farmhouse DSP, Joyous Noel Glimmer paper, Very Vanilla

Accessories: Tin Tile embossing folder, Cherry Cobbler twine, dimensionals, snowflake sequins (retired)

Thursday, October 25, 2018

Sweet Christmas Tree - Stampin' Up! Nothing Sweeter

Christmas cards come together fairly quickly when you have a super cute stamp set and some fun Designer Series paper!  I was mixing and matching some different Holiday catalog products and came up with this fast and easy card with a hint of shine with the gold embossing.


  The card base is Cherry Cobbler and I used the really cool Sweetly Stitched framelits to made the rickrack detail.  There is also a scallop border so lots of options.  

  I love the sweet little star design from the Festive Farmhouse DSP and I have a thing for stars (ex. 1 being that I put up a Christmas tree in my front hall that has nothing but star ornaments!).  I embossed the sentiment using the Merry Christmas to All stamp set in gold.  I also embossed the Nothing Sweeter tree in gold using Tranquil Tide cardstock.

  I popped the cut out tree along with a gold foil star over the top of a length of Tranquil Tide mini ruffled ribbon.

  See told you it was a quick and easy card!

  Thanks for looking!  Did you stamp today?

Stamps: Nothing Sweeter, Merry Christmas to All

Ink: Versamark

Paper: Cherry Cobbler, Tranquil Tide, Festive Farmhouse DSP

Accessories: Sweetly Stitched framelits, gold embossing powder, mini ruffled ribbon, dimensionals

Wednesday, October 24, 2018

Classic Christmas - Stampin' Up! Lovely as a Tree

  I just realized that the week is half over and my to do list is growing by the hour!  Yikes! And how is Halloween already next week?  My kids want to trick-or-treat (though they are getting close to be being too old in my opinion) and we still need to put together costumes.  It's fun to see them still get excited but it's just one. more. thing.  Onwards and upwards isn't that the saying? Let's start checking things off that list ok?

  Onwards to a Christmas card today.  I really like how this one turned out.  I think the colors and the images are really elegant and classic and the copper gives it some fun sparkle too.


 I pulled my colors straight from the piece of beautiful Joyous Noel Specialty paper.  I love how every sheet has the copper accents on one side; you don't have to be so choosy when cutting into it all!  When I cut this layer there were plenty of the Merry Merlot berries but they ended up all covered by the other layers!

 Mint Macaron is the card base and the layer under the embossed Tin Tile panel.

  The sentiment from the carryover Night in Bethlehem set is embossed in copper onto Merry Merlot cardstock. I layered the back with a strip of copper Joyous Noel Glimmer paper and adhered it across the card front.

  The Lovely As A Tree pine tree is a true classic and never disappoints.  I stamped it twice; once in Shaded Spruce (which I used by mistake instead of Tranquil Tide but it totally works) and in Mint Macaron.  I used a blender pen to pull the green inks from the trunk and then colored the trunk with markers in Crumb Cake and filled in with Soft Suede.

  I fussy cut the trees (takes way less time than you think...don't be put off that this set doesn't have framelits) and then layered them with dimensionals.

  The final detail is the copper glimmer star on the one tree.  The Starlight thinlet set (which carried over from last year's Holiday catalog) has a nice selection of stars for different projects and the little one was just right for my tree.

  Thanks for looking!  Did you stamp today?

Stamps: Lovely As A Tree, Night in Bethlehem

Ink: Mint Macaron, Shaded Spruce, Versamark

Markers: Crumb Cake, Soft Suede

Paper: Mint Macaron, Joyous Noel Specialty DSP,  copper Joyous Noel glimmer paper, Whisper White, Merry Merlot

Accessories: Tin Tile embossing folder, copper embossing powder, Starlight thinlets, dimensionals


Tuesday, October 23, 2018

Sweater Weather Colors - Stampin' Up! Falling for Leaves

  I know I've said it many times before but I am definitely a seasonal stamper in that I don't use some colors very often outside of a particular calendar season.  Many of the Regals collection colors only see the light of day during fall and Christmas.  But now that we are in what I call sweater weather I can break out all these Regal color combos and get stamping.

I have been stamping quite the collection of Thanksgiving cards that I really need to make sure I mail out on time.  I liked this layout challenge from Just Add Ink and I used up a few die cut pieces that I had cut and never used for the leaf element on the sketch.  Adding to the collection...


  Nothing crazy going on with this card but I hadn't used the Cable Knit embossing folder in a while either because you don't go for sweater-y cards when it's 90 degrees and 90% humidity.  It's a small window here in Richmond for sweaters but I'm going to take full advantage!

  The Detailed Leaves thinlets are really so delicate and pretty that the rest of the card doesn't need a lot of extras.

  Thanks for looking!  Did you stamp today?

Stamps: Falling for Leaves

Ink: Mossy Meadow

Paper: Cajun Craze, Mossy Meadow, Crushed Curry, Very Vanilla

Accessories: Cable Knit e.f., Detailed Leaves thinlets, 5/8" burlap ribbon, braided linen trim, dimensionals


Monday, October 22, 2018

Sweet Green Christmas - Stampin' Up! Nothing Sweeter

  I had some stamping time on Friday afternoon before the boys got home from school and I was able to knock out a few challenges.  It was good to focus on some Christmas cards to get the creative juices flowing for designing projects for my next class.  My stampers are excited to see Christmas cards and I always have more ideas than time/space when it comes to Christmas!

  I was inspired by the soon to be closing challenge over at Color Throwdown.  It's it use kraft, green and white on a card.  It was really hard to make a Christmas card and not put some red on it!  Might have to try a similar design with a pop of red ribbon just to get it out of my system.  I also used the current Freshly Made Sketches challenge again as I liked the circles to anchor the main images.


  I stamped the Call Me Clover card base with The Christmas Pines stamp set using Call Me Clover ink.

  Next I stamped the little gift box in Versamark onto Crumb Cake cardstock and embossed it in white.  I colored the ribbon with an Aquapainter and Call Me Clover ink.  I tested it first with the CMC marker but that ended up too dark for my liking so the aquapainter was a little less concentrated.  I added a layer of Wink of Stella for a subdued shimmer.  

  The Christmas tree is stamped in CMC ink on Whisper White.  I cut both images out with the Stitched Shapes framelits.  A little linen thread bow on the tree top brings a bit more of the Crumb Cake color to the card.

  The sentiment is stamped and embossed in white onto Call Me Clover cardstock and flagged before it's tucked under the popped up tree circle.

  I think this card design would be cute in a variety of color combos and mix and match the images in the circles to have a whole variety of coordinating but slightly different designs.

  Thanks for looking!  Did you stamp today?

Stamps: Christmas Pines, Nothing Sweeter

Ink: Versamark, Call Me Clover

Paper: Call Me Clover, Whisper White, Crumb Cake

Accessories: Stitched Shapes framelits, linen thread, Wink of Stella, dimensionals, white embossing powder


Friday, October 19, 2018

Lacy Leaves in Purples - Stampin' Up! Detailed Leaves Thinlets

  Wow!  We went from temps in the 80s last week to waking up to 39 degrees this morning.  At this rate we'll be shoveling a foot of snow by Sunday!  Let's hope that it levels off so we can enjoy some cool, sunny fall days.

  The Freshly Made Sketches challenge this week inspired me to make today's card.  I like the simplicity of the 2 circles even though I didn't end up using the circles but I thought the beautiful lacy leaf in the Detailed Leaves thinlets would be great in this sketch.


  There really isn't much stamping on this card but there is A LOT of ink!  Let's start with those leaves!  I used a few small pieces of Shimmery White cardstock and with an Aquapainter just painted a bit of all these purples onto the cardstock.  I was thrilled when the new Stampin' Up! color collections were released over the summer and that we gained some gorgeous purples.  I love that we now have some pinky purples and some blueish purples....so many more choices!

  I used Fresh Fig, Gorgeous Grape, Highland Heather, Blackberry Bliss and Rich Razzleberry.  I dried the cardstock with heat gun and then cut out 2 leaves.  Since the leaves are so pretty I didn't want to have too much other color so I used a Whisper White thick card base.  Then I layered a bit of Fresh Fig with some Wood Textures DSP.

  The sentiment is from Varied Vases and is stamped in Fresh Fig.  The leaves were adhered with the fin tip glue and a little knot of Braided Linen trim is on one stem.

  I hope you all have a fun weekend with a lot of stamping!

  Thanks for looking!  Did you stamp today?

Stamps: Varied Vases

Ink:  Fresh Fig, Gorgeous Grape, Highland Heather, Blackberry Bliss, Rich Razzleberry

Paper: Whisper White thick, Shimmery White, Fresh Fig, Wood Textures DSP

Accessories: Detailed Leaves thinlets, Braided Linen trim


Thursday, October 18, 2018

Glam Fall Thank You - Stampin' Up! Rooted in Nature

I got inspired yesterday by the newest challenge at the Card Concept.  It's a glam pink and gold fall theme.  I wish I had a pumpkin stamp so I could have recreated the pink gold dipped pumpkin in the challenge graphic (below) but I'm pumpkin-less this season so I went with a woodsy fall theme in pinks and gold.


  I haven't used the Woodland embossing folder in ages so I pulled that one out to go with my woodsy theme.  I embossed a piece of Very Vanilla and then sponged some (non SU) gold ink on just the raised parts.  I then adhered that to a Petal Pink card base.

  Next I die cut the various pink pieces using the Detailed Leaves thinlets.  The band across the front is Flirty Flamingo and the 2 leaves are Petal Pink and Powder Pink.  I'm not generally a pink person but I kind of like these 3 together with a heavy dose of Vanilla to balance it all out.

  I layered the leaves over the top of a gold embossed wood cut image from Rooted with Nature.  The sentiment is from Tropical Chic and is stamped in Powder Pink.  The last bit of glam is vanilla/gold ribbon which is retired but went perfectly with the theme so I couldn't say no.

  Thanks for looking!  Did you stamp today?

Stamps: Rooted in Nature, Tropical Chic

Ink: gold, Versamark, Powder Pink

Paper: Petal Pink, Powder Pink, Flirty Flamingo, Very Vanilla

Accessories: Detailed Leaves thinlets, Woodland embossing folder, vanilla/gold ribbon, dimensionals


Wednesday, October 17, 2018

Bold Christmas - Stampin' Up! Nothing Sweeter

 Sometimes good stamping ideas don't translate into good cards and I think my project today is one of them.  I like the colors and I like the stamp set but I just don't think I ended up doing either justice!  But that's the way of it sometimes and we just need to keep on stamping!  Since this is the only card in my unshared folder it's what you get and hoepfully tomorrow will be better!

  Part of the problem here is maybe trying to combine 2 challenges; color combo and layout.  They both ended last week but I liked both and wanted to see what I could come up with.  I think I might try this design again but with more traditional colors.


  On a better note the Take Your Pick tool is a rock star!  I used it to get my sequins placed just where I wanted them.  Definitely check it out on page 30 of the Holiday catalog.  

  Thanks for looking!  Did you stamp today?

Stamps: Nothing Sweeter, Itty Bitty Greeting

Paper: Whisper White, Blueberry Bushel

Ink: Call Me Clover, Lemon Lime Twist, Versamark

Accessories: sequins, Quilt Top embossing folder, silver wmbossing powder, Sweetly Stitched framelits, silver/white baker's twine


Monday, October 15, 2018

Fall into Christmas - Stampin' Up! Falling for Leaves

  We are finally feeling some cool fall weather here in the RVA and it is glorious!  I wore pants this weekend...what you say? Pants?  I know it's crazy talk but there were jeans happening yesterday!  Since tropical storm/former hurricane Michael blew through on Thursday the weather has been much more autumn like and I am loving it.  I even bought my first (but not my last) gallon of apple cider.

  When the weather gets cooler I don't feel like such a weirdo sharing Christmas cards so that's what you're getting today!  And check out the title of this post "fall into Christmas"... see what I did there?  I'm using the Falling for Leaves set to create a Christmas card and I love how it turned out except for one small part but we'll get to that later!


  The current challenge over at SUO Challenges is to create a project with items from the Holiday catalog.  Done. And done. 

  This card starts off with a Mossy Meadow card base layered with a piece of Festive Farmhouse DSP.

  I used the open leaf stamp from Falling for Leaves and stamped it in Mossy Meadow all over a piece of Very Vanilla.  Then I used my Old Olive Stampin' Blends to color them in for a bit of custom DSP.  I love that this stamp set has so much versatility!  After I finished coloring I backed that piece with a layer of Cherry Cobbler.

  I used 2 different dies to create the accents around the sentiment.  The Detailed Leaves thinlets are used for the delicate open leaves in Mossy Meadow and the Pretty Pines thinlets are used to cut the little berry sprigs from Joyous Noel Glimmer paper in Merry Merlot.

  The sentiment stamp is from the Sincerely Santa which goes with the Sincerely Santa tag kit.  These stamps can all be used on card projects as well.  They are a really fun mix of fonts.  And now for the part that I don't like....I cut the sentiment out a bit crooked!  For some reason I have a hard time lining up those oval framelits!  Oh well!  Just tip your head a bit when looking at it!

  So I think I covered this challenge really well...except for a few dies everything else is from the Holiday catalog.

  Thanks for looking!  Did you stamp today?

Stamps: Falling for Leaves, Sincerely Santa

Ink: Mossy Meadow, Cherry Cobbler

Stampin' Blends: Old Olive - light and dark

Paper: Mossy Meadow, Cherry Cobbler, Joyous Noel Glimmer, Festive Farmhouse DSP, Very Vanilla

Accessories: Detailed Leaves thinlets, Pretty Pines thinlets, Layering Oval framelits, Stitched Shapes framelits, dimensionals

Friday, October 12, 2018

Caffeinated Halloween - Stampin' Up! Coffee Cafe - Fab Friday 148

Happy Friday stampers!  Do you have your fun weekend plans all organized?  I hope you added some stamping time in so that you can join in with the Fab Friday challenge!  You've got nearly 2 weeks to play along so no excuses!

We have some fun colors this time!


With these colors you could go for the completely obvious Halloween theme like I did or really challenge yourself to a different kind of card!

Since Halloween is on a Wednesday this year I thought it might be appreciated if I sent in a card and a Starbucks gift card to Alex's teacher.  I'm thinking that she might need a big coffee to help her get through the day dealing with a bunch of sugar hungover 5th graders!  And it doesn't hurt that her favorite color is purple!


  The card base is Basic Black.  Then a layer of Pumpkin Pie topped with a Whisper White panel embossed with the Corrugated embossing folder.  Then a narrow Pumpkin Pie band across the middle.  Definitely use tear tape when adhering panels or adhering to panels embossed with the Corrugated folder as I didn't find that regular snail worked very well.

  The coffee cup, lid and sleeve are from the Coffee Cafe set which I haven't used in forever but is still super cute.  The cup outline and lid are stamped in Gorgeous Grape on Whisper White and the sleeve is stamped in black on Gorgeous Grape cardstock.  The sleeve is scored to give it that corrugated look.

  On the coffee cup I stamped the only Halloween sentiment I own from Itty Bitty Greetings in black. Next is a little Pumpkin Pie maple leaf from the Colorful Seasons stamp set.  I added a black baker's twine bow to bring a bit more black to the cup.

  For the sentiment I pulled out my Another Wonderful Year and stamped this appreciation greeting in black then punched it out with Everyday Label punch.  We don't have Stampin' Blends in Gorgeous Grape yet but the Highland Heather is a good substitute so I used them to fill in the outline on the sentiment.

  I definitely like these colors but confess that I don't think I could do anything but Halloween with them so I'm looking forward to seeing all the creativity in our Fab Friday gallery.  Check out the rest of the Fab Friday Design Team cards then play along!

  Thanks for looking!  Did you stamp today?

Stamps: Coffee Cafe, Another Wonderful Year, Colorful Seasons, Itty Bitty Greetings

Ink: Black, Gorgeous Grape, Pumpkin Pie

Blends: Highland Heather - light & dark

Paper: Basic Black, Gorgeous Grape, Pumpkin Pie, Whisper White

Accessories: Corrugated embossing folder, Everyday Label punch, Seasonal Layers thinlets, black baker's twine, dimensionals


Thursday, October 11, 2018

Trees & Leaves - Stampin' Up! Rooted in Nature

  I have had cause lately to send quite a few thinking of you or sympathy cards so my on hand supply is getting dangerously low.  I decided to re-stock a bit and came across the Paper Players challenge to make a project using trees and leaves.  Easy enough theme for this time of year even if everything is still green around here.  I went with the green theme for my thinking of you card.


  This card started with the panel of embossed Crumb Cake which ended up on my 'card parts' pile after it was rejected from another project.  It's embossed with the Tin Tile embossing folder (my current favorite!) and then lightly sponged with Crumb Cake ink.

  I backed the embossed panel with a bit of Soft Sea Foam and layered that onto a Crumb Cake card base.  I also used Soft Sea Foam to stamp and die cut the 2 leaves on the edge of the main panel.  It's a nice light spring-y green but I think it pairs nicely with the darker Shaded Spruce. I used a bit of narrow Shaded Spruce cardstock to anchor the center of the card.

  For the large oval (cut with the Layering Oval framelits) I stamped the large tree from Rooted in Nature in Crumb Cake then overstamped the sentiment in Shaded Spruce ink and then popped it up with dimensionals.

  The final (and only) adornment is the bit of knotted Nature's twine on the leaf stems.

  I hope I won't be needing to send this one out any time soon but if I must at least I'm prepared!

  Thanks for looking!  Did you stamp today?

Stamps: Rooted in Nature

Ink: Shaded Spruce, Soft Sea Foam, Crumb Cake

Paper: Shaded Spruce, Soft Sea Foam, Crumb Cake, Whisper White

Accessories: Nature's Roots framelits, Tin Tile embossing folder, Layering Oval framelits, Nature's twine, dimensionals


Wednesday, October 10, 2018

Fall Birthday Wreath - Stampin' Up! Falling for Leaves

  I get a lot of inspiration for stamping in my day to day life.  I see cool color combinations at Target in the bedding and decor departments.  At church I look at peoples clothes and jot down the Stampin' Up! colors to try out.  When I take my mom shopping at the local quilt stores I always leave with a list of colors and photos of fabric designs.  I also seem to find colors or styles that jump out at me in the Company Store catalog.  This bedding is what inspired today's card.  I liked the cluster of leaves and flowers in the brown tones with the subtle pop of the bluish/gray color.

  I thought that the Falling for Leaves bundle would be perfect to create a mostly monochromatic card in this style.  The coordinating Detailed Leaves thinlets are perfect for a variety of leaves.

  Once I saw that the current Just Add Ink challenge was to use vellum I got to work!  The card base is Very Vanilla thick then a layer of Very Vanilla embossed with the Tin Tile embossing folder (my favorite!!).  Using a sponge I lightly brushed some Crumb Cake ink onto the embossing to highlight the beautiful pattern.

  The sentiment circle is Very Vanilla and I stamped the large leaf stamp in Balmy Blue (not quite the same as the bedding but SU hasn't come out with this bluish/gray shade yet!) after stamping off once.  It gives a nice light pattern behind the Soft Suede sentiment from the Colorful Seasons stamp set.


Next, I cut a bunch of leaves out of Crumb Cake, Soft Suede and vellum.  For the Balmy Blue leaves I stamped off once so that the image would be lighter.  I used tear tape across the back of the circle and then added my die cut leaves all around it.  I even added a few little loops of the Nature's Twine in Crumb Cake for some more texture.

  After all the leaves were added I popped the whole wreath up on dimensionals on the card front.  This wasn't a hard card to make just a bit time consuming with all the die cutting.  But I think it turned out decently.

  Head out into the world and see where you can find inspiration for your next card!

  Thanks for looking!  Did you stamp today?

Stamps: Falling for Leaves, Colorful Seasons

Ink: Crumb Cake, Soft Suede, Balmy Blue

Paper: Very Vanilla thick, Very Vanilla, Crumb Cake, Soft Suede, Balmy Blue, vellum

Accessories: circle punch, Detailed Leaves thinlets, Tin Tile embossing folder, Nature's twine, dimensionals