Friday, July 18, 2025

Good Vibes - Stampin' Up!® Month by Month

   I've been participating in the Stampin' Up!® Virtual Album Retreat the last few days and as a baby scrapbooker I'm learning a lot and having a lot of fun with it but I'm also coming to realize that crafting after 10pm is not for me! Stampin' Up!® is trying to accommodate many of the time zones and for some of us that means very early mornings or late nights if you're following along live!  I'm definitely more of daytime/early evening crafter!  The later it gets, the harder it is to adhere things straight!  But the great thing is that I can go back and watch each class when it suits me to do it.  I'll get around to sharing the pages once I've got them put together, maybe a video to show all the cool things I learned!  Anyway I've been using the stamp sets that we're using on the scrapbook pages on some cards because who doesn't love a product that can be used on multiple projects!?  The Month by Month set has a lot of what I would call accent images but also has some flowers that are great for cards as well.  I'm using the closed TGIF Challenge layout for today's card.  


  I picked out the DSP patterns first and then pulled in the rest of the products to complement them.  I liked the Secret Sea pattern with the floral from the Florals in Bloom DSP so I used those for the overlapping corner layer.  I used the retired Basic Borders dies to get the long curved shapes.  

  I layered the DSP onto a Cloud Cover base that has a second layer of Cloud Cover embossed with the Glass & Garden embossing folder.  I used the folder twice to get the pattern to cover the whole panel.  

 The flowers are the images from the Month by Month stamp set from the virtual album retreat.  I stamped the large one in Timid Tiger then colored it with Blends.  The smaller flowers are stamped in Summer Splash and also colored in.  I got a bit heavy handed with the blending and ended up losing some of the image detail so if I were to re-create this one I would use a darker ink for the stamped image or just get better at coloring lol!

  The flowers are fussy cut then popped on dimensionals along with some die cut leaves from the Impressions Abloom dies in Secret Sea.  

  The sentiment from The Right Words is stamped in Secret Sea and added to the corner to follow the sketch.  A few Secret Sea Flat Pearls accent the Summer Splash flowers.

 Thanks for looking!  Did you stamp today?

All of the current supplies used can be purchased in my ONLINE STORE.

Stamps: Month By Month (Online Exclusive), The Right Words (Online Exclusive)

Ink: Timid Tiger, Summer Splash, Secret Sea

Blends: Peach Pie light & dark, Summer Splash light & dark

Paper: Cloud Cover, Basic White, Secret Sea, Florals in Bloom DSP 

Accessories: Garden & Glass embossing folder (Online Exclusive), dimensionals, 2025-2027 In Color Flat Pearls, Impressions Abloom dies, Basic Borders dies (retired)


Thursday, July 17, 2025

Curtis the Cat Birthday - Stampin' Up!® Month by Month Alphabet

    My boys' birthdays are 4 days apart so there is always a lot of birthday celebration during birthday week.  And So. Much. Cake.  It's hard to get through so much birthday dessert no matter how good it is.  We currently have most of a SpongeBob cake, most of an assorted cheesecake platter and a key lime pie that I had bought for an event that ended up being cancelled.  I'm going to have to make room in the freezer I think!  Anyway... my card today is for my oldest on his birthday.  I decided to do a punch art cat that looks like his cat since the SpongeBob card came out so well.


  Meet Curtis the Cat.  He's actually not this chubby in real life but the shape worked and I used the dies that I had on hand.  I started with a Balmy Blue background embossed with the Forever Plaid embossing folder.   The stripes on Curtis are created with an aqua painter and Peach Pie ink as well as some white craft ink sponged on various areas to mimic Curtis' white splotches.  The edges of all the pieces are sponged with Pumpkin Pie ink to give him a fuzzy appearance.


  The eyes came out kind of crazy looking; he doesn't look this unhinged in real life lol!  The whiskers are just super thin cuts of Basic White.  The stamped meow's are made with the Month By Month Alphabet set that comes in the Stampin' Up! Virtual Album Retreat kit.


  He may look like he wants you to rub his belly but don't be fooled!!  lol!

  Thanks for looking!  Did you stamp today?

All of the current supplies used for this card can be purchased in my ONLINE STORE.

Stamps: Monthy By Month Alphabet

Ink: Peach Pie, White craft, Gray Granite, Petal Pink, Pumpkin Pie

Paper: Balmy Blue, Peach Pie, Basic White, Basic Black, Soft Sea Foam

Accessories: Forever Plaid embossing folder, Impressions Abloom dies (body & tail), circle punches/dies (head, eyes, nose, cheeks), Party Banners dies (ears), oval punch/dies (paws), dimensionals, aquapainter

Wednesday, July 16, 2025

New at SU! - Blooming Phrases Birthday


The New at SU Blog Hop is back this month with some fabulous inspiration for birthdays!  We've got demonstrators from around the world sharing fun, creative projects to get you inspired for your own crafting.

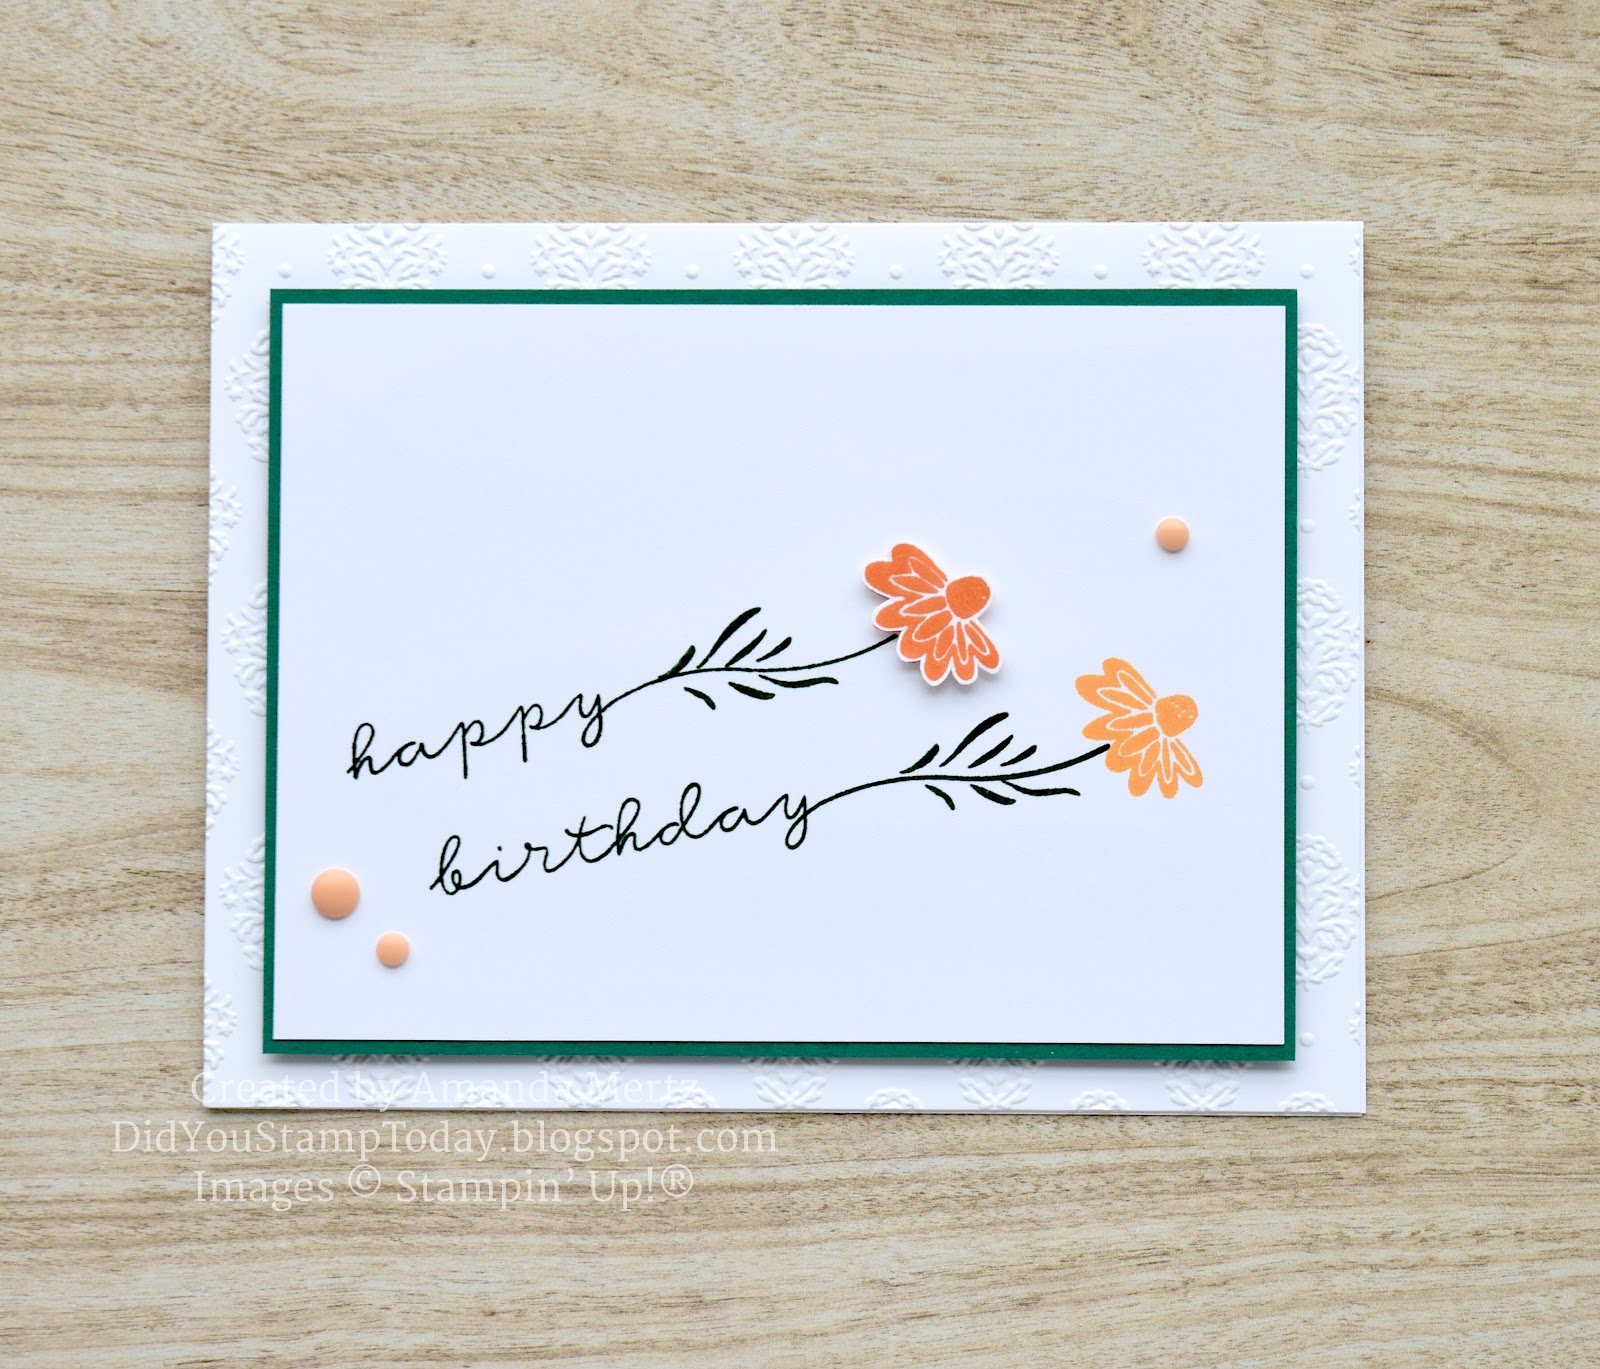
I decided to use the Blooming Phrases stamp set to make a set of birthday card that will get me through the next month of cards that I need to send out.  Using many of the same supplies for each card made this set come together really quickly!


 All of my cards use the Damask Designs embossing folder in the background for a subtle bit of pattern.  The Shaded Spruce works well for the stems and leaves and makes the flower colors just pop!


  I used the same layout for the sentiment on each card and just changed up the flower type and colors. 


  Each card has a color duo that is a "light" and "dark" and helps keeps the design clean and simple.


  One flower on each card is fussy cut and popped up for a little bit more dimension.


  The embellishments are very simple as well with just a few gems in one of the colors added around the sentiment/flowers.


  Take a look at your birthday calendar and plan out what cards you need and grab the Blooming Phrases stamp set to get them made!

  Follow the links below to hop around and see all the lovely projects from the New at SU! group!

  Thanks for looking!  Did you stamp today?

Stamps: Blooming Phrases (Online Exclusive)

Ink: Shaded Spruce, Daffodil Delight, Lemon Lolly, Timid Tiger, Peach Pie, Strawberry Slush, Pretty in Pink, Highland Heather, Fresh Freesia, Versamark

Paper: Basic White, Shaded Spruce

Accessories: Damask Designs embossing folder, dimensionals, white embossing powder, white baker's twine, assorted gems


Tuesday, July 15, 2025

Record Year - Stampin' Up! The Right Words

   My card today was going to be my oldest's birthday card until I had a better idea I wanted to do instead.  He's really into vinyl records and has already amassed quite the collection so I thought a record themed card would be fun.  I used the Sunday Stamps challenge layout.  Those circles were perfect for this theme!


I used a piece of retired Pattern Party DSP for the background.  Following the sketch I added two narrow strips of Basic Black.

For the records I used the retired Sale-a-Bration set Textures & Frames.  The open circle image is stamped in Versamark on Basic Black and then embossed with clear embossing powder.  I made 3 and then punched them out.  

 Smaller circles in Pool party, Shy Shamrock and Blueberry Bushel are adhered to the center of the records and then I used a small handheld circle punch for the middle.

  The circles are arranged following the sketch with the Blueberry Bushel one is popped up.  The sentiment from The Right Words is embossed in black on a strip of Pool Party and is popped on dimensionals.

 Since this was to be for a 19 year old boy I kept the embellishments to a minimum and just added a black Adhesive-Backed Sparkle Gem.

  Thanks for looking!  Did you stamp today?

All of the current products used to make this card can be purchased in my ONLINE STORE

Stamps: The Right Words (Online Exclusive), Textures & Frames (retired-SAB)

Ink: Versamark

Paper: Basic Black, Pool Party, Shy Shamrock, Blueberry Bushel, Pattern Party DSP (retired)

Accessories: clear embossing powder, dimensionals, circle punches, black embossing powder


Monday, July 14, 2025

Hello Flora - Stampin' Up! Extraordinary Flora

   When I saw the newest Paper Players challenge I knew immediately which set I wanted to use and it didn't disappoint!  These challenge colors and the Extraordinary Flora bundle are a perfect match! Pretty Peacock, Fresh Freesia and Lemon Lolly are a great combo!


  I started with a Pretty Peacock base and then used the Perennial Postage dies to cut a layer of Basic White and topped it with a piece of Floral Impressions DSP in this subtle Fresh Freesia pattern.

 I wrapped a bit of Lemon Lolly sheer ribbon around the panels for a bit of shine.  The Extraordinary Flora is stamped in Basic Gray and then I colored in a bunch of the flowers and leaves using my Blends markers in the challenge colors.  After they were colored I die cut all the images and then layered them to the side of the rectangle panel with some popped on dimensionals.

  The sentiment is from the Simply Said set and is stamped in Basic Gray and then fussy cut and popped.  I added a retired faceted gem in Pretty Peacock as the finishing touch.

  Thanks for looking!  Did you stamp today?

All of the current supplies used to make this card can be purchased in my ONLINE STORE.

Stamps: Extraordinary Flora, Simply Said

Ink: Basic Gray

Blends: Pretty Peacock light & dark, Lemon Lolly light & dark, Fresh Freesia light & dark

Paper: Pretty Peacock, Basic White, Floral Impressions DSP

Accessories: Perennial Postage dies, Extraordinary Flora dies, dimensionals, Lemon Lolly Sheer Ribbon (retired), faceted gem (retired)


Sunday, July 13, 2025

Vintage Blooms - Stampin' Up!® Gallery Blooms

 I originally started this card to play along with the Freshly Made Sketches challenge that I used a few days ago but by the time I finished the design it was a bit too layered and fussy to be considered 'fresh' so while it doesn't fit the challenge I still love how it turned out.  Basic Beige works great for a vintage feel when Basic White is too 'white'!  


  I just love this Cloud Cover and Early Espresso color combo along with the different textures!  I started with an Early Espresso base then added a layer of Early Espresso embossed with the Damask Designs embossing folder.  I was not paying attention and embossed the panel sideways but I decided to use it as is instead of re-doing it.  I should have just gone with a landscape layout instead but oh well! I added 2 circles of the Beautiful Gallery DSP in the corners and trimmed off the over hang.  A bit of Faux Seam Binding Ribbon goes across the middle of the panel.

  The flower is stamped in Early Espresso onto the Basic Beige and then is die cut with a Spotlight on Nature circle die.  I used Cloud Cover Blends to added some color to the blooms and then popped it up on dimensionals over some leaves cut with the Beautiful Motifs dies.

  The sentiment is stamped on a strip of Cloud Cover and embellished with a retired gem.  Finally a fork bow is added to the side of the flowers to finish this design.

Thanks for looking!  Did you stamp today?

All of the current supplies used to make this card can be purchased in my ONLINE STORE.

Stamps: Gallery Blooms, Beautiful Motifs

Ink: Early Espresso

Blends: Cloud Cover light & dark

Paper: Early Espresso, Cloud Cover, Basic Beige, Beautiful Gallery DSP

Accessories: Spotlight on Nature dies, Beautiful Motifs dies, dimensionals, circle punch, Cloud Cover Faux Seam Binding ribbon

Saturday, July 12, 2025

SpongeBob Birthday - Stampin' Up!® Punches & Dies

   My card today has no stamping but uses all Stampin' Up! products.  When I have a need for a card and I have no stamps that work for the theme, punch art always comes to the rescue!  My youngest asked for a SpongeBob cake for his birthday.  People, this boy just turned 17.  Whatever. SpongeBob cake was ordered and then I figured I might as well make it a theme for his card too!  I browsed Pinterest for a hot minute for some inspiration then pulled out my Daffodil Delight cardstock and a bunch of punches and got to work!


  I think it turned out pretty good and even my son was impressed so I guess that's a win for mom!  lol.  I started with a Daffodil Delight card base then added a layer of Daffodil Delight embossed with the retired Tasteful Textile embossing folder for that sponge-y texture.  Then I added some small punched circles in Crushed Curry.

  The eyes came together with a bunch of punched and die cut circles.  I had to play around a bit with sizes to see what worked.  The eyelashes are just very thinly cut pieces of Basic Black.  I don't have a white gel pen at the moment (they always crap out on me after using them just a few times!) or I would have added some highlights to his eyes to make them look a bit more finished.

  Next are the cheeks and the mouth; more circles which are sponged around the edges for depth.  The nose is made the same way. The mouth is just a partial circle that I used another circle die to cut a sliver from.  The teeth are just small pieces of Basic White.

  The shirt is a strip of Basic White and the collar is made from a square piece that was cut in half diagonally.  I ran my Basic Black Stampin' Write marker around the points of the collar pieces to make them more defined.  The tie is a strip of Real Red and the tie knot is just hand trimmed.

  I probably won't ever need a SpongeBob card again but if I did I would try to work his brown pants in too to help balance out All. That. Yellow. 

  Thanks for looking!  Did you stamp today?

All of the current products used to make this card can be purchased in my ONLINE STORE.

Stamps: none

Ink: Daffodil Delight, Basic Black marker

Paper: Daffodil Delight, Crushed Curry, Basic White, Basic Black, Azure Afternoon, Real Red

Accessories: various circle punches, various circle dies, Tasteful Textile embossing folder (retired)

Friday, July 11, 2025

Buttered Popcorn Appreciation - Stampin Up!® Poppin' By

   I used the Poppin' By bundle to make some customer thank you cards the other day.  This is such a fun set that I made a few extra to keep in my stash!  


  I started with a Real Red card base then a wide layer of Beautiful Bokeh DSP.  This DSP was just the right amount of pattern to make it interesting without being too busy.  I cut some of the film strips and added them behind some punched Basic White circles.

  The popcorn pieces are stamped in Lemon Lolly and then die cut and popped on dimensionals.  The popcorn guy was stamped twice, once in Real Red then again in Lemon Lolly.  I trimmed down the Lemon Lolly bit and added it to the die cut box.  Some Basic Black glasses are added for fun.

  Finally the sentiment is stamped next to the popcorn guy.  

  Thanks for looking!  Did you stamp today?

All of the supplies used to make this card can be purchased in my ONLINE STORE.

Stamps: Poppin' By (Online Exclusive)

Ink: Real Red, Memento Black, Lemon Lolly

Paper: Real Red, Beautiful Bokeh DSP, Basic White, Basic Black

Accessories: circle punches/dies, dimensionals, Poppin' By dies (Online Exclusive)

Thursday, July 10, 2025

Blooming Thanks - Stampin' Up! ® Blooming Phrases

 I've been busy working on projects for an upcoming blog hop as well as making my boys birthday cards all of which I'll be sharing in the next week or so.  But I've also been stamping along with a few challenges to re-stock my card bins after recently raffling off and selling 110 cards.  Today I'm combining the Freshly Made Sketches challenge and my latest customer color challenge.  I haven't used the Blooming Phrases set hardly at all since I've gotten it so I've been playing around with this sweet sentiment set that can be found in the Online Exclusives.


  I started with a Basic White thick card base and then embossed a layer of Basic White with the Soft Waves embossing folder.  I used the Around It All dies to cut 3 wonky circles in my customer challenge colors.  The 2 partial circles are slightly larger than the center circle.

  I stamped flowers from the Bloom Phrases set and then stamped and embossed in white the thanks from the same set.

All of the circles are popped on dimensionals and the overhang of the corner circles are trimmed off.  I added a few retired glittery sequins for just a bit of embellishment.

  Thanks for looking!  Did you stamp today?

All of the current supplies used to make this card can be purchased in my ONLINE STORE.

Stamps: Blooming Phrases (Online Exclusive)

Ink: Highland Heather, Versamark, Crushed Curry

Paper: Basic White thick, Basic White, Highland Heather, Crushed Curry, Balmy Blue

Accessories: Soft Waves embossing folder, Around It All Dies (Online Exclusive), white embossing folder, dimensionals, glittery sequins (retired)


Wednesday, July 9, 2025

20% Two-Toned Cardstock - July 9 - 11 Only


  Now is the perfect time to stock up on Two-Toned cardstock!  It comes in all the Stampin' Up! colors as well as variety packs that coordinate with the Scrapbooking Workshop Kits and they are all 20% off!

  Tear, sand and crumple it to show the white core or just use the light and true color sides as layers to your next creation.  It's like having a "stamped off" version of all the colors!

  Place your order now in my ONLINE STORE!

Tuesday, July 8, 2025

Sweet Treat - Stampin' Up! More Than Autumn

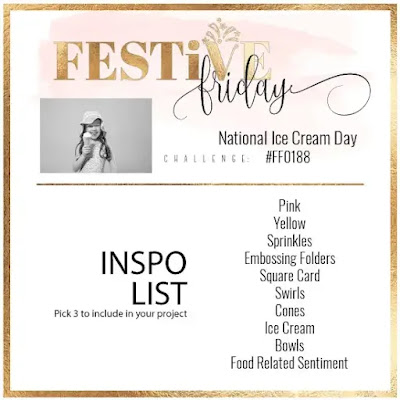
   I'm getting away from flowers for today's card but it's still a sweet one thanks to the Festive Friday challenge prompts for National Ice Cream Day.  Alas I don't have any ice cream stamps at the moment but I made it work with doughnuts instead!  The layout is courtesy of the Just Add Ink challenge.


I'm using the prompts of pink, yellow, sprinkles, embossing folder, and food related sentiment.  I started with a full card front sized panel of Florals in Bloom DSP. Then I cut a wonky circle with the Around It All dies and embossed it with the Forever Plaid embossing folder. Before adhering I tucked a length of Strawberry Slush Faux Linen Ribbon behind it to follow the sketch.

I stamped the doughnuts in Pecan Pie and then colored them with Stampin' Blends.  Once they were colored I cut them out and arranged them around the circle with sentiment in the center.  The sentiment is a combo of die cut and stamped and fussy cut.  The stamped bit is popped on dimensionals.


  Finally for a bit of bling I added a few Strawberry Slush & Pretty in Pink Gems to the circle.

  Thanks for looking!  Did you stamp today?

All of the supplies used to make this card can be purchased in my ONLINE STORE.

Stamps: More Than Autumn (Online Exclusive)

Ink: Pecan Pie, Strawberry Slush

Blends: Pecan Pie light, Strawberry Slush light & dark, Lemon Lolly light & dark

Paper: Florals in Bloom DSP, Basic White, Pecan Pie

Accessories: More Than Autumn dies (Online Exclusive), Forever Plaid embossing folder (Online Exclusive), Faux Linen Ribbon, dimensionals, Around It All dies (Online Exclusive)


Monday, July 7, 2025

Birthday Wishes Blooms - Stampin' Up!® Impressions Abloom

   I finally got to creating some new projects the last few days getting inspiration from challenges.  With all the stops and starts to my stamping so far this summer (it's nice to travel but being away makes it hard to stay consistent with blogging!) I forget what I've last used and end up showing the same products a few days in a row.  So I hope you like seeing more of the Impressions Abloom bundle because I've used it again to join in with Color Throwdown and their fun color challenge.  They've prompted us to use orange, fuchsia and kraft.  I've translated those to Stampin' Up!® Pumpkin Pie, Berry Burst, and Crumb Cake.


  I really love how the rich colors just pop against the neutral Crumb Cake.  The different bits of texture are fun too!

  I started with a Crumb Cake base, then embossed a smaller layer of Crumb Cake with the Eyelet embossing folder.  Using 2 sizes of the Spotlight on Nature Dies I cut one in Berry Burst and the second in Basic White.  The sentiment from the Simply Said stamp set is stamped in Crumb Cake on the Basic White Circle.  Before adhering all these first layers together I wrapped a length of retired Crumb Cake seam binding ribbon around the base layers.

  Two different flowers from the Impressions Abloom set are stamped in the challenge colors then die cut using the textured accent die along with the outline die.  The flowers are arranged around the circle with some being popped on dimensionals.  A few retired Earth Tones Shimmer Gems in Crumb Cake add a bit of sparkle and the card is finished with a seam binding fork bow.

  Thanks for looking!  Did you stamp today?

All of the current supplies used to make this card can be purchased in my ONLINE STORE.

Stamps: Impressions Abloom (Online Exclusive), Simply Said

Ink: Crumb Cake, Berry Burst, Pumpkin Pie

Paper: Crumb Cake, Berry Burst, Pumpkin Pie, Basic White

Accessories: Eyelet embossing folder, Spotlight on Nature dies (Online Exclusive), Impressions Abloom (Online Exclusive), dimensionals, seam binding ribbon (retired), Earth Tones Shimmer Gems (retired)


Sunday, July 6, 2025

Rustic Impressions - Stampin' Up!® Impressions Abloom

   I'm pretty sure my card today was one I made for a challenge but seeing as it was made more than 2 weeks ago I really have no idea which one anymore!  The Impressions Abloom bundle still is a 'go to' set to use for all types of projects.  I thought the flowers would look nice against a rustic wood background so I paired it up with a piece of Country Woods DSP which carried over into the 2025-2026 Annual Catalog.  


   There isn't really much stamping or technique on this card; just the sentiment that is fussy cut and popped on dimensionals.  The flower die cuts are layered for a nice full looking flower and I love the color combo of Flirty Flamingo and Petal Pink.  They really pop against the woodgrain.


  A few retired Petal Pink sequins are the only embellishment and they add just the right amount of 'bling' to this more rustic card!

  Thanks for looking!  Did you stamp today?

All of the current supplies used on this card can be purchased in my ONLINE STORE

Stamps: Impressions Abloom (Online Exclusive)

Ink: Crumb Cake

Paper: Crumb Cake, Flirty Flamingo, Petal Pink, Daffodil Delight, basic White, Old Olive, Country Woods DSP

Accessories: Impressions Abloom dies (Online Exclusive), dimensionals, Petal Pink sequins (retired)


Saturday, July 5, 2025

Extraordinary Wedding - Stampin' Up! Extraordinary Flora

 The Extraordinary Flora bundle and washi tape are apparently a huge hit as they are out of stock until later this month.  My stampers really enjoyed seeing these products in action at my last class.  It's so fun seeing how the washi tape images line up perfectly to be cut by the big die giving you almost instant flowers to use on your projects.  Add in the stamps and there are really a lot of possibilities!  Sign up in the online store to get a notification when these items are back in stock so you don't miss out!


  This card starts with a Pool Party base stamped with the Extraordinary Flora stamp in Pool Party ink.  The Party Banners dies and a bit of Two Toned Pool Party card stock team up to make the banner. The lighter side is used and a sanding block was was taken to the edges to show off a bit of the white core.  Such a fun was to use this paper!  The sentiment is stamped in Pool Party along the bottom of the banner before popping it on dimensionals.

  The trick to die cutting the washi tape is to first adhere it to a piece of Basic White which makes the colors pop beautifully.  There are 2 sets of colors, each length about 5 1/2" so you can alternate between Petunia Pop and Strawberry Slush blossoms. I make sure to use a bit of painters tape or a post it to keep my die from sliding on the washi.  Even with a magnetic platform the die slides a bit more than normal with the slickness of the washi.  And you don't want to waste any of these beautiful flowers!

  The flowers are added around the banner, to the inside of the card and even to the envelope.  Some are popped on dimensionals. You can even peel the washi tape away from the Basic White backing and adhere the images to the envelope for a nice smooth finish.  Some Strawberry Slush & Pretty in Pink Gems are added for a bit of sparkle.

Thanks for looking!  Did you stamp today?

All of the supplies used to make this card can be purchased in my ONLINE STORE.

Stamps: Extraordinary Flora

Ink: Pool Party

Paper: Pool Party, Two Toned Pool Party, Basic White

Accessories: Extraordinary Flora washi tape, Extraordinary Flora dies, Party Banner Dies, dimensionals, Strawberry Slush & Pretty in Pink Gems (Online Exclusive)


Thursday, July 3, 2025

Poppin' By Pop Up Card - Stampin' Up! Poppin' By - TUTORIAL

 I have such a fun card to share with you today including a video tutorial!  My stampers made this one at class last week and I think they were really surprised with how easy it was.  We made a fun pop up card using the Poppin' By bundle.  It's an adorable popcorn themed bundle so it was the perfect set to use to teach this technique!


  The front of the card looks just like a regular hello card that you might send to a friend to brighten their day.  I chose to use Cloud Cover card stock for the card base and then used Lost Lagoon and a circle of Florals in Bloom DSP for accents.  The Textured Notes dies gave some nice detail to the two rectangles.


  And now the fun part!  When you open the card you have a fun pop up element with more pieces of popcorn!  My video below walks you through making the inside pop up panel and gives you all the measurement as well tips and tricks to putting this card together.  It's easier than it looks and the cutting measurements can be used again and again for all different kinds of pop up cards!  Think flowers, bees, birds, trees, snowflakes....really anything you want can be popped up!


  Here are the measurements written out but definitely follow along with the video to see step by step!

Insert measures 5 ¼” x 8 ¼” - fold in half like a card base

Cut from folded side down (or up depending on how you align the paper trimmer)

Line up at 1” mark and cut down stopping at 1”

Line up at 1 ½” and cut down stopping at 1”

Line up at 2 ¼” and cut down stopping at 1 ½”

Line up at 3” and cut down stopping at 1 ½”

Line up at 3 ¾” and cut down to 1”

Line up at 4 ¼” and cut down to 1”

Push the 3 tabs to the inside of the folded insert and adhere to inside of card base

Thanks for looking!  Did you stamp today?

All of the supplies used to make this card can be purchased in my ONLINE STORE

Stamps: Poppin' By (Online Exclusive)

Ink: Memento Black, Lemon Lolly

Paper: Cloud Cover, Lost Lagoon, Basic White, Florals in Bloom DSP

Accessories: Poppin' By dies (Online Exclusive), paper trimmer, dimensionals, Textured Notes Dies (Online Exclusive), Cloud Cover Faux Linen ribbon, 2025-2027 In Color Flat Pearls


FoInser


Wednesday, July 2, 2025

Framed Gallery - Stampin' Up!® Gallery Blooms

 After a bit of a stamping break for some traveling and visiting family I'm back in the stamp room and ready to share some projects that were made before I went out of town.  We did a bit of ink blending and embossing to create this card at my last class.  The Gallery Blooms and Beautiful Motifs stamp sets work well for creating a layered backgrounds like this.


  This card starts with a piece of Basic White and Timid Tiger and Strawberry Slush ink blended all over the white cardstock.  Then the damask pattern stamp is stamped all over the blended ink panel stamping off once or twice using Strawberry Slush ink.  Finally, using a water painter water is flicked over the panel adding to the textured look and layering.  All of this is adhered to a Strawberry Slush card base that you can see here.

  Next the large flower stamp is inked up in Versamark and then embossed in white.  A frame is cut with the Gallery Blooms dies and then embossed with the Damask Designs embossing folder.  It's popped up on dimensionals around the embossed flower.


  To finish this card the sentiment is stamped in Strawberry Slush and a bit of Strawberry Slush Faux Linen ribbon is added behind it.  It's popped up over the frame and a Timid Tiger die cut leaf.  Rhinestones are sprinkled around the card front for the final touch.

  Thanks for looking!  Did you stamp today?

All of the supplies used to make this card can be purchased in my ONLINE STORE.

Stamps: Gallery Blooms, Beautiful Motifs

Ink: Strawberry Slush, Timid Tiger

Paper: Basic White, Timid Tiger, Strawberry Slush

Accessories: Gallery Blooms dies, dimensionals, Strawberry Slush Faux Linen ribbon, Damask Designs embossing folder, Basic Rhinestones, white embossing powder