Monday, August 31, 2020

Bitty Halloween - Stampin' Up! Banner Year

   I'm sneaking into the Freshly Made Sketches challenge at the last minute here today.  I had a lot of stamping time over the weekend and was able to go back to some challenges posted earlier last week.  I don't send many Halloween cards generally but I usually make a few for challenges during fall and I thought this sketch was perfect for some of the smaller images in the Banner Year stamp set.  It was also a good sketch to use some DSP.  I ordered way too much (not really, there's never too much!) DSP from the Aug.-Dec. mini catalog and since I'm not doing any classes right now I really need to make a BIG effort to use it up so you might be seeing more DSP than you usually would on my cards. 

  I started this card with a Basic Black base, then a smaller layer Basic Black embossed with with the Dainty Diamonds embossing folder.  Next is a piece of Plaid Tidings DSP.  What's great about the Plaid Tiding DSP is that it has colors for fall, winter and Valentine's Day.  Of course these colors and patterns can be used any time of the year but they really lend themselves to the next few months of events and holidays.  I liked this black, orange and yellow combo for a Halloween feel.  I tied a little black baker's twine bow around the panel before popping it up on dimensionals.

  All of the images and the 'boo!' are from the Banner Year stamp set.  The black parts of each circle are embossed with black embossing powder.  The pumpkin is Pumpkin Pie and Old Olive and the spider web is Smoky Slate. They are punched with a circle punch and then popped with dimensionals. 

  All in all a pretty quick design and a fantastic layout to show off some smaller images.

  Thanks for looking!  Did you stamp today?

Stamps: Banner Year

Ink: Versamark, Pumpkin Pie, Old Olive, Smoky Slate

Paper: Basic Black, Whisper White, Plaid Tidings DSP

Accessories: black embossing powder (retired), black baker's twine (retired), dimensionals, circle punch


Friday, August 28, 2020

Autumn Wreath - Stampin' Up! Arrange a Wreath - Fab Friday 196

    After taking a quick summer break the Fab Friday Challenge team is back with a brand new challenge for you.  If these challenge colors don't make you think of fall then I really want to see your project shared in the challenge gallery because that's all I could see with this palette!

    One of the reasons I love the Arrange a Wreath bundle is that is covers all seasons and events.  I thought a nice start on a few Thanksgiving cards were order.  I imagine I'll probably be sending out more Thanksgiving cards than normal as we most likely won't be seeing as much family as usual.


  The card base is Cajun Craze and under the wreath panel I've put a strip or torn Cinnamon Cider and a length of Very Vanilla scalloped lace trim.

  The wreath is stamped in Bumblebee ink onto Very Vanilla cardstock.  I stamped a few oak leaves in Cinnamon Cider and Cajun Craze ink onto the same color cardstock.  I cut them out along with a few little sprigs in the copper Brushed Metallic cardstock for a bit of an accent.  I layered them all along one side of the wreath and popped them on dimensionals.

  The sentiment is from the Banner Year stamp set and is stamped in Cinnamon Cider ink.  I flagged the end and slipped it under the edge of the leaves and adhered it with a dimensional.

  As a final touch I doubled up a length of linen thread and tied a bow for the edge of the sentiment banner.

  All in all a quick fall card with some beautiful fall colors.  Head over to see the rest of the Fab Friday Design Team samples and then play along!

  Thanks for looking!  Did you stamp today?

Stamps: Arrange a Wreath, Banner Year

Ink: Bumblebee, Cajun Craze, Cinnamon Cider

Paper: Cajun Crazy, Cinnamon Cider, Very Vanilla, Brushed Metallic Copper cardstock

Accessories: Wreath Builder dies, linen thread, Very Vanilla scalloped lace trim, dimensionals

Thursday, August 27, 2020

Heartwarming Hugs Christmas - Stampin' Up! Tree Angle - VIDEO

  I was inspired by the Paper Players challenge to cut into some of my new Christmas DSP, Heartwarming Hugs.  I thought this was a fun layout for using multiple patterns and would create a nice background for a cute Christmas tree.  It's also a super easy design to make multiples with and I've shown in the video how to cut the DSP so the angles match up perfectly and you get parts to make 3 cards.


  The card base is Mossy Meadow and then the pieces of the 3 Heartwarming Hugs patterns.  The scalloped rectangle is from Stitched So Sweetly dies.  

  The Tree Angle set has a nice mix of different styles of Christmas trees.  This one was the right size and shape for this layout which I flipped. I stamped the tree trunk in Soft Suede and the tree is Pear Pizzazz cardstock with Mossy Meadow ink.  Once it was cut out with the coordinating Stitched Triangle dies I popped it up on dimensionals.  

  The star is made with the Stitched Stars dies and Brushed Metallic cardstock.  I'm not sure if the one I used here is bronze or gold.  Anyone know how to tell?  They both look gold to me!

  The sentiment from Itty Bitty Christmas is stamped in Real Red onto a narrow piece of Whisper White.  I trimmed the ends at an angle and then backed it with a slightly larger piece of of the gold/bronze?? Brushed Metallic cardstock and angled those ends too.

  For the finishing touch I added a Real Red sheer ribbon flag behind the rectangle panel before popping it up on dimensionals.

  I hope you find the video helpful!  It wasn't quite as long of a process as my first one so hopefully I'll have more in the future to share.

  Thanks for looking!  Did you stamp today?

Stamps: Tree Angle, Itty Bitty Christmas

Ink: Mossy Meadow, Real Red

Paper: Mossy Meadow, Heartwarming Hugs DSP, Whisper White, Pear Pizzazz, Brushed Metallic cardstock

Accessories: Stitched So Sweetly dies, Stitched Triangle dies, Stitched Stars dies, dimensionals, Real Red Sheer ribbon, dimensionals


Wednesday, August 26, 2020

Autumn Leaves - Stampin' Up! Beautiful Autumn

  It is still solidly summer here in central VA but it's not too early to start on some autumn cards.  I used the Global Design Project challenge which is leaves and trees.  Definitely an easy challenge with fall right around the corner.


    The base layer of my card is a nice subtle pattern in the Gilded Autumn Specialty DSP.  It's not one of the metallic patterns but a nice light textured/speckled look.  Next is a Very Vanilla layer stamped with the Birch background in Early Espresso for my "tree" inspiration.

  I cut a Stitched Rectangle out of Cajun Craze and embossed it with the Tasteful Textile embossing folder.  Using up some more of my very retired stash of brads I added a few to the side opposite the images to balance the weight on the other side.  The sentiment from Beautiful Autumn is stamped in Early Espresso on Bumblee and is layered across the rectangle panel.  

  All the little images are stamped in Early Espresso.  The maple leaves are filled in with Bumblebee, the acorn with Soft Suede with the cap stamped off once and the oak leaves in Cajun Craze stamped off once. They are all punched out with the Autumn Punch pack and adhered along the rectangle panel.  

  And finally I added a little Very Vanilla baker's twine bow to the side of the sentiment.

  Thanks for looking!  Did you stamp today?

Stamps: Beautiful Autumn

Ink: Early Espresso, Cajun Craze, Bumblebee, Soft Suede

Paper: Gilded Autumn Specialty DSP, Very Vanilla, Cajun Craze, Bumblebee

Accessories: Stitched Rectangle dies, Tasteful Textile embossing folder, Autumn Punch pack, dimensionals, metallic brads (retired), Very Vanilla bakers twine (retired)


Tuesday, August 25, 2020

Triangle Birthday Banner - Stampin' Up! The Right Triangle

   I needed a masculine birthday card for a family member and as I browsed through my card stash I realized that I had no birthday cards for guys!  Yikes!  It's terrible when you "have to" sit down and stamp a card right? LOL!  

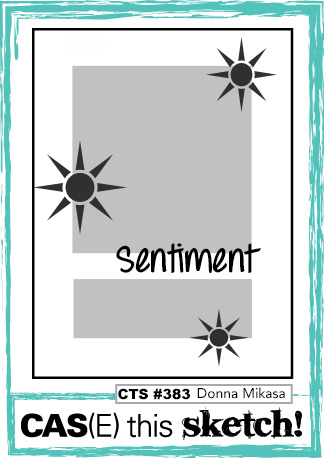
  I used the current CAS(e) This Sketch challenge as my starting point. I liked the simplicity of the banner and sentiment across the card front.

 I pulled out some masculine colors and DSP and got to work.  The card base is Smoky Slate then a layer of Whisper White cut with the Stitched Rectangle dies.  I topped that with a piece of In Good Taste DSP.  There's a hint of blue in this design and according to the list of colors it's Night of Navy but that seemed to dark for my design so I used the lighter In Color Misty Moonlight instead.

 I stamped the stripes in The Right Triangle onto a few small scraps of Misty Moonlight with the same color ink and then die cut with the Stitched Triangle dies.  I popped the banners up on dimensionals and then used some retired candy dots in between.  I'm never going to be finished with these dots!

  For the sentiment I cut 3 'happy's' in Smoky Slate using the Well Written dies and adhered them together with the fine tip glue pen. I used the Misty Moonlight marker to color in just the 'birthday' from one of of the Itty Bitty Birthday stamps and stamped that on a piece of Whisper White and then flagged the end.

  Thanks for looking!  Did you stamp today?

Stamps: The Right Triangle, Itty Bitty Birthdays

Ink: Misty Moonlight

Paper: Smoky Slate, Whisper White, Misty Moonlight, In Good Taste DSP

Accessories: Stitched Triangle dies, Well Written dies, Stitched Rectangle dies, dimensionals, candy dots (retired)


Friday, August 21, 2020

Glimmer Wreath - Stampin' Up! Wreath Builder dies

  Yup, I'm back on my Christmas card making nonsense again.  I wanted to try to use up some retired paper that I have hoarded but I also wanted to use a newer die set; Wreath Builder.

  This one is pretty self explanatory as it's just a wreath with some berries cut from glimmer paper.  

  I did use one of the Tasteful Labels dies a little differently for the sentiment tab.  I just used the very top edge of the die so that's a great way to get some different looks for some of the label shape dies and you can size them for smaller images or sentiments.

  Thanks for looking!  Did you stamp today?

Stamps: Itty Bitty Christmas

Ink: Shaded Spruce

Paper: Whisper White thick, Shaded Spruce, Joyous Noel DSP (retired), Joyous Noel Glimmer paper (retired)

Accessories: Wreath Builder dies, Tasteful Labels dies, dimensionals

Thursday, August 20, 2020

Best Bass- Stampin' Up! Best Catch

  Today's share is one that I made a while back before the Best Catch stamp set retired.  It was a great set and I got a lot of cards out of it for male family members birthdays and as well as father's day.  

 At the time of the cards making I used a mix of retired items, just about to retire items and brand new demonstrator preorder items.

  The card base is Crumb Cake topped with a piece of the retired Wood Textures DSP.  Next, I added a piece of Pool Party embossed with the new Old World Paper embossing folder.  I lightly sponged some Pool Party ink on the ridges for a bit of definition.

  The burlap ribbon is adhered with tear tape and I added the rest of my elements to it; Catch of the Day dies cut out the cattails and I added darker Early Espresso tops with a marker.  The bass or whatever kind of fish it is is stamped in Early Espresso on Very Vanilla cardstock.  I colored it in with Stampin' Blends and cut it out. I stamped a lure in Crumb Cake ink onto Crumb Cake paper and then topped it with the Well Said sentiment in Early Espresso. It's punched with the Tailored Tag punch. And look, there are those retired candy dots again.

  Thanks for looking!  Did you stamp today?

Stamps: Best Catch (retired), Well Said

Ink: Pool Party, Early Espresso, Crumb Cake

Blends: Petal Pink, Old Olive, Pool Party

Paper: Crumb Cake, Wood Textures DSP (retired), Pool Party, Very Vanilla

Accessories: Old World Paper embossing folder, Tailored Tag punch, dimensionals, Catch of the Day dies (retired), burlap ribbon (retired), candy dots (retired)


Wednesday, August 19, 2020

Fall in Hexagons - Stampin' Up! Banner Year

    I love a good multi-season set that has a mix of cute images and fun sentiments.  The Banner Year stamp set in the Aug.-Dec. mini catalog fits the bill!  

  I got some of my fall feels on when I was making this card.  I didn't make it in time to play in the CAS Colours & Sketches challenge before it closed but I used their layout and the hexagons were a cool element to anchor my little images.  

  I learned from Kelly Kent that you can use the Tailored Tag punch to make a hexagon.  How cool is that?  Stampin' Up! showed it here in this video.  I love learning new tips and tricks from other stampers! I think next time I should use a narrower piece of cardstock but the elongated versions here suited my images.

  I started with a Very Vanilla thick card base then topped it with a piece of the Gilded Autumn Specialty paper.  This pattern doesn't have any of the metallic accents but has some nice stripes in fall colors which I used for the rest of my card.

 I trimmed a piece of Mint Macaron down and stamped the sentiment in Early Espresso. Next it's embossed with the Tasteful Textiles embossing folder.  Before popping it up on the cardfront with dimensionals I wrapped a length of retired Crumb Cake twine around the bottom.  

  The hexagons are Very Vanilla and I stamped my images onto them in Early Espresso (how cute is that squirrel?  Doesn't it look like he's got a googly eye?), Crumb Cake and Cajun Craze.  I popped them up with dimensionals to follow the layout.

 Continuing my effort to use up the hundreds of retired candy dots that I still have I added some in Early Espresso to each corner for a finishing touch.

  Thanks for looking!  Did you stamp today?

Stamps: Banner Year

Ink: Early Espresso, Crumb Cake, Cajun Craze

Paper: Very Vanilla thick, Very vanilla, Mint Macaron, Gilded Autumn Specialty DSP

Accessories: Tasteful Textiles embossing folder, Tailored Tag punch, dimensionals, Crumb Cake twine (retired),  candy dots (retired)

Tuesday, August 18, 2020

Summery Tiles - Stampin' Up! Today's Tiles

   I've always tried to make my stamps as easy to use and as versatile as they can possibly be.  After using the Today's Tiles stamp set a few times I found that having all of the tiles and their matching accent stamp all attached really kind of limited how I could use them.  I like to stamp on the inside of my cards as well as on the envelopes and having the large panels that couldn't be inked individually kept me from easily doing that.  Also, I didn't always want a full panel of the tiles; I maybe just wanted to a few but to mix and match colors I had to stamp the whole panel (and clean the whole panel).  

  So I splurged and bought a second Today's Tiles set to cut apart so I can have each tile on it's own to use!  I know I will reach for this set even more now that I've made it more versatile.  

  I'm playing along with the Just Add Ink challenge which is to "Just Add T" so my tiles are my letter t item.  My colors were inspired by the closed Global Design Project challenge colors.  Aren't they a nice summery combo?


 The card base is Granny Apple Green with a layer of Whisper White embossed with the Tasteful Textiles embossing folder.  I wrapped a length of Bumblebee Twill ribbon around this panel.

  One of the best things about cutting the tile stamps apart is that now I can use up a lot of my more narrow scraps.  I stamped 3 different tiles and their coordinating accents in each of the colors on Whisper White and then trimmed them down with my paper snips.  I attached them to a Whisper White square just so if I unevenly trimmed any they wouldn't stand out so much.  Then I backed that with a Granny Apple square and popped it up with dimensionals on the card front.

  The sentiment from Itty Bitty Greetings is stamped in black and cut out with smallest Stitched So Sweetly die which reminded me a bit of the tile pattern shapes.

  Thanks for looking!  Did you stamp today?

Stamps: Today's Tiles, Itty Bitty Greetings\

Ink: Granny Apple Green, Bumblebee, Calypso Coral

Paper: Granny Apple Green, Whisper White

Accessories: Tasteful Textiles embossing folder, Stitched So Sweetly dies, twill ribbon, dimensionals


Monday, August 17, 2020

Snowflakes in Pastels - Stampin' Up! Snowflake Wishes

   While the weather doesn't suit me for Christmas cards right now I always start making them once the Holiday mini catalog is released so I can be sure to have enough made by the time early December rolls around.  And with all the extra time on my hands this summer and fall I hope to maybe have a surplus of cards!

  My card today was inspired by the Color Throwdown challenge which is to use aqua, peach and kraft which translated into Stampin' Up! colors is Pool Party, Petal Pink and Crumb Cake.


  I started with a Crumb Cake card base, then a smaller layer of Crumb Cake with the corners rounded.  I stamped snowflakes in white craft ink as well as sponged the edges.

  The sentiment is also stamped and sponged in white craft ink.

  The largest snowflake is 3 layers starting in the back with Pool Party cardstock and the snowflake embossed in shimmer white embossing powder, then a Petal Pink die cut snowflake, and finally the smallest one cut from Shimmery White cardstock.

 Add 2 more smaller snowflakes one each in Pool Party and Petal Pink.  I kept the embellishments to a minimum with just some sequins from my stash and a colored rhinestone for the center of each one.  I colored the rhinestone with my dark Pool Party Stampin' Blends marker for a matching look.

   Thanks for looking!  Did you stamp today?

Stamps: Snowflake Wishes

Ink: white craft ink, Versamark

Paper: Crumb Cake, Pool Party, Petal Pink, Shimmery White

Accessories: So Many Snowflakes dies, shimmer white embossing powder (retired), dimensionals, sequins, rhinestones


Friday, August 14, 2020

Gilded Autumn Thank You - Stampin' Up! Beautiful Autumn

  I liked yesterdays Freshly Made Sketches layout so much that I made another card with it.  This one came out more on the elegant side.  It's also very much an autumnal card with the colors and images.

 And what a layout to show off the gorgeous Gilded Autumn Specialty DSP!  This is the first time I've used any of the patterns in this pack and it was hard to choose!  I went with this Mint Macaron/copper pattern and it did not disappoint.

  I started with a Whisper White thick card base.  The DSP is cut in a 4 x 4 square and then I angled it in my paper trimmer to make the 2 pieces.  Once you line them up on the card front there is a nice open space through the center.  Before adhering the DSP with dimensionals I stamped the sentiment in Early Espresso.

  The Beautiful Autumn bundle comes with 3 punches that match the oak leaf, acorn and maple leaf images in the stamp set.  I stamped the 3 images in Versamark onto Early Espresso, Crumb Cake and Cajun Craze and then embossed them with copper embossing powder.  Unfortunately, Stampin' Up! doesn't have Copper embossing powder anymore but fortunately I'm a bit of a hoarder with embossing powder so it works out!

  After punching the images out I popped them up with mini dimensionals and arranged them on the side of the sentiment.

  I'm looking forward to using this set and DSP a lot this coming fall.  The metallics and punches will be fun to create with.

  Thanks for looking!  Did you stamp today?

Stamps: Beautiful Autumn

Ink: Early Espresso, Versamark

Paper: Whisper White thick, Gilded Autumn Specialty DSP, Early Espresso, Crumb Cake, Cajun Craze

Accessories: Autumn punch pack, copper embossing powder (retired), dimensionals


Thursday, August 13, 2020

Playful Summer Fun - Stampin' Up! Playful Alphabet Dies

   We are deep in the hot, humid summer and even the afternoon thunderstorms aren't giving any relief.  If anything the storms are making it worse; it looks like it should be cooler because it's overcast but then when you go outside you are slammed in the face with a wall of humidity.  Good old central Virginia!  So all the more reason to stay inside and stamp right?

  I used the fun, bright colors and summer theme from The Card Concept challenge  for a Clean and Simple style and the layout from Freshly Made Sketches for today's card which I flipped to landscape orientation.  

  The card starts with a Whisper White thick base then a layer of Poppy Parade.  Topping that layer is a piece of Whisper White embossed with the Tasteful Textile embossing folder. 

  I thought that Poppy Parade, Melon Mambo, Pumpkin Pie and Daffodil Delight were good matching colors to the inspiration photo.  I cut little triangles using the Stitched Triangle dies in all four of my colors.  I used a strip of Whisper White about 1/2" wide to attached the triangles to for ease of placement. Once I had them all placed I adhered the strip to the card front and trimmed the overhang.

  To make the 'stay cool' letters I used the Playful Alphabet dies and cut one set in retired black Glimmer paper and the other with the new Foam Adhesive Sheets.  I attached the glimmer paper letters to the foam letters and then arranged them on either side of my triangle strip.

  After I had the letters finished I thought the card still needed something so I looked through my stamp sets to try to find a "summer" image.  I didn't have much that would be right except for this little sun from an older Sale-a-Bration set called Hello.  I stamped it in Daffodil Delight and then fussy cut it and adhered it with a mini dimensional right on the edge of the 'y'.

  Stay cool and stay inside and stamp!

  Thanks for looking!  Did you stamp today?

Stamps: Hello (retired SAB)

Ink: Daffodil Delight

Paper: Whisper White thick, Whisper White, Poppy Parade, Melon Mambo, Pumpkin Pie, Daffodil Delight, black Glimmer paper (retired)

Accessories: Stitched Triangles dies, Playful Alphabet dies, Tasteful Textiles embossing folder, foam adhesive sheets, dimensionals


Wednesday, August 12, 2020

Welcome to the Neighborhood - Stampin' Up! Arrange a Wreath

  We've got a few new neighbors on our street so I have to hop to it to get some cards made so we can go introduce ourselves before they aren't "new" anymore.  I thought I could make a cute little house card by pairing the Stitched Triangle dies with the stitched square from Stitched Shapes dies.


 The Paper Players challenge this week has a great set of colors and I thought they would be perfect for a little trio of houses. 

  I started with a Whisper White thick card base then a layer of Night of Navy, then a Stitched Rectangle embossed with the Subtle embossing folder.  Before embossing I stamped the "welcome" from Well Said in Night of Navy.

  Once I had the houses cut out and popped on dimensionals I added a few finishing touches.  The Arrange a Wreath bundle had a heart and flower that were just the right size.  The heart is stamped in Melon Mambo and cut out and adhered with a dimensional.  The flower is cut out from Pool Party cardstock and in the center I added an adhesive pearl.  The Pool Party house has a Night of Navy baker's twine bow.

  Thanks for looking!  Did you stamp today?

Stamps: Well Said, Arrange a Wreath

Ink: Melon Mambo, Night of Navy

Paper: Whisper White thick, Whisper White, Pool Party, Night of Navy, Mango Melody

Accessories: Stitched Triangle dies, Stitched Shapes dies, Subtle embossing folder, Wreath Builder dies, dimensionals, adhesive pearl, Night of Navy baker's twine (retired)


Tuesday, August 11, 2020

Balmy Snowflake - Stampin' Up! Snowflake Wishes

   I couldn't help myself over the weekend and had to make another card using the Snowflake Wishes bundle.  I started with several different colors but ended up editing the design to stick with blues.  I thought the CAS(e) This Sketch challenge was a perfect one to use with the largest snowflake die from the So Many Snowflakes die set.


  So the first time I tried to cut the largest snowflake I didn't realize that it didn't cut out the whole outline of the snowflake so when I went to take it off of the cutting plate I ended up with a bunch of little bits of cardstock scattered every where and the snowflake sitting there (not centered at all!) in the middle of the scrap piece of cardstock I had used.  So when you look at the dies on the bottom of page 38 in the Aug.-Dec. mini catalog it's the one that's shown in the square. 

  So while my first snowflake didn't come out well it works perfectly on the 2 corners of this larger panel.  I stamped a few little Balmy Blue snowflakes around the die cuts.

  I then used some Misty Moonlight cardstock to cut a smaller snowflake to put near the top of the card.  Before adhering it I colored it with a clear Wink of Stella marker and added a retired From My Heart faceted gem to the center.

  The sentiment from the set Banner Year is stamped in Misty Moonlight.  Definitely don't overlook this set.  It's got lots of seasonal sentiments and cute smaller images to go with them.  This set is bundled with the Banners Pick a Punch but it can definitely be used without it.

  And the best part of this card is the Balmy Blue Glimmer paper backing the top panel.  It's so sparkly in real life.  I hardly ever let myself use such a large piece of Glimmer paper but it's certainly worth it for this design.

  Thanks for looking! Did you stamp today?

Stamps: Snowflake Wishes, Banner Year

Ink: Balmy Blue, Misty Moonlight

Paper: Whisper White thick, Whisper White, Misty Moonlight, Balmy Blue Glimmer paper

Accessories: So Many Snowflake dies, dimensionals, Wink of Stella, From My Heart faceted gem (retired)


Monday, August 10, 2020

Summer Greenery Thanks - Stampin' Up! Forever Fern

   I needed a few thank you cards and wanted to use some more of the Forever Greenery DSP.   I based my layout on the sketch at Inspire. Create. Challenges I decided to do some sprigs of greenery as the circle element in the sketch instead of an actual circle.


  You can't see it here but I started with a Soft Sea Foam card base topped with a piece of Forever Greenery DSP.

  I embossed a piece of Garden Green with one of the Greenery embossing folders and adhered that just down from center of the card front.

  A Whisper White stitched rectangle is the base for the focal pieces.  The sentiment from Ornate Thanks is stamped at the bottom of the panel in Pretty Peacock.

  I cut a Garden Green sprig, then stamped and cut one in Soft Sea Foam and Pretty Peacock.  I adhered them to the panel with dimensionals.  I added a bit of braided linen trim to the stems with a glue dot and put a Pretty Peacock faceted gem next to it.

  Thanks for looking!  Did you stamp today?

Stamps: Forever Fern, Ornate Thanks

Ink: Pretty Peacock, Soft Sea Foam

Paper: Garden Green, Whisper White, Forever Greenery DSP

Accessories: Forever Flourishing dies, Stitched Rectangle dies, Greenery embossing folder, braided linen trim, dimensionals, faceted gem (retired)


Friday, August 7, 2020

Embossed Vellum Birthday - Stampin' Up! Whale Done

  This past Monday I posted another inspiration photo for my local stamping Facebook group to use as a starting point for their own projects.  I chose the card on page 103 of the annual catalog which uses the Dandelion embossing folder to emboss vellum and then some of the image is colored on the reverse side.  It's a cool technique and something I don't usually think about.  I wanted to do that technique for my own card and I also needed a birthday card so I got to work.


   I started with a card base of Pool Party, then embossed a layer of vellum with the Seabed embossing folder.  I flipped it over and colored some of the elements with Blends.  The little star fish which got kind of covered up are colored with the Bumblebee Stampin' Write marker since that color doesn't have a Blends.  I should have adjusted my layout because I ended up covering some coral at the bottom too.  Oh well!  I think it looks pretty neat regardless.

  For the strip of waves I hand cut a bit of one of the patterns in the Whale of a Time DSP and layered it across the vellum.  The whale is stamped in Pretty Peacock and punched with the whale punch.  The spout is punch with silver glimmer paper.  Both the whale and the spout are popped up with dimensionals.  

 The happy birthday from Itty Bitty Birthdays is stamped in Bumblebee ink onto Bumblebee cardstock.  I added a little silver/white bakers twine bow to the side to finish off the focal cluster.

  When attaching the vellum piece to the card front I used a strip of tear tape behind the wave strip and another shorter piece behind the whale.  Then I added a few glue dots behind the colored parts of the embossing and you can't see them at all so that eliminates one of the struggles of using vellum which is how to adhere it without the adhesive being seen.  

  Thanks for looking!  Did you stamp today?

 Stamps: Whale Done, Itty Bitty Birthdays

Ink:  Pretty Peacock, Bumblebee

Blends: Just Jade dark, Terracotta Tile dark, Pretty Peacock dark

Marker: Bumblebee

Paper: Pool Party, vellum, Whale of a Time DSP, Bumblebee, Whisper White, silver glimmer (retired)

Accessories: Seabed embossing folder, whale punch, dimensionals, white/silver bakers twine (retired)

Wednesday, August 5, 2020

Snowflake Sparkle - Stampin' Up! Snowflake Wishes - VIDEO

  I'm an old dog and I've been working on learning a new trick lately.  Since quarantine I've been unable to hold classes for my local stampers and several of them have have encouraged me to give virtual classes or videos a try.  Since there doesn't seem to be an end in sight and my family will be at home working and schooling virtually for the next several months I figured I should bite the bullet and get with the times.  And I love my stampers too! 

 So today I'm sharing my first ever video and I want you all to know that I hate hearing myself talk so this is a big deal.  The video and editing are a little rough and I'm sure I said "um" too much but I hope with time and practice I'll be able to put out a decent product.  And maybe shorter too...is 15 minutes too long?? In the meantime feel free to leave me a comment or send an email with any constructive criticism.  And thanks to my husband for his construction skills for building me a stand to be able to record with my phone and thanks to my boys who helped with the YouTube stuff because somehow they are the experts at that stuff!

  On to the fun stuff!  Stamping!  First is a photo of the card like usual and then the video link.  At the end I will share the list of supplies used as usual but some of them are also listed with item numbers in the video.  Also, I made this card to play along with the current Global Design Project challenge which is a CASE the Designer inspiration.


  Thanks for looking!  Did you stamp today?

Stamps: Snowflake Wishes

Ink: Balmy Blue, Coastal Cabana, Highland Heather, Misty Moonlight

Paper: Shimmery White, Whisper White thick, Balmy Blue Glimmer paper

Accessories: So Many Snowflakes dies, dimensionals, rhinestones, silver metallic edged ribbon

Partridge in a Pear Wreath - Stampin' Up! Arrange a Wreath

  One of the Christmas challenges that I follow challenged us to make a card using the "Twelve Days of Christmas" song as inspiration.  The designers over at the CAS Christmas Card Challenge had some great samples and I thought it was a fun theme though I wasn't sure I had anything that I could use for the song.  After looking through my Christmas stamps I figured the the Arrange a Wreath set was the best bet for the theme.  The set has a pear image as well as a bird which could be a partridge.  I don't have any tree stamps that would work so I stuck with the wreath.


    I pulled my colors right from the Heartwarming Hugs DSP and started with a Mossy Meadow card base with a layer of the DSP on top. 

  I stamped the wreath in Pear Pizzazz and then die cut a second wreath out of Mossy Meadow and popped it up on dimensionals.  The pears are embossed in gold and cut out and placed around the wreath. 

  I'm a bit of a bird nerd so I looked up images of partridges to decide what color I wanted to use for it and I found that they are quite multi-colored.  I pulled out some neutrals and went to work.  I started with cutting out the bird shape in Gray Granite.  I then stamped the bird in Cinnamon Cider, Gray Granite and Soft Suede.  I cut out each section by hand then adhered the parts to the Gray Granite bird shaped base.  I cut off the little head feather also since that seems to be more of quail thing.  I filled in the open white spaces in the bird image with the matching colored Blends marker.  The partridge is then tucked into it's "tree".

  The Whisper White piece of cardstock has to be quite wide to accommodate the wreath image but that also leaves a lot of open space in each corner that seemed a bit naked and unfinished to me so I added some retired gold brads to the corners for a more polished look.

  A layered Mossy Meadow and Real Red flag is the base for the gold embossed sentiment from Itty Bitty Christmas.  And finally the wreath panel is popped on dimensionals on the card front.

  Thanks for looking!  Did you stamp today?

Stamps: Arrange a Wreath, Itty Bitty Christmas

Ink: Pear Pizzazz, Versamark, Gray Granite, Cinnamon Cider, Soft Suede

Blends: Cinnamon Cider light, Gray Granite light, Soft Suede light

Paper: Mossy Meadow, Whisper White, Real Read, Gray Granite, Heartwarming Hugs DSP

Accessories: Wreath Builder dies, gold embossing, gold brads (retired), dimensionals


Tuesday, August 4, 2020

Follow Me Guys! - Stampin' Up! Festive Post

  I haven't used my Posted for You bundle hardly at all since I got it.  So when that happens you know what I do?  I go and order another stamp set to go with the punch that I haven't used much.  So now I've got the Posted for You stamp set which has more all occasion stamps and the Festive Post stamp set which covers Halloween, Christmas and Valentine's Day.  I'm good to go for a while I think!

  For my card today I used the 52 Christmas Card Throwdown challenge which is a sketch.  The reindeer in the Festive Post was calling my name for this card.  I used the card sample on page 63 of the Aug.-Dec. mini catalog as inspiration. 


  The card base is Balmy Blue with little snowflakes from the Snowflake Wishes stamp set.  I used white craft ink for a subtle look.  Next is a piece of Snowflake Splendor DSP.  I really like the soft watercolor look and colors of the patterns in this pack.

  In keeping with the sketch I created a little banner in Balmy Blue embossed with the Winter Snow embossing folder.  I lightly sponged white craft ink onto the raised snowflakes for added definition.  I tied a Cherry Cobbler bakers twine bow to the top. 

  I stamped the reindeer in Soft Suede onto Crumb Cake cardstock then punched them out with the postage stamp punch.  I sponged Crumb Cake ink on the edges then stamped the snowflake in white craft ink all around the reindeer.  Then I "canceled" the stamps with the cute little cancel stamp that says "it's the most wonderful time of the year".  The Cherry Cobbler ink ties in with the baker's twine.

  I arranged the reindeer stamps across the card front and popped the right most one up on dimensionals.  And since he's clearly the leader of the group I named him Rudolph and gave him a red rhinestone nose to light the way for the rest of the herd.

  The final touch are the snowflake sequins that I topped with a few little From My Heart faceted gems that were in the Occasions catalog this year.  I only have a few of those left and I'm determined to use them up.

  I'm looking forward to making a lot of seasonal cards with the Festive Post and postage stamp punch.  And I'm already looking at my other stamp sets to see which images might fit this punch as well.

  Thanks for looking!  Did you stamp today?

Stamps: Festive Post, Snowflake Wishes

Ink: Soft Suede, Crumb Cake, Cherry Cobbler, white craft

Paper: Balmy Blue, Crumb Cake, Snowflake Splendor DSP

Accessories: Rectangular Postage Stamp punch, Winter Snow embossing folder, Cherry Cobble bakers twine (retired), dimensionals, snowflake sequins (retired), From My Heart faceted gems (retired)


Monday, August 3, 2020

Retro Stitched Trees - Stampin' Up! Tree Angle

  I finally broke into some of my new Christmas stamps over the weekend.  This card was slow going but I finally got something I was happy with.  I think I was just overwhelmed with so much new stuff to choose from!  I kept flip-flopping between papers and colors.  Once I decided to use 2 challenges to get started it was a bit easier as I had far fewer choices to make.  Sometimes you just have to limit yourself!

  I used the Just Add Ink inspiration challenge for the colors.  These cool non-traditional colors just made me think retro.  The layout came from CAS(e) This Sketch.  I thought the background panel being split like this was a neat element and a nice way to use some the **cough** too much **cough** DSP I bought from the new mini catalog.


  The card base is Whisper White thick, then a layer of Whisper White embossed with the new Winter Snow embossing folder.  I topped the embossed layer with a piece of new Snowflake Splendor DSP split into 2 pieces and popped on dimensionals.

  The sentiment from the new Tree Angle is stamped in Versamark onto Coastal Cabana and embossed with the retired Shimmer White embossing powder.  I so wish this was an item that Stampin' Up! had kept around but I will continue to use it until it's gone.  I love the little bit of extra sparkle that comes with using it.  I flagged the ends and then layered it slightly over the DSP break as shown in the sketch.

  For the trees I made 3 to go with the sketch.  The top one is Coastal Cabana embossed with the Dainty Diamonds embossing folder and then cut with the the Stitched Triangle dies.  All of the trunks are stamped in Soft Suede.  I popped the top tree with dimensionals and added a Bermuda Bay Blends colored rhinestone.

  The middle tree is Melon Mambo ink stamped onto Melon Mambo cardstock and die cut.  I highlighted the little dots in the pattern with Wink of Stella and layered a rhinestone onto a iridescent sequin.

  The smallest tree is Melon Mambo ink stamped onto Whisper White and then cut out.  I trimmed down the trunk to fit the scale of the tree a bit better.

   Thanks for looking!  Did you stamp today?

Stamps: Tree Angle

Ink: Melon Mambo, Versamark

Paper: Whisper White thick, Whisper White, Coastal Cabana, Melon Mambo, Snowflake Splendor DSP

Accesories: Winter Snow embossing folder, Stitched Triangle dies, Shimmer White embossing powder (retired), dimensionals, rhinestones, sequins