Monday, October 31, 2022

Believe in Cherry Cobbler - Stampin' Up! Jingle Jingle Jingle

   Cherry Cobbler is always a classic color to use for Christmas and when you bring in some gold it gets even better.  My stampers made this design at my last class using two stamp sets to bring it all together.


  This one starts with a Cherry Cobbler card base.  Then another layer of Cherry Cobbler stamped with the large Snow Crystal stamp using Cherry Cobbler ink.

  The sentiments and Santa hat are stamped in Versamark on Basic White and then embossed in gold.  The 'believe' and hat are fussy cut and then popped on dimensionals.

  Several different sized pieces of specialty paper are flagged and then adhered behind the narrow sentiment strip before adhering the whole element under the popped 'believe'.  The flags are a great way to use some of the fun papers in the July-Dec. mini catalog; you don't always need to use big pieces to be effective.  Also a great way to use up smaller scraps!

  Thanks for looking! Did you stamp today?

Stamps: Jingle Jingle Jingle, Snow Crystal

Ink: Cherry Cobbler, Versamark

Paper: Cherry Cobbler, Basic White, Festive Foils Specialty, Lights A Glow DSP, Distressed Gold Specialty

Accessories: gold embossing powder, dimensionals

Friday, October 28, 2022

Spruce Tree Christmas - Stampin' Up! Spruced Up

   My stampers made this card at my last class and I think it was a hit.  We are focusing on Christmas cards and we all agreed that using the adhesive sheets for the outlines made it really easy to put together.  Anything that helps get a lot of cards made for Christmas is always welcome in my stamp room!


  The colors are pulled right from the striped paper in the Sweetest Christmas DSP.  Such a classic Christmas color combo isn't it?

  We started with a Garden Green base, then the Sweetest Christmas DSP.  Next we embossed the sentiment in white onto a piece of Sweet Sorbet.

  The large tree is stamped in Garden Green on Basic White and the small tree is stamped in Pool Party ink onto Pool Party cardstock.  Once the pieces were die cut the outlines and stamped images are layered onto the Sweet Sorbet panel.  The Pool party tree is popped in front on dimensionals.

  3 gifts are stamped in Real Red with 2 being stamped off for a lighter version and then die cut and added to the base of the trees.

  A gold glimmer paper star tops the Garden Green tree and some adhesive backed Seasonal Sequins decorate the tree.  All 4 colors in the sequins pack coordinate with this color combo so my stampers had the choice of whichever color they liked the best.

  Thanks for looking!  Did you stamp today?

Stamps: Spruced Up, Ringed With Nature

Ink: Garden Green, Pool Party, Real Red, Versamark

Paper: Garden Green, Basic White, Pool Party, Sweet Sorbet, Gold Glimmer paper, Sweetest Christmas DSP

Accessories: Spruced Up Outlines dies, white embossing powder, dimensionals, adhesive sheets, adhesive backed Seasonal Sequins

Wednesday, October 26, 2022

Ringed Christmas Wreath - Stampin' Up! Ringed With Nature

   I skipped getting the wreath set in the holiday mini this year not because I didn't love it but because there are only so many hours in the week to create with and my mini preorder in June was already overflowing with stamp sets.  There's always a way to make a wreath card even if you don't have a wreath stamp set so I figured I could live without it.  I used the Ringed With Nature set to get my wreath fix any way!


  All of the little branches and sprigs in the Ringed With Nature set really work well for creating a wreath.  And even though I kind of covered up the wreath with my sentiment banner and ribbon it still makes for a nice cheerful Christmas card.

  I started with a Pear Pizzazz base, then a layer of Basic White embossed with the Tree Rings hybrid embossing folder.  

  To make the wreath panel I punched a small circle out of scrap paper and adhered it to a piece of Basic White with re-positional adhesive.  Then I stamped various images all around the circle leaving the center masked.  I used Pear Pizzazz, Old Olive, Soft Sea Foam, Sweet Sorbet and Daffodil Delight inks.

  I edged the sides of the wreath panel with narrow strips of Sweet Sorbet In Color DSP and then popped the panel on the card front with dimensionals.

  The sentiment is embossed in white and a piece of mini ruffled ribbon is tucked behind it.  I added a few Old Olive candy dots because I am determined to use them up.  But I swear they are having babies in my embellishment drawer because it seems as if there are always more of them not less!

  I'm really digging these colors and might have to try using them all again on another card design soon!

  Thanks for looking!  Did you stamp today?

Stamps: Ringed With Nature

Ink: Versamark, Pear Pizzazz, Old Olive, Soft Sea Foam, Sweet Sorbet, Daffodil Delight

Paper: Pear Pizzazz, Basic White, Sweet Sorbet In Color DSP

Accessories: Tree Rings hybrid embossing folder, dimensionals, white embossing powder, mini ruffled ribbon, candy dots (retired)

Tuesday, October 25, 2022

Flamingo Tree - Stampin' Up! Trees for Sale

   I've got a super simple but super cute Christmas card today! I used the Perfectly CAS challenge to "Think Pink" and since I'm really trying to make headway with my Christmas cards I thought a pink inspired Christmas card would be perfect.


  I kept this clean and simple card mostly white with just a few pops of Flirty Flamingo. Using a limited color palette can also help keep a card clean and simple.  I started with a Basic White thick card base topped with another layer of Basic White embossed with the Whimsical Woodland embossing folder.  The retired Flirty Flamingo ribbon is wrapped around that layer and anchored with a fork bow.

  The tree is stamped in Flirty Flamingo and cut out along with a white glimmer paper overlay. I popped the tree on dimensionals on a Stylish Shapes square which is also popped on dimensionals on the card front.

  The sentiment is in the Inspired Thoughts set and is stamped and trimmed down and adhered under the square separated with some small rhinestones.

  I thought this design would look great in a variety of colors; traditional as well as non-traditional.  All the white and open space really lets the single color stand out.  For those that do craft fairs it would be fun to make a rainbow set of tree cards to sell!

  Thanks for looking!  Did you stamp today?

Stamps: Trees for Sale, Inspired Thoughts

Ink: Flirty Flamingo

Paper: Basic White thick, Basic White, White Glimmer paper

Accessories: Whimsical Woodland embossing folder, Stylish Shapes dies, dimensionals, rhinestones, Tree Lots dies (SAB, retired), Flirty Flamingo ribbon (retired)

Monday, October 24, 2022

Lights Aglow Trees - Stampin' Up! Brightest Glow

   I finally got around to making a card with some of the leftover pieces from designing this card where I ended up with some gold glimmer paper tree outlines.  I knew backing the outlines with some designer series paper would look great and I wasn't wrong!  


  I started with an Evening Evergreen base and then topped it with a piece of Basic White embossed with the Merry Melody embossing folder.  This folder is from last year's holiday mini catalog and I had almost forgotten it had carried over into the annual catalog.  It's a great background especially for Christmas cards.  

  I wrapped a bit of Evening Evergreen ribbon around the white layer and then added my trees which are backed with Lights Aglow DSP.  The front most tree is popped on dimensionals.

  I embossed the sentiment from Brightest Glow in gold on Evening Evergreen and then cut it out with the Tasteful Label dies.

  Using a bit of scrap gold glimmer paper I cut a few mini stars using the Spruced Up Outlines dies and added them above the sentiment.

  Definitely don't throw out those little outline shapes from the Spruced Up bundle.  If you're not using them on the card you're working on they will be handy to kick start another card soon!

  Thanks for looking!  Did you stamp today?

Stamps: Brightest Glow

Ink: Versamark

Paper: Evening Evergreen, Basic White, Gold Glimmer, Lights Aglow DSP

Accessories: Merry Melody embossing folder, Spruced Up Outlines dies, dimensionals, Evening Evergreen ribbon, Tasteful Labels dies (retired)

Saturday, October 22, 2022

Around the Sun Birthday - Stampin' Up! Party Puffins

  One of my go to birthday sets is Party Puffins.  They are just too cute and so fun to create with.  I used this set for the current Seize the Birthday challenge which is to use a face (human or animal) on a birthday card.  


  I paired the puffins with the retired Sale-a-Bration sentiment set Amazing Phrases and with some bright, fun retired DSP in a balloon pattern.

  The base is Coastal Cabana with some Coastal Cabana candles stamped along the bottom.  Then the retired Birthday Bonanza DSP down the center.  

  The 3 puffins are stamped in Memento Black and die cut with the Stylish Shapes dies.  I stamped 3 more and then fussy cut just the party hats.  After coloring the hats and puffins the circles were adhered to the card front on dimensionals.

  The sentiment is stamped in Memento and then fussy cut and also popped on dimensionals.

  Thanks for looking!  Did you stamp today?

Stamps: Party Puffins, Amazing Phrases (SAB, retired)

Ink: Memento black, Coastal Cabana

Blends: Pool Party Dark, Sweet Sorbet dark, Daffodil Delight light & dark, Calypso Coral light, Pumpkin Pie dark

Paper: Coastal Cabana, Basic White, Birthday Bonanza DSP (retired)

Accessories: Stylish Shapes die, dimensionals


Friday, October 21, 2022

Fresh Thinking of You - Stampin' Up! Ringed With Nature

  One of my goals for designing for my Quick & Easy card classes is to use minimal supplies and use some easy techniques that sometimes get lost in the fancy die cut and messy ink techniques world.  I want my customers to be able to go home and create a card of their own using the color combo or layout or easy technique even if they don't own the exact stamp set.  Keeping supplies to a manageable level not only helps me for packing for class but can also help beginners feel able to jump right in with more experienced stampers.

  I love this fresh color combination for an all purpose thinking of you card.  I used a set that seems like it's really for fall and winter; do you recognize the poinsettia flower?  With Orchid Oasis and Pale Papaya Ringed With Nature doesn't seem so seasonal now does it?


  The easy technique on this card is just the torn edge of the stamped layer letting a bit more of the Orchid Oasis card base peek through.  A bit of shimmer is brought in with the ribbon and the sentiment tag punched with the retired Tailored Tag punch adds some modern angles.  A few Matte Decorative Dots are sprinkled among the flowers and leaves for a bit of texture.

  Card base, stamped layer and punched sentiment that's all and that's really easy to translate into a card with supplies you have at home.  It's also fantastic if you are stamping multiples.  Add in a few embellishments (rhinestones and pearls are perfect all purpose embellishments if you don't want to commit to colors!).

  Thanks for looking!  Did you stamp today?

Stamps: Ringed With Nature

Ink: Pale Papaya, Orchid Oasis

Paper: Orchid Oasis, Basic White, Pale Papaya

Accessories: Metallic Woven ribbon, Matte Decorative Dots, Tailored Tag punch (retired), dimensionals


Wednesday, October 19, 2022

Autumn Season Birthday - Stampin' Up! Christmas Season

   Don't relegate seasonal stamp sets to the closet after that season is over!  I've used a Christmas set to make today's card which clearly has a fall feel to it!  I focused on rich fall colors and the leaf and berry stamps from the Christmas Season set work perfectly.


  We made this card at my last Quick & Easy card class.  A little ink blending in the corners with a blending brush, then stamp the images overlapping a bit and some stamping off for various tones is really all there is to this card.  Change up the colors for a seasonal look no matter if you're months away from Christmas!

  If you're local to the Richmond, VA area and would like to join my next Quick & Easy card class check out my events calendar.

  Thanks for looking!  Did you stamp today?

Stamps: Christmas Season, Go To Greetings

Ink: Rich Razzleberry, Night of Navy, Cajun Craze

Paper: Night of Navy, Basic White

Accessories: adhesive rhinestones, baker's twine

Tuesday, October 18, 2022

Bright Floral Birthday - Stampin' Up! Cup of Tea

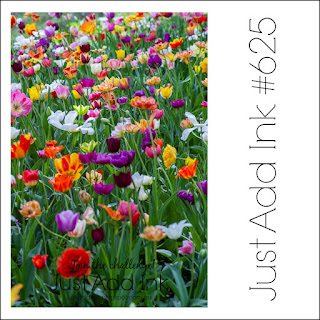
   I was inspired for today's card by the inspiration at Just Add Ink.  They have a gorgeous floral photograph from which I pulled all my colors.  I definitely didn't do the real flowers justice but I thought it ended up a fun birthday card especially for a flower lover.  A quick switch of sentiments could turn this one into a great hello or thinking of you card.


  No crazy techniques or anything here.  I just used the small flower and leaf stamps from the Cup of Tea stamp set and randomly stamped all over a Basic White panel.  Don't overlook those smaller supporting stamps in a set.  In the right layout they can definitely stand on their own!  I popped it up over a Polished Pink card base embossed with the Gingham embossing folder.

  The sentiment is from Party Puffins and I stamped that in Blackberry Bliss onto Daffodil Delight cardstock and cut it out with the retired Tasteful Labels die set.  I layered a piece of DSP underneath cut into a flag.

  A bit of scrap white ribbon and a die cut flower help accent the sentiment layers and then a few adhesive sequins are sprinkled in among the flowers for a little shine.

  Thanks for looking!  Did you stamp today?

Stamps: Cup of Tea, Party Puffins

Ink: Poppy Parade, Polished Pink, Daffodil Delight, Mango Melody, Rich Razzleberry, Blackberry Bliss, Garden Green

Paper: Polished Pink, Basic White, Daffodil Delight, Peaceful Poppies DSP (retired)

Accessories: Gingham embossing folder, Tea Cup dies, dimensionals, white ribbon, adhesive sequins, Tasteful Labels dies (retired)


Monday, October 17, 2022

Splendid Pumpkin Give Thanks - Stampin' Up! Rustic Pumpkin Dies

  Still working on my Thanksgiving cards.  There is so much inspiration for autumn themed cards out there right now!  From designer series papers, card challenges and then the colors right outside our doors that it's so fun to see what can be made next!  I used the Fusion Card Challenge for the inspiration for today's card.  I used both the inspiration photo elements as well as the sketch.


  I loved the softer colors of the pumpkins in the the photo as well as the leafy garland around the window.  I pulled both of those elements along with a lot of white like the kitchen photo to put this card together. I started with a Basic White thick card base, then embossed another layer of Basic White with the Brick Wall embossing folder for some nice subtle texture in the background.

  Next I used the Splendid Stems dies to cut leaf sprigs in Evening Evergreen and Soft Succulent.  I layered them across the card front like the narrow horizontal element of the sketch.  I cut a Basic White banner and using the edge of the brush end of the Evening Evergreen Stampin' Write marker I lightly inked the edges of the banner to define it a bit against the white background.  

 To make the pumpkin I cut 3 skinny pumpkins with the Rustic Pumpkins dies out of retired 2021-2023 In Color Designer Series Paper in a nice light plaid pattern in Pale Papaya.  I layered them and then popped them up with dimensionals on the banner along with an Evening Evergreen stem.

  The sentiment is from another long retired set and I stamped it in Soft Succulent and fussy it cut to fit on the pumpkin.  The final touches are some retired In Color gems sprinkled on the garland and a Soft Succulent ribbon knot on the pumpkin.

  Thanks for looking!  Did you stamp today?

Stamps: Good Greetings (retired)

Ink: Soft Succulent

Marker: Evening Evergreen

Paper: Basic White thick, Basic White, Soft Succulent, Evening Evergreen, 2021-2023 In Color DSP

Accessories: Brick Wall embossing folder, Splendid Stems dies, Rustic Pumpkin dies, Soft Succulent ribbon, dimensionals, In Color gems (retired)


Sunday, October 16, 2022

Thanksgiving Tree Rings - Stampin' Up! Ringed With Nature

   I wanted to have a few Thanksgiving cards on hand and the colors over at Color Throwdown are perfect for an autumn inspired card.  I also used the sketch from Freshly Made Sketches since it gives just the perfect little spot for the main card elements.


  The challenge colors are listed as navy, mustard, and brown.  I translated that to Night of Navy, Crushed Curry, Soft Suede and Crumb Cake.

  I started with a Night of Navy base and then following the sketch I added a panel of Rings of Love DSP from the last Sale-a-Bration.  I hardly used this paper at all when it was a freebie but find myself pulling it out more now that the weather seems more in line with the designs!  Seasonal stamper I am for sure!

  I cut and embossed the tree ring with the Tree Rings hybrid embossing folder/die and it makes a nice little anchor for the rest of the elements.

  The house is stamped in Night of Navy and Crushed Curry and some stamped off Crushed Curry berries and Night of Navy branches are accents behind the house. the whole grouping is popped on dimensionals.

  I had to go to the retired sentiment vault to find something just the right size and saying for Thanksgiving.  I used the long retired And Many More set here and stamped it in Soft Suede and then trimmed it down to size.

  Thanks for looking!  Did you stamp today?

Stamps: Ringed With Nature, And Many More (retired)

Ink: Night of Navy, Crushed Curry, Soft Suede

Paper: Night of Navy, Soft Suede, Crumb Cake, Basic White, Rings of Love DSP (SAB retired)

Accessories: Tree Rings Hybrid embossing folder/die, dimensionals


Saturday, October 15, 2022

Spooky Pumpkin - Stampin' Up! Hello Harvest

   I wanted to play along with the fun colors over at As You See It Challenge.  It's a set of colors that screamed Halloween to me and the inspiration photo was my inspiration for my blended alcohol inked background to go with the pumpkin.


  I started this with a bright Parakeet Party base.  I made the background square using Blends markers, vellum and rubbing alcohol.  I've described this technique in this post and it's really easy and makes for a unique background each time.  I mounted the finished vellum piece onto a Basic White square to make the colors really pop and then backed it with a Starry Sky panel.

  The 'boo!' is cut out of black glimmer paper and foam sheets for a nice big sentiment.  Some black baker's twine is wrapped around the panel a few times then tied in a bow.

  The pumpkin from Hello Harvest is stamped in Memento and colored in with Parakeet Party and Mango Melody blends.  I hand cut the jack 'o lantern fave pieces from Black Glimmer.  The pumpkin is adhered with dimensionals and a few black Classic Matte dots are added for more detail.

  Thanks for looking!  Did you stamp today?

Stamps: Hello Harvest

Ink: Memento Black

Blends: Starry Sky dark, Parakeet Party light & dark, Mando Melody light & dark (retired)

Paper: Parakeet Party, Starry Sky, Basic White, vellum, Black Glimmer paper

Accessories: Rustic Pumpkin dies, Playful Alphabet dies (retired), foam dimensional sheets, black baker's twine, Classic Matte Dots 


Friday, October 14, 2022

Rainbow Flurry - Stampin' Up! Joyful Flurry

   Rainbow flurry sounds like a fantastic frosty ice cream treat doesn't it?  Anyone at Dairy Queen need a great idea for a new Flurry flavor??

  I used the Global Design Project challenge of CASE the designer which has a lovely rainbow project to inspire us and I combined that idea with the sketch at CAS Colours & Sketches as I thought the diagonal lines would be prefect for the snowflakes.


  I feel like this card is missing something but I can't quite figure out what to add/change and still keep it CAS (clean and simple).  I might have to do another version and pull out all the 'over the top' stops! 

  I stamped the snowflakes on the diagonal in the rainbow colors (listed below) then used my Blends markers (colors listed below) to highlight parts of the images to give them a bit more weight.  They are very delicate, thin lines so I think adding a bit more color helps them stand out.

  I added a few Adhesive Backed Seasonal Sequins and then the greeting from Brightest Glow is stamped in Bermuda Bay and accented with flagged ends then popped with dimensionals.  I can't tell if I mounted the sentiment crooked or if I took the photo crooked....maybe a bit of both lol!

  Thanks to both challenges for the wonderful inspiration!

  Thanks for looking!  Did you stamp today?

Stamps: Joyful Flurry, Brightest Glow

Ink: Bermuda Bay, Granny Apple Green, Mango Melody, Flirty Flamingo, Polished Pink

Blends: Pool Party dark, Granny Apple Green light, Flirty Flamingo light, Polished Pink light

Paper: Basic White, Polished Pink, Bermuda Bay

Accessories: dimensionals, Adhesive Backed Seasonal Sequins


Tuesday, October 11, 2022

Gold Pumpkin Hello - Stampin' Up! Hello Harvest

   For my customer thank you cards for orders placed in September I wanted to send a nice autumn card but maybe not in traditional colors so I got to work with black, white and gold.  What do you think?


  I started with a Basic White thick card base, then a layer of the black and white plaid pattern from the Rustic Harvest DSP.  Next is a layer of Basic White embossed with the Leaf Fall embossing folder for some subtle texture.

  I embossed the pumpkin from Hello Harvest in gold and then cut it out along with a few vines out of the Distressed Gold Specialty paper.  I mounted the pumpkin with dimensionals over a length of retired Fine Art (which has pretty gold threads woven through it) onto a Basic Black circle cut with the Stylish Shapes dies.

  Lastly, I embossed the 'hello' from the Inspired Thoughts stamp set in gold onto Basic Black and then added it to the side of the pumpkin.  

  I love how this card came out; I think it's really elegant and understated.

  If you'd like to get a hand stamped card from me go ahead and place your order in my Stampin' Up! store.  Click here or there is a link in the sidebar ------->

  Thanks for looking!  Did you stamp today?

Stamps: Autumn Harvest, Inspired Thoughts

Ink: Versamark

Paper: Basic White thick, Basic White, Basic Black, Rustic Harvest DSP, Distressed Gold Specialty paper

Accessories: Leaf Fall embossing folder, gold embossing powder, Rustic Pumpkin dies, Stylish Shapes dies, dimensionals, Fine Art ribbon (retired)

Monday, October 10, 2022

Sweet Christmas - Stampin' Up! Sweet Candy Canes

   This card is a pretty easy one to make for Christmas if you're looking for something not too complicated to reproduce in multiples.


  I started with a Pool Party base and then added a panel of Snowflake Specialty vellum in one of the flocked patterns.  Just this bit of fancy paper adds a lot to the design without a lot of effort.  

  Next I stamped the 2 large candy canes in Sweet Sorbet and cut them out.  Using the tag/candy candy slider die I cut a sentiment and threaded the Garden Green ribbon through the holes to attach it to my card front.  A fork bow (tutorial here) finishes the details.

  You don't need to throw everything and the kitchen sink on a card for it to be special!  Use that fancy paper and have fun!

  Thanks for looking!  Did you stamp today?

Stamps: Candy Cane Wishes

Ink: Sweet Sorbet, Garden Green

Paper: Pool Party, Basic White, Snowflake Specialty vellum

Accessories: Candy Cane dies, Garden Green ribbon

Saturday, October 8, 2022

Sunflower Wedding Wishes - Stampin' Up! Jar of Flowers

   One of the (many!!) perks of being married to me is always having a supply of cards to choose from and/or being able to ask for a bespoke card when needed.  I made this wedding card for my husband to give to someone on his team who is getting married soon.  The team went in on a gift and of course needed a card to go with it.  I was told sunflowers and the color navy were the wedding theme and main color.  So pretty for a fall wedding don't you think?


  The card starts with a Night of Navy base, then a layer of Basic White, then a layer of some unnamed DSP that I found in my retired stash in a navy/polka dot pattern.  I then cut 3 Stitched Rectangles in Night of Navy and layered them on the DSP.

  The sentiment is from Splendid Thoughts and is embossed in retired Early Espresso embossing powder and then cut with a Stylish Shapes circle die.  I popped it up on dimensionals.

  Next come the 2 clusters of sunflowers from the Jar of Flowers set.  I stamped them both in Early Espresso and then colored them in using a variety of Blends markers (listed below). I fussy cut them and adhered them with more dimensionals.

  A few Gold Faceted Gems are sprinkled on the card front for some shine.  

  Thanks for looking!  Did you stamp today?

Stamps: Jar of Flowers, Splendid Thoughts

Ink: Early Espresso, Versamark

Blends: Daffodil Delight light & dark, Mango Melody light & dark (retired), Cajun Craze light & dark, Calypso Coral light, Old Olive light, Crumb Cake light & dark

Paper: Night of Navy, Basic White, unknown Navy DSP (retired)

Accessories: Stitched Rectangle dies, Stylish Shapes dies, Early Espresso embossing powder (retired), dimensionals, Faceted Gold Gems

Friday, October 7, 2022

Sweet Country Kitten - Stampin' Up! Cheerful Basket

   I haven't had much time to play along with challenges lately but I was able to get a card made for the current Festive Friday challenge which is Farmer's Day.  I didn't have much farm stuff on the inspiration list but I was able to create a card with some of the elements.  I used farm animal (mine is a barn cat! Because everyone knows you have to have barn cats!), gingham, green, die cut and thank you sentiment.  While it doesn't overtly scream 'farmer' I think it ended up with a country feel to it in the end.


  I started with a Basic White thick card base and then layered a piece of retired Gingham Gala DSP in Balmy Blue for the background.

  I stamped and colored in the kitten and 3 butterflies from the Cheerful Basket set with Blends markers and then die cut them.  The kitten is layered on a Soft Sea Foam Stylish Shapes circle with the sentiment flag to the side (also cut with the Stylish Shapes dies).

  The butterflies are adhered with dimensionals above the cat to give it something to look at.  I embellished the cat with a tiny piece of narrow grosgrain ribbon and added 2 Polished Dots to the corner.

  So happy Farmer's Day however you celebrate!!

  Thanks for looking!  Did you stamp today?

Stamps: Cheerful Basket, Biggest Wish

Ink: Basic Gray, Balmy Blue

Blends: Smoky Slate light, Daffodil Delight light, Soft Sea Foam dark, SU1000

Paper: Basic white thick, Basic White, Soft Sea Foam, Gingham Gala DSP (retired)

Accessories: Stylish Shapes dies, Full Basket dies, dimensionals, grosgrain ribbon, Polished Dots, dimensionals


Wednesday, October 5, 2022

Evergreen Spruce Christmas - Stampin' Up! Spruced Up

 At first look, the Spruced Up bundle in the July-December mini catalog seems to be more of a whimsical Christmas set but I wanted to design a card using it to be more traditional and elegant.  I decided to pair it up with some rich greens and gold sparkle.  What do you think?


  There is only a little bit of stamping on this card but lots of sparkle and shine.  It starts off with an Evening Evergreen base stamped with the large snowflake stamp from the Spruced Up set.  Next are 3 panels of different paper adhered to a Very Vanilla base.  At the top is a piece of Festive Foils Specialty paper in Soft Succulent. Then a panel of Evening Evergreen stamped with the little snowflake stamp and then embossed in gold.  The last panel is a piece of Very Vanilla Glimmer paper.  The trio panel is popped on dimensionals towards the lower right corner of the card front (not every card has to be exactly symmetrical!).

  Next, a Gold Glimmer paper tree is die cut with the Spruced Up Outlines dies.  You'll end up with the solid tree as well as the skinny outline tree shape which I didn't use on this design but set aside to use on another card.  The tree is adhered to the side of the panel.  

  The sentiment is stamped in Soft Succulent on Very Vanilla and then popped with a dimensional.  A gold Shimmer ribbon knot accents the side the of the sentiment while a pearl layered on an Adhesive Backed Seasonal Sequin (that's a mouthful!) adorns the top of the tree.

  Using smaller pieces of DSP and/or specialty paper and using them together with other pieces will make it go a long way so you can definitely make multiples without worry of running out!

  Thanks for looking!  Did you stamp today?

Stamps: Spruced Up

Ink: Evening Evergreen, Soft Succulent, Versamark

Paper: Evening Evergreen, Very Vanilla, Gold Glimmer paper, Very Vanilla Glimmer Paper, Festive Foils Specialty paper,

Accessories: Spruced Up Outlines dies, dimensionals, Gold embossing powder, Gold sequins, adhesive pearls, Gold Glimmer ribbon

Tuesday, October 4, 2022

Rose Gold Pumpkin - Stampin' Up! Hello Harvest

   Central Virginia fall weather certainly keeps us on our toes and keeps the wardrobe decisions in constant flux.  I have shorts, t-shirts, jeans, sweats, flip flops, warm slippers and 8 other layers in a pile in my closet because the weather is changing from hour to hour and I'm never sure what I might need to change into as the day goes on!  It went from hot weather last week to cooler and rainy with remnants of hurricane Ian and now it's in the low 50s but sunny.  At least the weather is matching my card for today!  

  We made this design at my last class and while some of my stampers are more than happy to start on Christmas cards I didn't want to bypass autumn altogether.  


  I love the Rose Gold Specialty paper and it looks awesome when cut with the Rustic Pumpkin dies with the great texture.  The pumpkin is made with 3 of the narrow pumpkin shapes layered together with an Old Olive stem and vine.  Dimensionals make it pop from the card front.

  The sentiment is stamped in Memento black and fussy cut and then layered with 2 oak leaves that were made by inking up the stamp first in Pale Papaya and then using a sponge dauber added a bit of Cajun Craze ink along the edges and then stamped one leaf and then the other without reinking so you get the lighter version.

  The banner is made from the Rustic Harvest DSP which has great black and white patterns on the reverse sides of colored patterns.

  The base of the card is Cajun Craze with another slightly smaller layer of Cajun Craze embossed with the Leaf Fall embossing folder.

  I made a few extras of this design and I think they will be perfect to send out to a few people for Thanksgiving.

  Thanks for looking!  Did you stamp today?

Stamps: Hello Harvest

Ink: Pale Papaya, Cajun Craze, Memento Black

Paper: Cajun Craze, Basic White, Rose Gold Specialty paper, Rustic Harvest DSP, Old Olive

Accessories: Rustic Pumpkin dies, Leaf Fall embossing folder, dimensionals,