Friday, March 31, 2023

Blended Ink Note - Stampin' Up! Conversation Bubbles

   When I was designing for my last class I wanted to show off the Conversation Bubbles bundle but I wanted to make a card that didn't just use it as an add on to another stamp set by using the just one or 2 parts of the bundle.  After trying a few ideas this is the card my stampers ended up making.


  I love the colors that I landed on for this design!  Coastal Cabana, Polished Pink and Daffodil Delight.  Such happy colors and in the places where they overlap you get a little bit of a rainbow effect.  The colors reminded me of cotton candy or fun unicorn graphics I've seen.

  This is such an easy card to make and ends up so cute.  First it starts with a Coastal Cabana card base, then a layer of Basic White on which we blended our three colors with Blending Brushes making sure to not make the spots of color too big so that all the colors could show.

  Using another panel of Basic White the same dimensions as the blended panel the conversation bubbles were die cut.  I created a template for my stampers to use so they just needed to place the dies in the template openings.  This was a benefit because they didn't have to fuss around to figure out the best placement and the template also helped hold the dies in place so they didn't get pulled out of position with the magnetic base plate we were using.  I would definitely suggest using a template if you're going to be making multiples of the same design; it really makes the process so much quicker.  You'll end up with a lot of word bubbles that aren't needed for this design but save them to use on another project.

  Once the panel is die cut lay it over your blended panel (without adhering it!) to stamp the sentiment for perfect placement.  Next, a conversation bubble is then cut from a bit of Polished Pink.  Turn the cut out panel to the back side, add the Polished Pink bubble into the opening so the back side is up also.  Now add some dimensionals all around the Polished Pink bubble to hold it in place.  Add more dimensionals to the rest of the panel and adhere to the blended panel.

  A few embellishments in the way of Coastal Cabana twine, Iridescent Rhinestones and a heart and star die cut add the finishing touches.

  To purchase the supplies to make this card you can visit my ONLINE STORE

  Thanks for looking! Did you stamp today?

Stamps: Conversation Bubbles

Ink: Coastal Cabana, Polished Pink, Daffodil Delight, Memento Black

Paper: Basic White, Coastal Cabana, Polished Pink, Daffodil Delight 

Accessories: Conversation Bubbles dies, dimensionals, Three Twine combo pack, Iridescent Rhinestones

Thursday, March 30, 2023

Pop & Flip Turtle - Stampin' Up! Playing in the Rain **VIDEO TUTORIAL**

 My card today is a really fun card that my stampers made at class this week.  I'm always on the lookout for fun folds or fancy folds that are not overly complicated.  When you're in a class setting with multiple people working on the same project you've got to balance time, supplies, reproducibility and cuteness (of course!).  This one hits all the marks.  It's called the Pop & Flip card but there might be other names for it as well.


  We used the great Regency Park DSP and the Playing in the Rain turtle to bring this one together.  See how the circle folds in when you open the card!  It's so cute!


  I've made a quick video showing how to put this card together including all the measurements for the pop & flip mechanism which is really easy!  Watch the video and see for yourself.


   Some quick measurements if you want to make the card along with the video:

Card base: standard A2 (8.5" x 5.5")  folded in the center

DSP: 4" x 5.25"

Insert: 3" x 5.25"

Pop & Flip Piece 1: 3" x 4" - score at 1", 2" and 3"

Pop & Flip Piece 2: 3/4" x 2.25" - score at 1"

Turtle Circle - scrap piece of basic white about 3" x 3" & Stylish Shape circle die (2nd largest)

   I hope you have fun learning how to make this card!  My stampers certainly did!

  If you'd like to purchase supplies to make this card visit my ONLINE STORE.

  Thanks for looking!  Did you stamp today?

Stamps: Playing in the Rain

Ink: Memento Black

Blends: Shaded Spruce light & dark, Daffodil Delight light & dark, Petal Pink light & dark

Paper: Night of Navy, Basic White, Regency Park DSP

Accessories: Stylish Shapes dies, Tear & Tape adhesive, Adhesive-backed Milky Dots, Night of Navy Bordered ribbon


Wednesday, March 29, 2023

I Love You Hearts - Stampin' Up! Country Bouquet

   The Country Bouquet punch has been out of stock for quite a while but it's back in the online store now!  The bundle is great for all your heart stamping needs!  They aren't just for Valentine's day people.  You can add hearts to cards all year round.

  I made this card a while back and I think I will be using it for my husband for our anniversary this year.  I like the soft understated colors and the gold embossing bring a nice bit shine.


  The card base is Basic White thick, then a layer of Basic White embossed with the retired Pinewood Planks embossing folder.

  I used Blushing Bride, Basic White and Pool Party to emboss gold hearts and then punched them out with the Country Bouquet punch.  I arranged them in a cascade down the front of the card with a few getting popped with dimensionals.

  I stamped and embossed the sentiments then used the Stylish Shapes dies to cut the banner shapes.  Those are then popped on dimensionals as well.

  The final embellishment is a Blushing Bride baker's twine bow right above the "I love you".

  All of the current products used on this card can be purchased in my ONLINE STORE.

  Thanks for looking!  Did you stamp today?

Stamps: Country Bouquet

Ink: Versamark

Paper: Basic White thick, Basic White, Blushing Bride, Pool Party

Accessories: Country Bouquet punch, gold embossing powder, Stylish Shapes dies, dimensionals, baker's twine, Pinewood Planks embossing folder (retired)

Monday, March 27, 2023

Garden Butterflies - Stampin' Up! Butterfly Brilliance

   I spent most of my weekend stamping time designing and prepping for a class on Tuesday (you'll get to see those projects later in the week!) but before I jumped into all that I used the Seize the Birthday challenge to make a card.  Their theme this week is "Things in a Garden".  After scanning my stamp sets I had a lot of flowers I could have used but decided to go with butterflies as I hadn't used the Butterfly Brilliance set in a really long time.


  I started this card with a gold embossed butterfly Night of Navy panel as the background for nice wow factor.  Next I stamped a few of the smaller butterflies in Night Navy ink and colored them in with a variety of Blends markers.  Then they were die cut and I adhered them with dimensionals around an elegant birthday sentiment from the Go To Greeting stamp set.  I added a few Iridescent Rhinestones around the sentiment.

 All supplies are available in my ONLINE Store if you'd like to re-create this card.

  Thanks for looking!  Did you stamp today?

Stamps: Butterfly Brilliance, Go To Greetings

Ink: Versamark, Night of Navy

Blends: Calypso Coral light, Petal Pink light & dark, Daffodil Delight light & dark, Melon mambo light, Pumpkin Pie light

Paper: Night of Navy, Basic White, Petal Pink

Accessories: gold embossing powder, Brilliant Wings dies, dimensionals, Iridescent Rhinestones


Friday, March 24, 2023

Mountain Camping - Stampin' Up! Greatest Journey Dies

 It's time to go camping!!  No, not really....I'm not a big fan of camping.  I love the outdoors and hiking and being in the woods but the whole logistics of packing everything and planning for food etc. is too much trouble when you can just rent a cabin and get to do all the fun outdoors stuff and still have running water and a refrigerator right there.  So all you campers go crazy but after doing it a number of times I just don't think it's for me!  

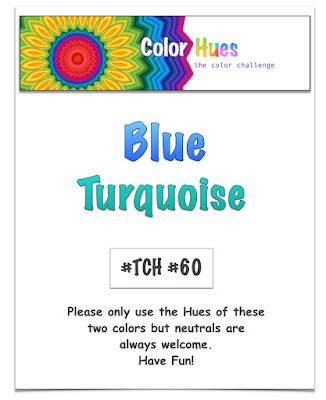
  But I'll make a camping card for sure!  I'm using The Color Hues challenge for my palette.  They got us using Blue and Turquoise.  I choose to use Night of Navy and Bermuda Bay and Coastal Cabana to create this scene.


  I started with a Night of Navy base then added a piece of Enjoy the Journey DSP in a fun night sky pattern.  The color listed for this is Starry Sky but Night of Navy definitely matches better.  Using the mountain/hill die in the Greatest Journey die set I cut a mountain peak in Night of Navy and then blended some of the same color ink onto the edge to darken it even more.  I colored the edge with Clear Wink of Stella for some nighttime sparkle.

  I positioned the mountain inside a Basic White frame made with the Stitched Rectangle dies.  I added a Basic White moon also colored with Wink of Stella.

  For the hiker I cut 2, one each in Bermuda Bay and Coastal Cabana and then trimmed the backpack and lantern from the Coastal Cabana hiker and glued them to the Bermuda Bay hiker.  I also added a tiny piece of Basic White on the backside of the lantern so it appears lit.  The lantern has more Wink of Stella. Both the tent and hiker are popped on dimensionals.

  I left a sentiment off the card front as I didn't want to cover up any of the elements and I liked the balance and didn't want to throw that off.  I added a happy birthday sentiment on the inside.

  All of the items used for this card can be found in my ONLINE STORE.

  Thanks for looking!  Did you stamp today?

Stamps: none

Ink: Night of Navy

Paper: Night of Navy, Basic White, Coastal Cabana, Bermuda Bay, Enjoy the Journey DSP

Accessories: Enjoy the Journey dies, Stitched Rectangle dies, Wink of Stella, dimensionals


Thursday, March 23, 2023

Pastel Park - Stampin' Up! Sentimental Park

   I just keep finding different ways to use the Regency park suite.  For my card today I took inspiration from the Global Design Project layout and paired it with the Sentimental Park stamp set.  I just used a few of the images to make the stamped panels but I think it turned out so cute!


  I started with a Petal Pink card base then topped it with a piece of Basic White embossed with the Brick & Mortar embossing folder which I had in my orphaned card parts basket.  

  Next, I stamped the leaves and flower images on Basic White with Basic Gray ink and then punched them out with the Rectangular Postage punch. I used Blends markers to color the images including filling in the open space around them with Balmy Blue light.

  I arranged the flowers and leaves over a strip of Country Gingham DSP and little strip of scalloped edging made with the Basic Borders dies.  The flower panel is popped up on dimensionals in the center.

  Happy Birthday from Go To Greetings is stamped in Basic Gray then fussy cut and added under the images to follow the sketch.  A narrow grosgrain bow in Petal Pink as well as some Polished Dots complete the look.

  If you'd like to recreate this card the supplies are listed below and current items can be purchased in my ONLINE STORE

  Thanks for looking!  Did you stamp today?

Stamps: Sentimental Park, Go To Greetings 

Ink: Basic Gray

Blends: Balmy Blue light, Old Olive light & dark, Petal Pink light & dark, Calypso Coral light & dark

Paper: Petal Pink, Basic White, Country Gingham DSP, Balmy Blue

Accessories: Brick & Mortar embossing folder, Basic Borders dies, Rectangular Postage punch, dimensionals, Polished Dots, Petal Pink ribbon (retired)


Wednesday, March 22, 2023

Spring Rain - Stampin' Up! Playing in the Rain

   I've a "spring is on the way" card today!  The Playing in the Rain bundle is just so cute with the adorable animals and all the "accessories" dies to create sweet scenes.  I ended up not using any of the dies on this card and just focused on the fox taking his little walk in a spring rain storm.


  I love these colors as a change from spring pastels; these are bright colors but the white keeps them from overpowering the image.

  The card starts first with a panel of Basic White embossed with the Raindrops embossing folder.  then I used my Balmy Blue light Blends marker to color each raindrop. Be careful here as the paper absorbs the ink very quickly and can easily spread further than than the embossed bit.  I just lightly touched the brush tip to the embossing and that's all that I needed to get them colored.

  After adhering the embossed panel to the the card front I die cut some Stylish Shapes circles in Daffodil Delight, Sweet Sorbet and Balmy Blue and added them to opposite corners.

  Next I stamped the fox in Memento black on Basic White and colored him with Blends markers then cut him out with a larger Stylish Shapes circle die.  The big circle is popped on dimensionals in the center of the card overlapping the smaller circles slightly.

  The sentiment is stamped and fussy cut and popped up in the corner.  I highlighted it with a single Sweet Sorbet Matte Decorative Dot to continue to draw the eye all the way down the card on the diagonal.

  Definitely check out the Playing in the Rain bundle if you're in the mood for some cute animal scenes for your spring cards!  If you're looking for a Stampin' Up! demonstrator I'm happy to help you out!  To shop my online store click on the shopping bag in my sidebar or HERE

  Thanks for looking!  Did you stamp today?

Stamps: Playing in the Rain

Ink: Memento Black

Blends: Balmy Blue light, Sweet Sorbet light & dark, Daffodil Delight light & dark, Cajun Craze light & dark

Paper: Basic White, Sweet Sorbet, Balmy Blue, Daffodil Delight

Accessories: Raindrops embossing folder, Stylish Shapes dies, dimensionals, Matte Decorative Dots

Tuesday, March 21, 2023

Birthday Stripes - Stampin' Up! Greatest Journey

   For this week's Testosterone Tuesday card (aka A Guy Card!) I've got a really easy design that can be adapted to lots of color combos and themes depending on the guy you're designing for.  For my colors I was inspired by the mood board over at Just Us Girls Challenge.  I loved the photo with the green and yellow crayons laid out in a striped pattern and used that in paper form to make the background of my card.


  I pulled out all of my greens and a few yellows and played around for a few minutes to see which ones played nicely together.  I put away a few greens that just didn't jive and then got to work.  I dug through my scraps of each color and pulled out 1/2" wide pieces and then just began tearing them at different lengths and then adhering them to the card front repeating the pattern until I covered the whole edge. So not only do you end up with a cool guy card but you can feel virtuous by using up some smaller scraps!

  This color grouping made me think of summer with all the trees and other plants being green so I stamped a set of trees from Greatest Journey in Garden Green and then added them to a Stylish Shapes circle embossed with the birthday greeting from Best Day stamp set.  A quick change of sentiment and this would make a great Father's Day card as well. Both pieces are popped on dimensionals onto the card front.

  I added a few retired candy dots and a bakers twine bow to finish up the details.  I think this will be a great birthday card for the summer months for a guy who loves the outdoors.  And after finishing this design it really made me think of a vintage 70s t-shirt; you know the ones with the stripes across the chest?  Anyway.....it was a fun challenge and now my guy birthday card stash is plus one!

  Thanks for looking!  Did you stamp today?

Stamps: Best Day, Greatest Journey

Ink: Versamark, Garden Green

Paper: Basic White thick, Basic White, Mossy Meadow, Old Olive, Pear Pizzazz, Granny Apple Green, Garden Green, Crushed Curry, Daffodil Delight

Accessories: Stylish Shapes dies, Greatest Journey dies, dimensionals, Black embossing powder, candy dots (retired), baker's twine (retired)


Monday, March 20, 2023

Candle Wishes - Stampin' Up! Best Day

 I've been using the Best Day stamp set a lot lately and I'm using it again for today's card.  Instead of using one of the main images in the set I decided to highlight the smaller candles/sparklers stamp after seeing this fabulous card by Angela Meiritz-Reid.  She used embossing for the candles/sparklers but I was designing this card for a Quick & Easy card class so I stayed with ink for a similar look using fewer supplies.


  The card base is Fresh Freesia and then a panel of Butterfly Kisses DSP in a Starry Sky pattern.  The candles are stamped in Starry Sky on both edges of a Basic White panel.  The edges are softened a bit with some Fresh Freesia ink and a blending brush.  The centers of the candle flames are highlighted with a bit of gold Wink of Stella. 

  I cut a label shape out of the fantastic gold Fine Shimmer paper with a retired Tasteful Label die (to recreate yours at home any label or rectangle-ish shaped die would work).

  The sentiment is stamped in Starry Sky and punched out and popped on dimensionals over the top of some bunched up Crinkled Seam Binding ribbon.

  A few gold adhesive sequins embellish the sentiment circle for the final detail.

  Thanks for the inspiration Angela!

  Thanks for looking!  Did you stamp today?

Stamps: Best Day

Ink: Starry Sky, Fresh Freesia

Paper: Fresh Freesia, Butterfly Kisses DSP, Gold Fine Shimmer paper, Basic White

Accessories: gold Wink of Stella, Tasteful Label dies (retired), dimensionals, crinkled seam binding ribbon, gold sequins

Sunday, March 19, 2023

Hey There Taco - Stampin' Up! Taco Fiesta

   A few weeks back I was designing for an upcoming class and TGIF Challenges had a great layout and was just what I was looking for to highlight a smaller image.  The challenge closed before I could share it but I definitely got my inspiration there! I used the Taco Fiesta stamp set to create this bright hello card. The taco is easy to color and gets highlighted perfectly with this layout.


  This card was for a Quick & Easy card class and I love how the fun patterned papers do so much of the heavy lifting filling in the background of the card.

  The Mango Melody star design can be found in the recent Sale-a-Bration reward Dandy Designs DSP and the Parakeet Party stripes are in the Butterfly Kisses DSP in the annual catalog.

  The taco is stamped in Memento Black and colored in with Stampin' Blends markers on a Stylish Shape circle and then popped up.  The sentiment is stamped right onto the DSP.

  The final touch is a black baker's twine bow. 

  I told you it was a quick & easy card!

  Thanks for looking!  Did you stamp today?

Stamps: Taco Fiesta

Ink: Memento Black

Blends: Parakeet Party dark, Poppy Parade dark, Daffodil Delight light & dark

Paper: Poppy Parade, Basic White, Dandy Designs DSP (SAB), Butterfly Kisses DSP, Basic Black

Accessories: Stylish Shapes dies, dimensionals, bakers twine

Saturday, March 18, 2023

Get Well Journey - Stampin' Up! Greatest Journey

   Today's card is a really straightforward design using the Global Design Project challenge colors.  The Coastal Cabana, Crumb Cake and Vanilla combo could be used for so many types of cards and I decided to go with a get well card.  My stampers made this one at my last Quick & Easy card class.  The limited supplies and and easy embellishments make this card a great one to reproduce with supplies you've got at home.


  This one starts with a Very Vanilla thick card base topped with a panel of Dandy Designs in a geometric Coastal Cabana pattern.  

  Using some Crumb Cake I cut a rectangle with the Stitched Rectangle dies.  The large flower stamp from the Greatest Journey stamp set is stamped to one side in Crumb Cake ink.  A few of the blossoms are colored in with a blender pen and Coastal Cabana colored pencil.

  A length of thick Frayed Ribbon is adhered to the side of the flower panel (I used a bit of Tear & Tape to make sure it stayed put!).

  The sentiment from Inspired Thoughts is stamped on Very Vanilla in Coastal Cabana ink and cut out with another Stitched Rectangle die.  It's then popped up on top of the ribbon.  I gave my stampers the choice of either a get well or sympathy sentiment as I think it a design that can go for either depending on what you need for your card stash.

  The last details added are some Classic Matte Dots in Very Vanilla.

  Thanks for looking!  Did you stamp today?

Stamps: Greatest Journey, Inspired Thoughts

Ink: Crumb Cake, Coastal Cabana

Paper: Very Vanilla thick, Very Vanilla, Crumb Cake, Dandy Designs DSP

Accessories: Stitched Rectangle dies, Frayed Ribbon, Classic Matte Dots, dimensionals, colored pencils


Friday, March 17, 2023

Tea Hello - Stampin' Up! Cup of Tea

   In the frenzy to make sure I used limited time only mini catalog products I tend to forget stamp sets in Annual Catalog which have a longer sales period.  The Cup of Tea bundle hasn't seen much ink the last few months and I decided it was time to change that once I saw the fun spring-like colors that The Paper Players were using this week.  I'm getting in under the wire sharing this card...I really must plan my blog posts better!  Daffodil Delight, Tahitian Tide, Granny Apple Green and White are just such happy colors and I tried to make a happy card with them.


  I haven't made a square card in ages and the little tea cup just seemed like it needed a square layout.  I started with a Basic White thick base to make a 4.25" square card.  I embossed a square panel with the Cane Weave embossing folder for the card front.

  I backed a piece of Tea Boutique DSP with some Daffodil Delight as a base for the cup and flowers.  The cup is stamped in Tahitian Tide, the greenery in Granny Apple Green and the flowers in Daffodil Delight.  After die cutting them all I adhered each piece with dimensionals.

  The hello from Biggest Wish is stamped in Basic Gray (I like this neutral sometimes in place of black as it's a bit softer and less bold to go better with certain color combos) and then fussy cut.  It's also adhered with a dimensional.

  The final touches are a bakers twine bow and a tiny brass butterfly on one of the flowers.

  Thanks for looking!  Did you stamp today?

Stamps: Cup of Tea, Biggest Wish

Ink: Tahitian Tide, Daffodil Delight, Granny Apple Green, Basic Gray

Paper: Basic White thick, Basic White, Daffodil Delight, Tea Boutique DSP

Accessories: Teacup Dies, Cane Weave embossing folder, dimensionals, bakers twine, Brushed Brass Butterfly


Thursday, March 16, 2023

Best Cake Birthday - Stampin' Up! Best Day

   I'm playing along with Hand Stamped Sentiments challenge and their sketch today.  I was intrigued by the arched panel and thought it would be a good challenge to attempt.


  Since we're about to say good-bye to Polished Pink and Pale Papaya (maybe??!!) I thought it would be fun to pair them with Pumpkin Pie for a bright birthday card.   The base is Polished Pink and I stamped the candles from the Best Day stamp set along the top and bottom using the same color ink.

  Next I cut out a large label with the Seasonal Labels dies and trimmed off the bottom so it looks more like a tag and fit the sketch better with just the top being rounded.  I stamped the cake in Basic Gray and then colored it in with Blends Markers.  A strip of Enjoy the Journey DSP in a great zigzag pattern gives a nice base for the cake panel to rest on.  A bit of Pumpkin Pie twine (found on page 59 of Jan.-April mini catalog) is wrapped around it before being popped with dimensionals.  

  The "it's all about you" secondary sentiment is added under the panels in Basic Gray and then a few adhesive sequins are added for extra detail.

  Thanks for looking!  Did you stamp today?

Stamps: Best Day

Ink: Polished Pink, Basic Gray

Blends: Pumpkin Pie light & dark, Polished Pink light & dark, Pale Papaya light & dark

Paper: Polished Pink, Basic White, Enjoy the Journey DSP

Accessories: Seasonal Labels dies, dimensionals, Three Twine Combo Pack (Pumpkin Pie), white adhesive sequins


Wednesday, March 15, 2023

80th Petal Wreath - Stampin' Up! Petal Park

   My mother in law asked me recently to make a special 80th birthday card for her to give to a friend so I got busy using the Petal Park and Sentimental Park stamp sets.  I think these 2 sets have been my most used so far in this mini catalog.  I had fun building up a wreath shape with stamped and die cut flowers.


  I chose bright spring-like colors as they seemed perfect for a celebration of a milestone birthday this time of year.  The Cane Weave embossing folder gives a nice texture to the Basic White background.

  I pulled out some REALLY old dies to make the '80'.  The other number dies I had just weren't the right size.  The long retired Bigz Alphabet Typeset dies have been in my closet for years and are rarely used but they were such an investment back in the day I just can't get rid of them!  And sometimes like for this card I'm really glad I let them continue to take up precious closet space.  I used some retired Bermuda Bay glimmer paper for a nice bling-y centerpiece to the florals.

  The number are popped on dimensionals on a large die cut circle which gave me a nice base to arrange the flowers and helped keep everything nice and round.

  After everything was adhered I added a few sequins and white matte dots to accent a few of the flowers.  I also added a tiny ribbon knot in a thin shimmer ribbon...it's either Bermuda Bay or Coastal Cabana...I can't quite tell as it's not a perfect match to either and there are not markings on the roll since I think it was a 3 pack Sale-a-Bration reward at some point.  

  This was a fun card to put together and used up some small bits of cardstock for all the die cut flowers which is always a bonus!

  Thanks for looking!  Did you stamp today?

Stamps: Petal Park, Sentimental Park

Ink: Fresh Freesia, Daffodil Delight, Polished Pink, Granny Apple Green

Paper: Fresh Freesia, Basic White, Coastal Cabana, Daffodil Delight, Bermuda Bay, Polished Pink, Bermuda Bay Glimmer paper (retired)

Accessories: Cane Weave Embossing folder, Petal Park punch, Sentimental Park dies, dimensionals, Stylish Shapes dies, Bigz Alphabet Typeset dies (retired), sequins, white matte dots

Monday, March 13, 2023

Love You Hearts - Stampin' Up! Country Bouquet

   I know I'm not the only card maker with a basket or bin full of card parts that didn't make the cut to be used on a card but were too good to just toss.  I have panels of embossed cardstock, die cuts, stamped images and off cuts that "might be good for something" sitting in a bin on my stamp desk.  Every once in a while I cull it and toss what I know I will never use no matter how many times I tell myself I will.  The rest sit there waiting for their second chance.

  Thanks to the current challenge over at As You See It a few of those orphaned card parts made onto a card finally.  For the challenge they are asking us to "Spring Clean the Stash" and use up some bits and pieces that we've been holding onto!  


  The bits of this card that I already had sitting around are the large stamped heart; it was die cut and everything with the Stylish Shapes dies just sitting and waiting!  The Cane Weave embossed panel was also an orphaned card part as well as the baker's twine bow.  

  I added all the pieces to a card base and added a panel of Country Gingham DSP and a smaller embossed heart in Sweet Sorbet and a sentiment.  A few In Color dots finish up this card that was completely based around a few pieces I had saved "just in case"!

  Thanks for looking!  Did you stamp today?

Stamps: Country Bouquet

Ink: Mint Macaron, Sweet Sorbet, Versamark

Paper: Basic White thick, Basic White, Mint Macaron, Country Gingham DSP, Sweet Sorbet

Accessories: Stylish Shapes dies, Cane Weave embossing folder, white embossing powder, dimensionals, Country Bouquet punch, baker's twine, In Color Matte Decorative Dots


Sunday, March 12, 2023

Rainbow World - Stampin' Up! Watercolor World

   I was able to spend quite a bit of time in my stamp room yesterday and made a few projects as well as just tidied up some messy spots.  I was inspired to make today's card by the Just Us Girls challenge which is to make a card with rainbows.

  I haven't used the Watercolor World background stamp since I got it way back in the demonstrator preorder period!  I had something like this card in the back of my mind this whole time and finally put the ink to the paper to make it!


  I inked up the stamp using sponge daubers and 6 ink colors just going across in rainbow order and stamping it on Basic White cardstock.

  I edged the top and bottom of the stamped panel with narrow strips of Basic Black and then mounted it to a Basic White thick card base.

  The sentiment from Full of Love is stamped in Versamark ink onto Basic Black cardstock and then embossed in white.  Dimensionals adhere the sentiment to the card front.

  Thanks for looking!  Did you stamp today?

Stamps: Watercolor World, Full of Love

Ink: Gorgeous Grape, Pacific Point, Granny Apple Green, Daffodil Delight, Pumpkin Pie, Poppy Parade, Versamark

Paper: Basic White thick, Basic White, Basic Black

Accessories: sponge daubers, dimensionals, white embossing powder

Saturday, March 11, 2023

Sweet Goose - Stampin' Up! Silly Goose

   Just a quick card to share today using the Silly Goose stamp set.  It's always nice to have a few friendship cards on hand as you never know when you'll have to pop on in the mail.  I used a closed Freshly Made Sketches challenge for the layout.  Since the images in this set are smaller I liked the sketch for the circle which was a perfect size to make the little swimming scene.


  I started with a Night of Navy base topped with a piece of Basic White embossed with the Cane Weave embossing folder.  The sketch called for a band along the left side of the card so I used a strip of Butterfly Kisses DSP in a cute Calypso Coral heart pattern.

  The goose is stamped in black Memento ink on Basic White and then die cut with a Stylish Shapes circle die.  I added a few extra "waves" along the bottom of the circle then blended some Balmy Blue ink over the top with a mini blending brush.

  I highlighted the waves with the dark Balmy Blue Blends marker and then colored in the rest of the images with Blends.  I popped the circle on dimensionals and then added the sentiment in Night of Navy.

  A Night of Navy baker's twine bow and some long retired candy dots used for embellishments.

  Thanks for looking!  Did you stamp today?

Stamps: Silly Goose 

Ink: Memento Black, Night of Navy, Balmy Blue

Blends: Balmy Blue light & dark, Night of Navy light, Calypso Coral light & dark, Daffodil Delight light and dark, Crumb Cake light, Granny Apple Green light

Paper: Night of Navy, Basic White, Butterfly Kisses DSP

Accessories: Cane Weave embossing folder, Stylish Shapes dies, dimensionals, baker's twine, candy dots (retired)

Friday, March 10, 2023

Zesty Birthday - Stampin' Up! Sweet Citrus

   Today's card is a bright cheerful birthday card to bring a little bit of color to this cold wet day here in the RVA.  After a few sunny but colder days this week today is wet and cold so these bright lemons will at least make your computer or phone screen a little more cheerful!

  I used the Global Design Project challenge of caseing a card by the designer Kim Fee for my layout.  The open DSP ring allows more of the watercolored background to show through which is a fun design feature and I turned the layout to be a landscape orientation instead of portrait because I need a little more room for the longer sentiment banner.


   My color combo for this card was inspired by a color palette Stampin' Up! recently shared as inspiration.  They had used Crushed Curry but I swapped it out for Daffodil Delight for a brighter yellow for my lemons.  The other colors; Starry Sky, Crumb Cake and Coastal Cabana are used as well.

  I started with a Coastal Cabana base, then a layer of Shimmery White cardstock embossed with the Sweet Citrus embossing folder.  I then watercolored the raised embossed images with my water painters and reinkers.

  The open ring is made with a piece of Dandy Designs DSP and 2 of the Stylish Shapes circle dies.  I popped it up with dimensionals then added 2 stamped and die cut lemons and some leaves on one side.

  The sentiment is stamped in Starry Sky ink and then the end is flagged.  It's tucked just under the inside of the ring and adhered with mini dimensionals.

  The final detail is a linen thread bow added just under the lemons.

  If you haven't checked out the Sweet Citrus bundle yet don't wait; it makes such cute cards and you can do all the different citrus fruit just by changing up the ink colors.  See an orange card, lemon card, and a grapefruit card.  Looks like I should put a lime card on my to do list!!

  Thanks for looking!  Did you stamp today?

Stamps: Sweet Citrus

Ink: Daffodil Delight, Coastal Cabana, Crumb Cake and Starry Sky

Paper: Coastal Cabana, Shimmery White cardstock, Basic White, Dandy Designs DSP (SAB retired)

Accessories: Sweet Citrus Hybrid embossing folder/dies, Stylish Shapes dies, dimensionals, linen thread


Thursday, March 9, 2023

All the Conversations - Stampin' Up! Conversation Bubbles

 My stamping time has been limited for various reason this week but I did finish this card just in time to join in with the Just Us Girls Challenge color challenge which ends tonight.  The colors were fun and I thought they would work well on a bold, graphic card.


  I start with a Coastal Cabana base, then a layer of Basic White, then a layer of Basic Black on which I created a full background using all the different die cuts from the Conversation Bubbles die set.  I cut them out in Coastal Cabana and Daffodil Delight cardstock and mixed and matched open bubbles with solid bubbles.  One trick that I use when doing a panel with a lot of pieces is to arrange it until I get it just so then I take a quick picture with my phone so if the panel get bumped or if I have to move a few pieces to glue another one down I don't get mixed up where everything fits.  

  Once I had the background squared away I embossed the 'welcome' and the outline bubble in black embossing powder, cut it out and popped it on dimensionals.  I added the little yellow heart to balance my unintentionally offset sentiment.  Some times a goof ends up being a good design decision!  lol!  A quick change of the sentiment and this card could be for many other occasions.

  Thanks for looking!  Did you stamp today?

Stamps: Conversation Bubbles

Ink: Versamark

Paper: Coastal Cabana, Basic White, Basic Black, Daffodil Delight

Accessories: Conversation Bubbles dies, black embossing powder, dimensionals


Tuesday, March 7, 2023

Spring Florals - Stampin' Up! Petal Park

   My stampers made this very spring like card last week at class.  These colors are definitely screaming spring to me!  Blushing Bride, Fresh Freesia and Soft Sea Foam are a pastel lovers dream for a floral card when the weather starts turning warm(er).  


  The card starts with a Basic White thick card base topped with a piece of Soft Sea Foam stamped with the open leaves stamp from the Petal Park stamp set.  Next, the trio of flowers was stamped twice; the open flowers in Fresh Freesia and the solid flowers in Blushing Bride.  They are punched out with the Petal Park Builder punch.

  The fantastic detailed label can be found in the Sentimental Park dies and we cut it out using Fine Shimmer paper in Fresh Freesia.  This paper has a gorgeous shimmer and is different from glimmer paper in that it doesn't have the bits that can flake off, it's very smooth to the touch and cuts beautifully.  You get 2 sheets of 3 colors in the 12x12 pack; Gold, Fresh Freesia and Soft Succulent. The catalog photos don't do it justice in my opinion.

  Next the sentiment is stamped in Basic Gray onto Basic White and cut out with the coordinating Sentimental Park die.  The sentiments are in the Sentimental Park stamp set and can be mixed and match.  This one is 3 separate stamps that I placed on one clear block for easy stamping.  The white label tucks into slits cut into the detailed label for a seamless look.

  All of the punched flowers are adhered around the label; some flat, some popped on dimensionals.  The Blushing Bride flowers have Opaque Adhesive-backed gems in the centers and one of the Fresh Freesia flowers has a baker's twine bow.

  Thanks for looking!  Did you stamp today?

Stamps: Petal Park, Sentimental Park

Ink: Soft Sea Foam, Blushing Bride, Fresh Freesia, Basic Gray

Paper: Basic White thick, Soft Sea Foam, Basic White, Fine Shimmer paper (Fresh Freesia)

Accessories: Petal Park builder punch, Sentimental Park dies, dimensionals, Opaque adhesive-backed gems, baker's twine

Monday, March 6, 2023

Springtime Fun - Stampin' Up! Playng in the Rain

   I was inspired to design this card for a recent class by a customer who sent me a lovely watercolored card that she had made.  I hadn't done a watercoloring card in class for a really long time so it was long overdue.

  The Playing in the Rain stamp set was perfect for a little bit of watercoloring and scene building with the fantastic coordinating Playing in the Rain dies.


  This one starts with a nice bright card base in Tahitian Tide.  Then using a piece of Fluid 100 watercolor paper (which is nice and thick and takes ink beautifully) we watercolored the background sky and grass.  Water painters (on page 129 in the Annual Catalog) are perfect for all the coloring on this card.  We used the wide brushes for the sky and grass and the finer tip ones for the small spaces on the bunny.  All the ink colors used are listed below.

  Once the background was dry the rest of the scene was added.  The bunny is stamped in Stazon onto Shimmery White paper and then watercolored.  The bunny was stamped a second time onto a small piece of Rain or Shine DSP and then the raincoat is fussy cut then paper pieced onto the bunny for a fun patterned design.

  The kite, grass sprouts and clouds are die cut and added to the scene.  For ease of use for my customers we used adhesive sheets for the kite pieces to make adhering all those small bits super easy.  One cloud and one of the grass sprouts are popped on dimensionals.  

  The sentiment is from the Sale-a-Bration set Thanks a Bunch and is stamped in Tahitian Tide and popped on dimensionals at the bottom of the card.  A few Pastel Adhesive Backed sequins around the clouds adds a bit of sparkle for the finishing touch.

  Thanks for looking!  Did you stamp today?

Stamps: Playing in the Rain, Thanks a Bunch (SAB-retired)

Ink: Stazon, Tahitian Tide, Parakeet Party, Blushing Bride, Smoky Slate (Gray Granite makes a nice bunny color too)

Paper: Tahitian Tide, Fluid 100 watercolor paper, Basic White, Shimmery White, Sweet Sorbet, Granny Apple Green, Mango Melody, Rain or Shine DSP

Accessories: water painters, dimensionals, Playing in the Rain dies, dimensionals

Thursday, March 2, 2023

Orange Squeeze - Stampin' Up! Sweet Citrus

   Here it is Thursday already and I haven't shared many projects this week.  I was busy getting ready for classes at the beginning of the week and then all day yesterday I mulched the yard and by the time I was finished with it there was no energy left for blogging!  I finally have a few minutes today to share what I've been working on.

  I designed this card for a recent class to introduce the Sweet Citrus bundle to my stampers.  Since it is a similar product to the Tree Rings hybrid embossing folder which they loved I was pretty sure they would like it and I was right!  They loved the emboss and cut at the same time option as well as the beautiful texture you get from the Sweet Citrus embossing folder.


  We started with a Balmy Blue base, then a layer of Night of Navy topped with Basic White stamped with the little flower cluster stamp in Balmy Blue ink.  The centers of the flowers are stamped in Pale Papaya.  The sentiment is stamped in Night of Navy over the top of the flowers.

  A piece of Country Gingham DSP is adhered to the side of the Basic White panel.  The oranges are stamped in Pumpkin Pie and Pale Papaya and during class we used the Stamparatus for perfect alignment.  The embossing folder and die were used to emboss and cut the orange slices.

   Before adhering the oranges a piece of Night of Navy Bordered ribbon was added along the bottom of the Basic White panel.  The smallest slice of orange is popped on dimensionals.

  Finally 2 Milky Dots are added to the DSP for the finishing touch.

  This is the perfect card to send to someone needing a big hug.

  Thanks for looking!  Did you stamp today?

Stamps: Sweet Citrus

Ink: Balmy Blue, Night of Navy, Pumpkin Pie, Pale Papaya

Paper: Balmy Blue, Basic White, Night of Navy, Country Gingham DSP

Accessories: Sweet Citrus Hybrid embossing folder/die, dimensionals, Night of Navy Bordered ribbon, Milky Dots