Sunday, May 30, 2010

Guest Blogger! Learn how to build your own ink pad storage!

  While I love all the storage options Stampin' Up has available for us to keep our supplies in an organized manner sometimes you just need something that will work better with your own space.  In my stamp room I don't have a lot of table top space to devote to the Stampin' Up ink pad storage caddy.  I need the entire flat surface of my desk to spread out when I stamp.  My husband calls me "Messy Mandy" when I'm in the kitchen and I'm afraid that is also the case in my stamp room.  I showed my husband some wall mounted ink pad storage units that I saw online and hinted that this would be a SUPER idea for a Christmas gift.  Being the handy guy that he is he said, "I could totally build that"....  Hmmmmm....would this be something I would see this year for a Christmas gift or a project that gets filed away for sometime when there is more free time (almost non-existent with an almost 4 year old & almost 2 year old!)????

  Well lo & behold, there was some figuring & measuring and a trip to Lowe's for supplies....a few consultations...a request for a shelf and some decorative molding and I got a wall mounted ink pad storage unit for Christmas from my dear husband!  He was smart (way smarter than I am) and took some pictures during the building process and I had him write up the instructions to share with you all.  If you have any questions please don't hesitate to leave a comment or send me an e-mail and he'll get back to you as soon as he can.  Hopefully you have someone in your life (maybe even yourself!) that is handy with wood and could be persuaded to get the sawdust flying to make this ink pad storage unit for you.  I love mine and it makes it so easy having all of my ink color options within reach of my stamping table.  So a HUGE thank you to my husband for building & then writing up the instructions about making my ink pad storage!

***And don't worry....I have WAY more ink pads than are shown in the final photo.  I had a lot pulled out for my stamp club as well as another project when the picture was taken!***

This storage is about 21 ¼ inches wide and 24 ¾ inches tall (without the molding pieces) and can hold 60 ink pads. 
Parts list
  • 2          6-foot pieces of ¾ pine
  • 1          4-foot piece of ¾ pine
  • 1          2 x 2 foot piece of ¼ board (backer board)
  • 1          4 x 2 foot piece of ¼ board (shelves)       


1)      Cut the ¾ pine for the frame. 
a.       2 Sides: 24 ¾ inches
b.      3 Top/Bottom: 17 ¾ inches
c.       3 Middle: 18 1/2 inches   (****this measurement was originally 18 1/5 inches....this was incorrect and I have updated it to read the correct measurement of 18 1/2*****)

2)      Mark the grooves in the side pieces, which will hold the shelves.  I allowed for 1 inch gaps so I marked the top of the side pieces and then started with a 1 ¾ inch mark from the top of the wood.  In the end this gave me a smaller top shelf spacing (3/4), because I didn’t allow for the first groove cut width, so you could modify this, but it worked the way I did it.  From that first mark 1 ¾ inch from the top of the sides I marked a center line every 1 ¼ inch, making 13 more marks.  These marks are where you will cut the grooves for the shelves.   


3)      Mark the grooves in the middle pieces.  Top/bottom doesn’t matter with these.  Start by marking at 1 inch and then every 1 ¼, again making 13 more lines.
4)      Cut your grooves.  I used a table saw with a ¼ inch dado saw blade at a ¼ inch depth.  Center the dado blade on your marks.  Because the side and middle pieces have different measurements for the grooves I cut them at different times.  I did, however, make sure to use each measurement to make all of the cuts I could before changing the fence.  For the sides this meant only two cuts but for the middle pieces each measurement will give 12 cuts.  3 boards, two sides and two ends.  Just keep flipping the board and make all the cuts.
5)      I would paint a few coats now (which I did not), which will make your life easier later.  You will have to do some topcoats later, but get a good base down now.
6)      Cut strips of your 4 x 2 x ¼ board to start making the shelves.  You will need 5 lengths to make the 56 shelves and will have waste at the 4x2 size.  Using the table saw, cut them along the 4-foot length at 3.5 widths (this matches the width of the ¾ pine boards)
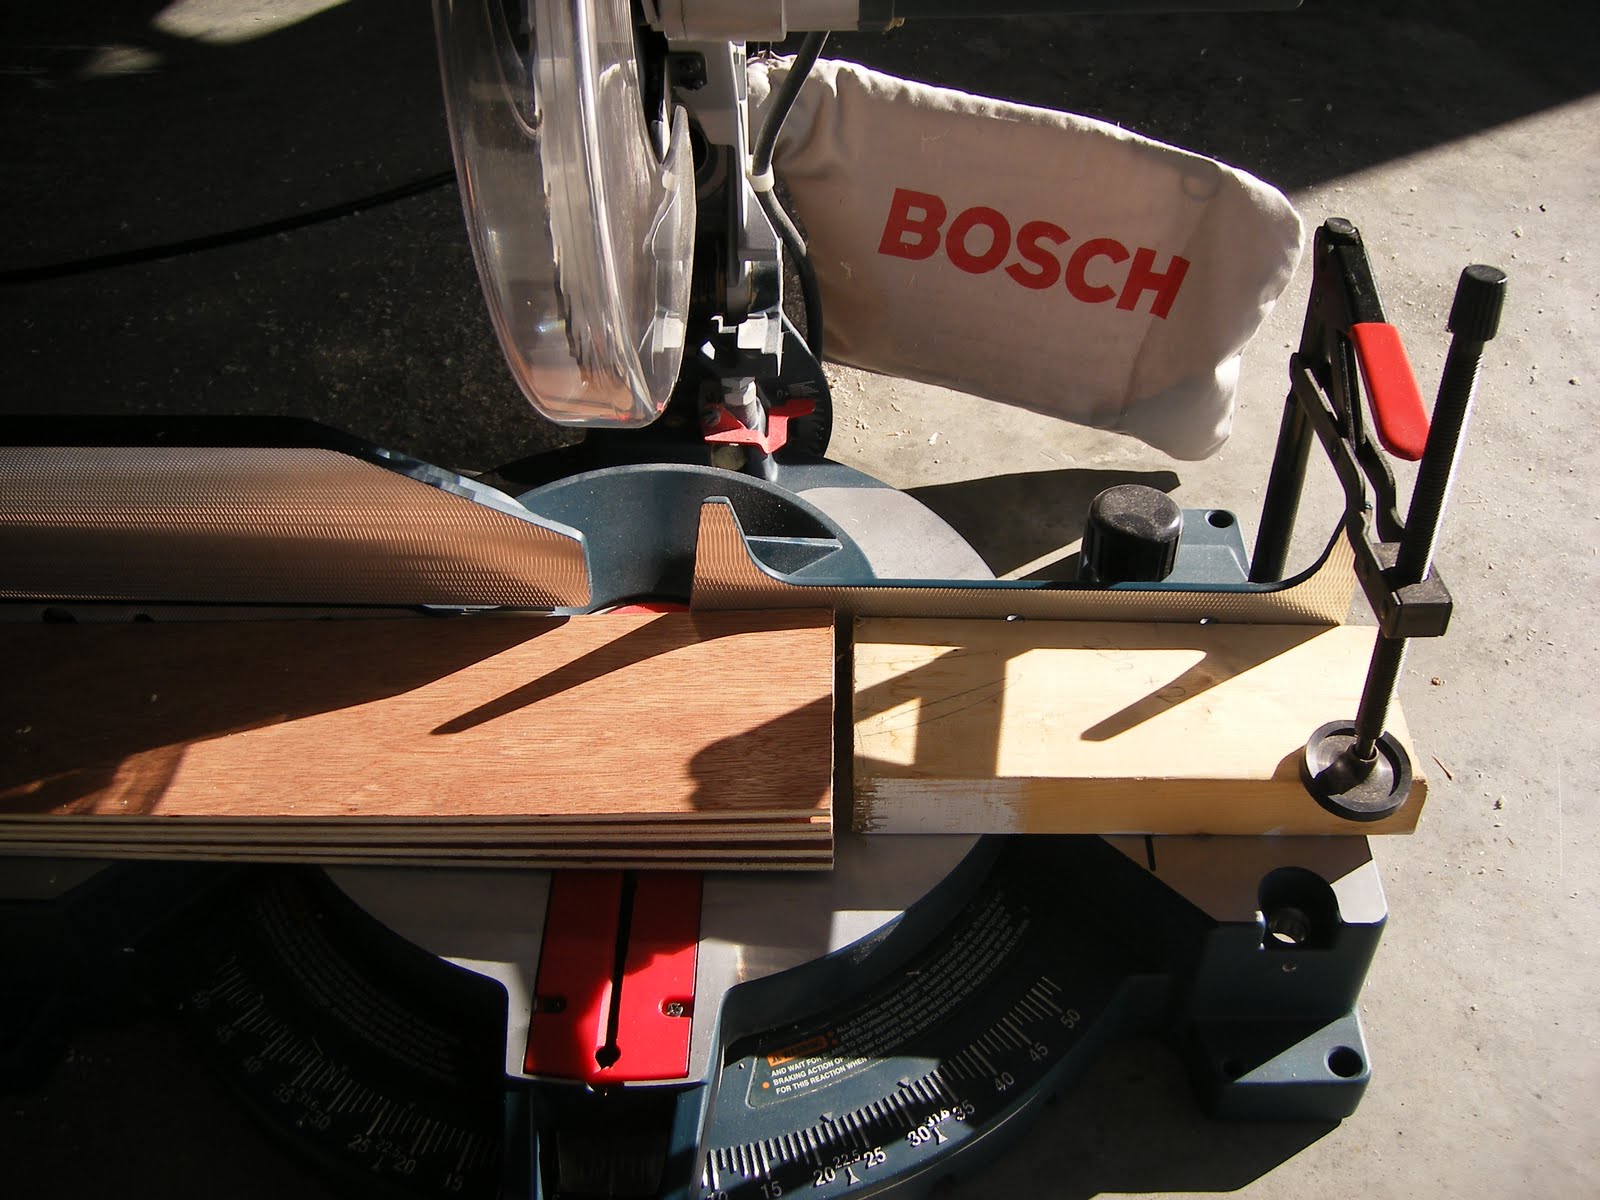
7)      I made a simple jig for my miter saw to make this next cut go faster.  Just clamp a block giving you 4 ¼ inches to the jig side of the blade.  At 4 ¼ inches the shelves should slide into the frame.


      8)      Paint your 56 shelves.  You will be very sick of this step.  Remember at least one of the 4 ¼ inch edges will be showing, so you need to paint it as well.

9)      Once your frame pieces are dry you can start assembly.  The way I built this the top and bottom pieces fit inside and flush to the sides.  The outer middle sections are 5 inches (on center) from the outside edge of the frame.  The very middle is centered between those, which is 4 5/8 inches, from center to center.  The bottom section has a 4-inch gap, so 4 ¾ from center of the bottom board to the center of the bottom piece of the shelf section.


10)  I had various pieces of molding from other projects, which I used to dress up the joints a little.  I have another jig for molding (again from another job) which makes corners that much easier.  Your project will be painted at this point, of course!


11)  Mark the 2x2 backer board to fit your finished frame and nail it on.  Paint this first, again.
Here is the finished product in the stamp room.
                                                                               

Saturday, May 29, 2010

WOW! 10,000 visitors in one year! (And a card of course!)

  I just took a look at my visitor counter and I am totally floored that I have had 10,000 visitors to my blog in the last year.  When I first started this blog last June I never would have thought I would have that many visitors in 3 years or ever in fact.  Thanks to all of you who check out what I've been working on and leave comments letting me know what you think.  This blog is my adult creative outlet amid the chaos of preschooler madness and I appreciate knowing that I'm not (always) talking to myself out here in the blogging world!

  I've also been meaning to write about the addition of some other blog links that I have posted in my sidebar.  I've recently teamed up with a group of very talented Stampin' Up! demonstrators to share ideas and have some stamping fun with.  Take a few minutes to check out the Stampin' Up! Only (SUO) projects that these great ladies have been posting on their blogs and don't forget to leave some comments (who doesn't like to receive compliments!??).

   And now without further ado.....The card.

  This is the first of 3 projects we did at my Stampin' Tuesday this past week.  It's the reinker technique using the rose from Fifth Avenue Floral.  First, stamp your rose on Shimmery White cardstock with Versamark.  Then emboss using white embossing powder.  Next, spray your rose with water until the water pools up inside each petal (I use an old body spray bottle that I've cleaned out---my club ladies get to enough the residual smells!  You could get a small travel size sprayer from a drug store or dollar store).  If you're not sure you have enough water keep spraying!  Then take an aquapainter and pick up some ink from your reinker.  You can drop the ink right onto the lid of your ink pad or I've used the lid from an empty brad container or even the imaging sheet from your Stamp-a-ma-jig.  Once you have some ink on your aquapainter touch the brush tip right to the pool of water on your rose.  The ink will spread out and mix with the water. Add as much ink as you want.   I started with the lightest color of ink (Blush Blossom) in the center and then worked my way out.  You can blend the ink into any areas where the water didn't reach.  I used Pretty in Pink next and for the outside petals Melon Mambo.  Dry your rose with your heat gun and then use your paper snips to cut your rose out. 

  On the Pretty in Pink layer we stamped the daisy using white craft ink.  Tear the top edge of the cardstock to give some texture and stamp your sentiment in black.  We used the white organza ribbon which looks awesome with the shimmery rose.  Lastly, pop your rose up on dimensionals and send it off to someone who loves roses!

Stamps: Fifth Avenue Floral

Ink: Versamark, Black Stazon, White craft, Blush Blossom reinker, Pretty in Pink reinker, Melon Mambo reinker

Paper: Shimmery White, Black, Pretty in Pink

Accessories: white embossing powder, organza ribbon, dimensionals, aquapainter, heat gun

Thursday, May 20, 2010

Jeanne's Sweet Birthday

  This past Saturday was my dear friend Jeanne's birthday.  We had her and her family over to celebrate so of course I had to make a card.  Jeanne is a super sweet person so I wanted to make her a card that went with her personality.  Sweet Scoops was just sitting on my stamping table begging for some ink.  What could be sweeter than ice cream??

 This is a quick and easy layout inspired by last week's Clean and Simple (CAS) challenge over on Splitcoaststampers (CAS66).  I have a lot of Kaleidoscope Designer Series Paper left so I went for this pink stripe pattern.  I added a layer of Pixie Pink punched with the scallop border punch.  I paper pierced each scallop and then highlighted them with my white gel pen.  I pierced again above my DSP.

 The Sweet Scoops set comes with a cute texture stamp so you can make your ice cream look like it was just scooped with the little wavy lines and everything! Ink up the ice cream stamp and then stamp it directly onto the un-inked texture stamp then stamp your ice cream on your cardstock. The texture stamp will pull just a bit of ink from the other stamp making it lighter when you do your final image on cardstock. Super cool!  Then I made a quick mask for the ice cream with a sticky note (stamp your image at the top of the sticky note, cut the image out and then use it to cover up the image you want to make).  I wanted to make sure my cone looked like it was underneath the ice cream and not just floating on top.  Once my ice cream was masked I stamped the cone with Creamy Caramel (soon to be retired color).  The small tag punch fits perfectly with this ice cream cone and then layered with Pixie Pink using the large tag punch.

  The tag is finished off with a Whisper White grosgrain knot (I don't do bows--they always look crooked!) and popped up on dimensionals.  I stamped the sentiment with Creamy Caramel. I have Sweet Scoops in the clear mount option and I think it makes it really easy to see where you are lining up your scoops and cones.  Yay clear mount!

Stamps: Sweet Scoops

Ink: Pixie Pink, Creamy Caramel

Paper: Whisper White, Pixie Pink, Kaleidoscope DSP

Accessories: paper piercer, Signo white gel pen, grosgrain ribbon, dimensionals

Saturday, May 15, 2010

Elegant Eggplant Congrats

I made the below congratulations card for a friend of ours who recently completed an advanced degree and invited us to a party to celebrate.  Unfortunately we weren't able to attend but I wanted to send a card to congratulate her on the achievement.  I was inspired by the invitation and wanted to use the same colors and design for my card.  I covered up the details with my stamped envelope (you can't send a naked envelope!!) but here is the invite...

The colors were almost a perfect match for Elegant Eggplant, Green Galore and More Mustard.  It's funny how I would never ever have put these colors together but seeing them on the party invitation I thought they looked great together.  I might try this combination out on some other cards to see what I can come up with.

For my card I stamped the large design from the Baroque Motifs set in white craft ink and embossed it with white embossing powder.  I definitely had to use my Stamp-a-ma-jig to get it lined up just right.

And I obviously wasn't very thorough with my Embossing Buddy because you can see little white flecks of embossing powder that went astray from the sentiment and from the top image. Lesson learned-- rub harder!

Next I punched out a Whisper White circle with my 11/4" circle punch.  I stamped the flower-like stamped in Elegant Eggplant ink on Whisper White and punched that out with my 1" circle punch.  I colored in parts of the design with my Green Galore & More Mustard markers.  I layered my circles and then finished them off with a green jeweled brad for the center and popped it up over the embossed image.

An organdy ribbon bow, ticket corner punch & More Mustard brads finishes it off.  Let me know how you think I did matching the style of the invitation!

***It was super hard photographing Elegant Eggplant and I played around with the placement of my lights and this was the best I could do.  There always seemed to be some amount of glare no matter where I placed the lights.  If anyone has any tips I'd love to hear them. 

Stamps: Baroque Motifs, Well Scripted

Ink: White craft, Elegant Eggplant

Paper: Whisper White, Elegant Eggplant

Accessories: brads, jeweled brad, ticket corner punch, 11/4" & 1" circle punch, embossing powder, organdy ribbon

Wednesday, May 12, 2010

Wonderful!

  This is one of the cards I made for Mother's Day.  It is super easy and a great way to use your Designer Series Paper.  I used the retired Sweet Pea DSP pack from the Occasions Mini but you could substitute any DSP that you have on hand with great results.

   I layered 4 scalloped squares punched out of the Pretty in Pink houndstooth pattern on top one of the Rose Red colored papers.  To keep with the scalloped look I punched out a scalloped oval in Rose Red and layered my "wonderful" sentiment from Warm Words on top of it.

  Finish it of with a length of Chocolate Chip grosgrain ribbon & Sweet Pea felt flower & leaf.  I know the Sweet Pea felt is retired but I couldn't let these little beauties go to waste!  Hopefully Stampin' Up! will offer more felt embellishments in the new catalog in July!

And there you have it; a "Wonderful" Mother's Day card.

Stamps: Warm Words

Ink: Chocolate Chip

Paper: Whisper White, Rose Red, Sweet Pea DSP

Accessories: Grosgrain ribbon, Sweet Pea felt, scallop square punch, scalloped oval punch, large oval punch

Friday, May 7, 2010

Birthday Gift Stack

  Tuesday was my sweetie's birthday and I was running short on time to get a card made (I know, it's what I do and I didn't have a card prepared??).  I had some leftover retired Manchester DSP that I'm trying to use up to make room for all the new products that are coming in July.  And I also had a few scraps of Baja Breeze cardstock (will definitely be ordering more of this color as soon as I can) to use.  I made this card 4.25 x 4.25 square.

  I love to use the paper piecing technique on cards and it's a great way to use up some of those scraps since you usually only need a small piece to stamp on.  Line image stamps are perfect for this technique.  I stamped my image three time using Stazon.  Once on the striped piece of DSP, again on the plaid DSP piece and the third time on my Whisper White cardstock.  I used my paper snips to cut out the 2 gifts and adhered them to the image stamped on Whisper White.  The top gift was colored in using my Sahara Sand marker.  This panel was matted on a piece of Sahara Sand and then mounted with dimensionals on top of the base layer which I just put 4 basic squares on.  And there you have it.... nice masculine birthday card!

Stamps: Happy Moments (Sale-A-Bration 2010)

Ink: Stazon

Paper: Sahara Sand, Whisper White, Baja Breeze, Manchester DSP (retired)

Accessories: dimensionals, marker

Saturday, May 1, 2010

Tropical Party Good Friend - Happy New Mini!!

Check out this great set that was just released today in the new Summer Mini.  It's called Tropical Party.  I love it's tropical island summer feel.  I don't have another set like this so as soon as I saw it I knew what would be making it's way to my stamp room!

I combined a little old with a little new here.  Again, I'm trying to use up some of my soon to be retired colors as well as Designer Series paper that will be retiring also (because it contains retiring colors). The Tempting Turquoise strip was run through the Big Shot using the also new Square Lattice Textured Impressions Embossing Folder (also new in the Summer Mini!).  The sentiment is from the "Good Friends" set in the Idea Book & Catalog.  I stamped the flowers on scrap paper and cut them out with my paper snips (love those!).  The 2 larger flowers have brads in the centers and are raised on dimensionals.

Definitely get your Stampin' Up Summer Mini as soon as you can to see all the great new products that are being offered!

Stamps: Tropical Party, Good Friend

Ink: Temping Turquoise, Green Galore, Pink Passion

Paper: Green Galore, Tempting Turquoise, Whisper White, Kaleidoscope DSP


Accessories: Grosgrain ribbon, brads, Square Lattice embossing folder